Use Templates to Improve MR Descriptions

You can use MR description templates to improve and simplify MR decriptions by guiding and motivating developers to add more information about what changed in the codebase. This, in turn, will help code reviewers better understand the subject of the review, ultimately helping them to provide better feedback.

The MR template definition is stored in the Git repository so it can be tracked as it evolves. Different templates can be used for different target branches, so a specific template can be mapped to a specific branch. Individual teams will define the template content, which follows standard markup syntax (Markdown, Confluence, Textile).

Only .txt and .md (Markdown) files will be recognized as MR description template files. The templates must be in your repository's default branch.

There are two types of MR description templates:
  • Default MR description templates, where there is one template for all branches.
  • Branch-specific MR description templates, where there are different templates for different branches.
  1. Create your template definition file(s) for the MR description(s) and save them to your Git repository's default branch's .templates/merge_request/description folder.
    Make sure you save your template to files that have a .txt or .md (Markdown) extension. If you use any other extension, your files won't be recognized as MR description template files.

    Tip:

    Open the terminal in the root of the folder and run the cat command (cat .git/HEAD) to read the contents of HEAD.
  2. Name your template file according to how you want it to be used. The type of merge request definition template is determined by its filename:
    • The name for default MR description templates is default_template.md.
    • The name for branch-specific templates must exactly match the branch name or match the first level of the branch name, such as main, patchset, dev, release, feature, and so on.

      The template named patchset.md would be acceptable for version-based branch naming. The template would be applied to patchset or patchset/* (for example, patchset/24/01/0). Other separators (slash, underscore, hyphen, and dot) are supported, so it would also work for patchset/*/*.* or patchset_*_*_* or patchset-*-*-* or patchset.*.*.*.

    • You can also use issue.md and feature.md for ticket-based branch naming, such as issue/VBS-1234 or feature/29706999.
  3. In the left navigation menu, select Merge Requests and display the Merge Request page.
  4. Click + Create Merge Request to bring up the MR wizard.
  5. In the Branch dialog, select the repository, target and review branches, and click Next.
  6. In the Reviewers dialog, select your reviewers and click Next.
  7. In the Details dialog, search and link issues and build jobs, select tags, and click Next.
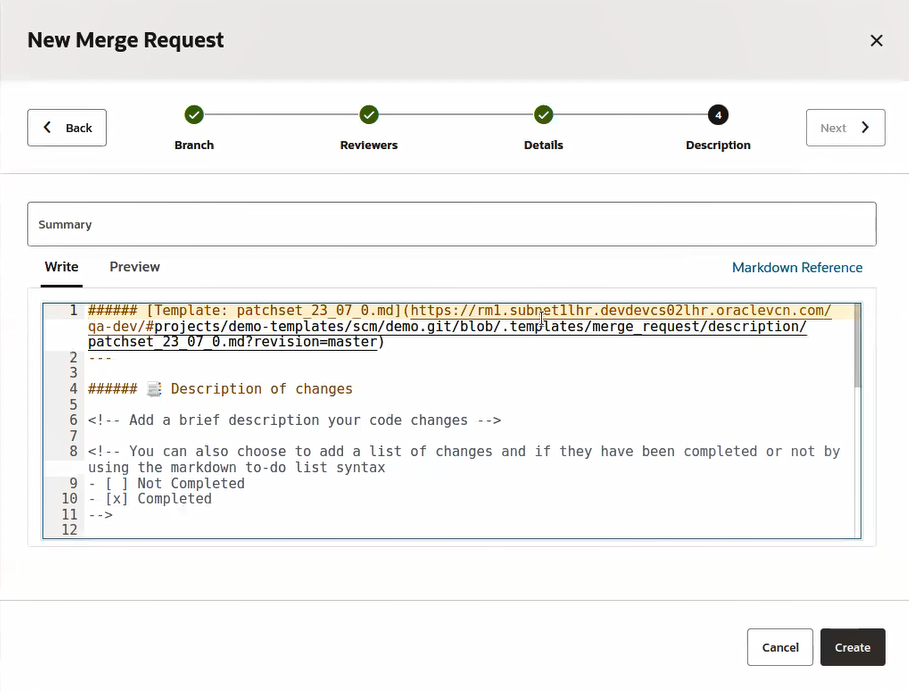
  8. In the Description dialog, fill in the summary.
    Notice that if your branch name matches your MR description template name, the Description is filled out for you.


    Description of mr-description-template-write.png follows
    Description of the illustration mr-description-template-write.png

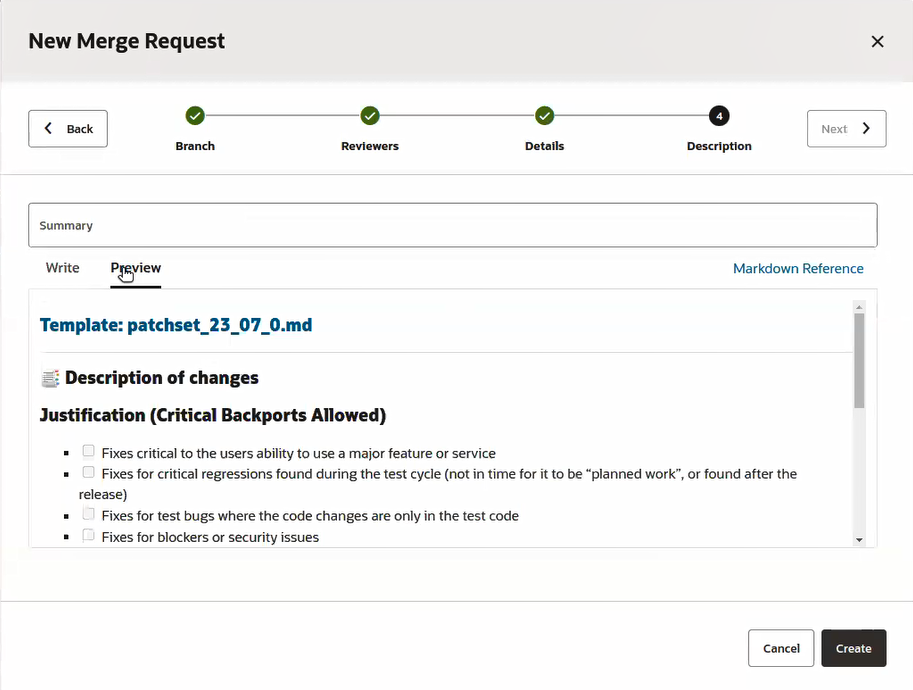
  9. Click Preview to see how it looks rendered.
  10. Make sure that the templated description matches the code changes and other modifications you want reviewers to look at.
  11. Click Create to create the MR.

Once the merge request has been created, the template's contents are available in the Conversation tab, where any developer can edit the description and add more information or insert comments.