Working with Transactions
Transactions are line-items preparers add to reconciliations to reconcile differences between source system and subsystem balances.
To work with transactions:
- From the Home Page, select Reconciliations.
- From the Reconciliations list, click Open to start working on a reconciliation assigned to you.
- See Preparing Reconciliations for an example of how to start preparing reconciliations.
- To work with transactions and adjustments, in this example, click the Adjustments to
GL tab to open the transaction details.
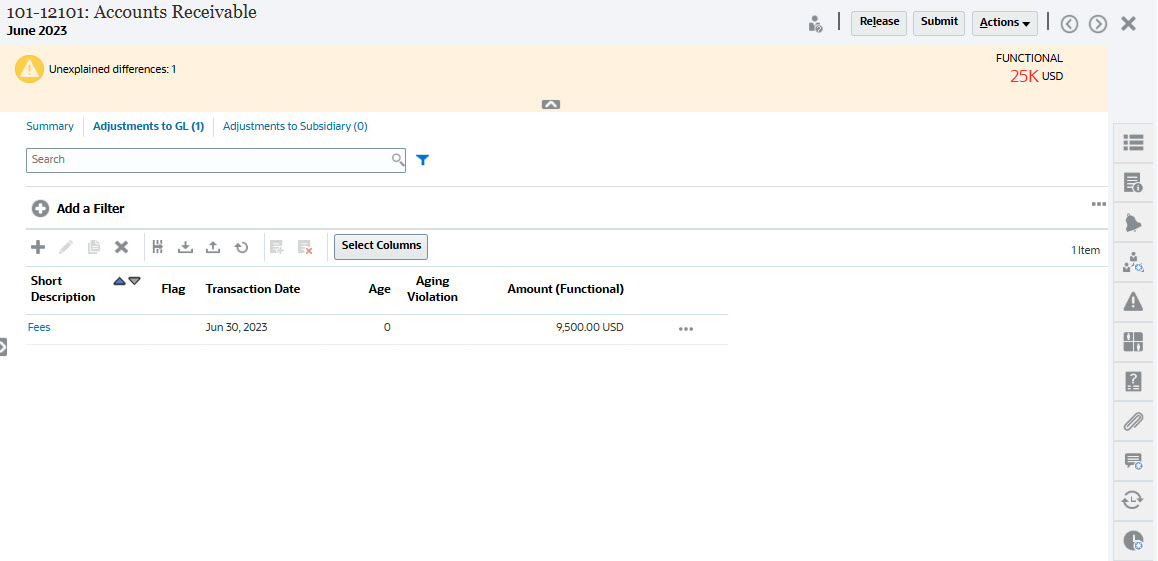
In addition to the default columns displayed, use Select Columns to display additional details such as Creation Method, Close Date, Amortization, and so on.
For Creation Method, the possible values are as follows:
- Manually - Added manually, one at a time, by the Preparer from within the reconciliation User Interface
- Imported - Added manually by the Preparer in bulk using the Import option within the reconciliation
- Carried Forward - Carried forward automatically by rule or manually, by the Preparer, from the previous reconciliation
- Pre-Mapped - Loaded in bulk through the Reconciliation List, Periods page, Smart View, EPM Automate commands, or EPM REST API commands
- Loaded from Data Integration - Loaded through the Data Integration Reconciliation Compliance Transactions Application
- Generated - Created during the Generate Summary Reconciliation process
-
You can take the following actions:
- Click + (New) to manually enter a transaction. You can also edit, copy, or delete. If you select Delete (X), the Delete Transactions dialog allows you to delete All transactions or just selected transactions.
- Click Copy from Prior Period to add transactions.
- Click Import to add transactions from a file.
Note:
When you import transactions from within a reconciliation, the import file does not need the Reconciliation Account ID column.To import transactions in bulk across multiple reconciliations in one load, users can import pre-mapped transactions from the Reconciliation List under Actions > Import Pre-Mapped Data > Import Transactions. To use this option, ensure your role is set to User (under Choose Role). See Importing Pre-mapped Transactions for Reconciliation Compliance.
- Click Export to export transactions. See Exporting Transactions.
- Click Refresh to refresh the page.
- To manually enter a new transaction, click + (New) on the
Transaction dialog and then enter the information
for that transaction. You can Save or Save and
Create Another transaction.
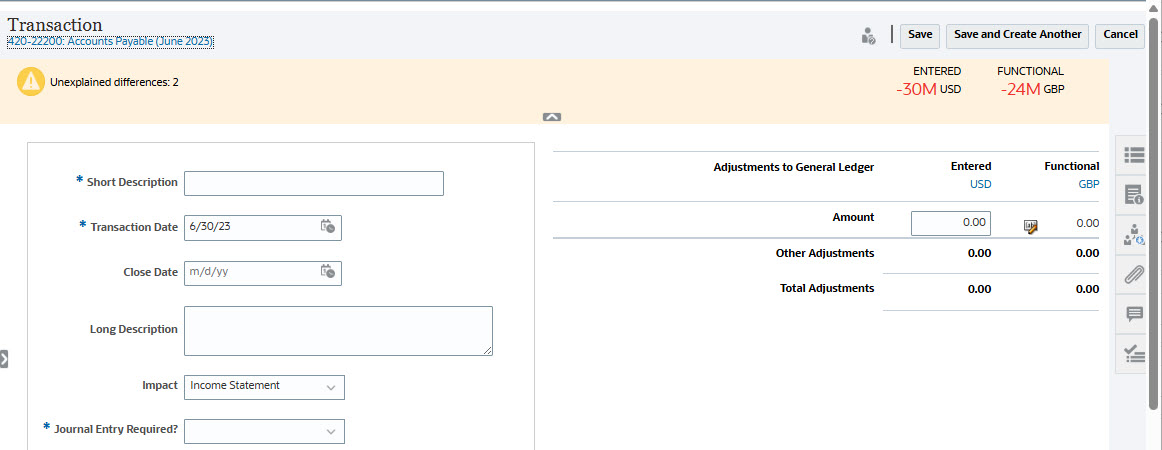
- You can click on a transaction on the list and see the details for that transaction.
- You can also click Action Plan

.