Introduction
This 30-minute tutorial provides a step-by-step representation of how to perform a completeness check in Account Reconciliation.
Background
Organizations require periodic checks to ensure that all reconciliations are complete and accounted for within the designated time period. To accomplish this, you can create reconciliations for all active profiles in each period and designate them to be completed, or mark them as Not Required. This gives managers an easy way to view and categorize the status of the reconciliations and ensure completeness.
Prerequisites
Before starting this tutorial, you should have:
- A working knowledge about Oracle Fusion Cloud EPM applications.
- Have Administrator access to an Account Reconciliation instance.
Creating an attribute
To create an attribute in Account Reconciliation, perform the following steps:
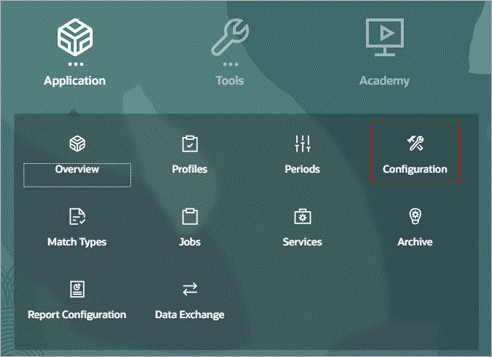
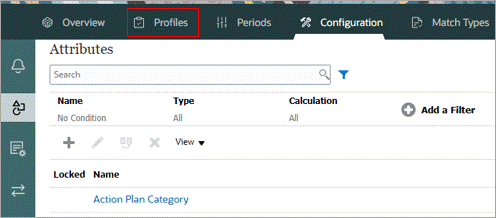
- From the Account Reconciliation homepage, click Applications, and then select Configuration.
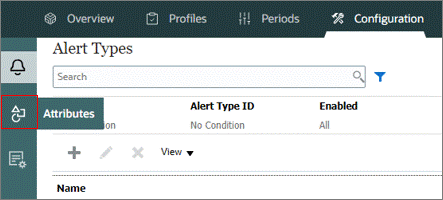
- Click the Attributes tab.
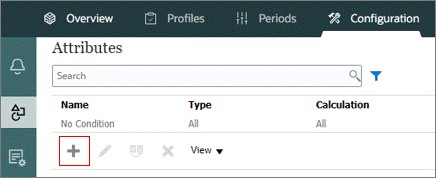
- Click
 (New) to create a custom attribute.
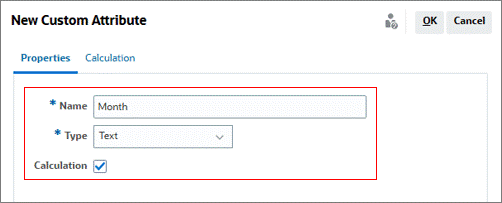
 - Enter a name for the attribute. For Type, select Text, and select the Calculation checkbox.
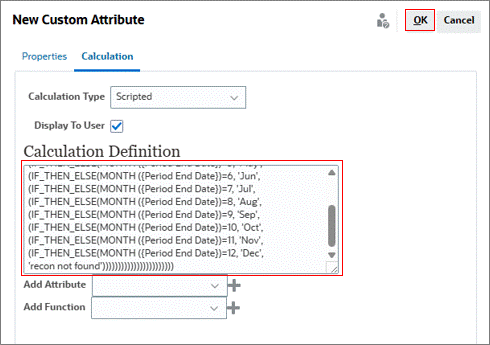
- Click the Calculation tab. In the Calculation Definition field, enter the following script:
- From the Attributes tab, click (New) to create another custom attribute.
- Give the attribute a name, select Text for Type, and select the Calculation checkbox.
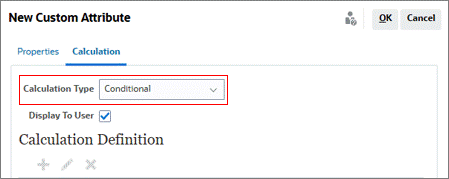
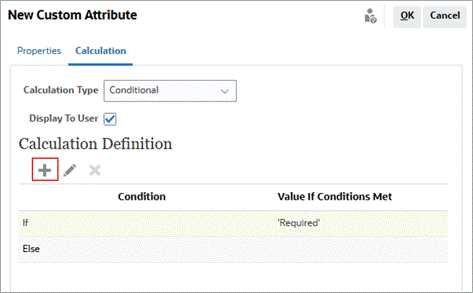
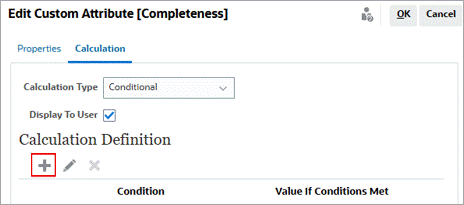
- From the Calculation tab, click the Calculation Type drop down and select Conditional.
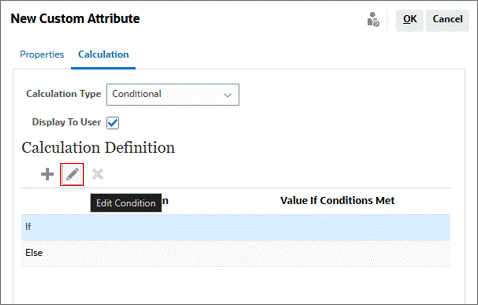
- In the Calculation tab, select the row containing If in the Calculation Definition field, and then click Edit.
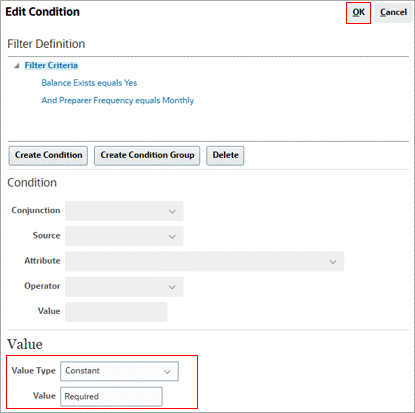
- Create conditions where a reconciliation will be required for each period, and it does not have a zero balance. In this example a Balance Exists, and the preparer frequency equals Monthly. If all the criteria are met enter the Value Type as Constant and the Value as Required. Click OK.
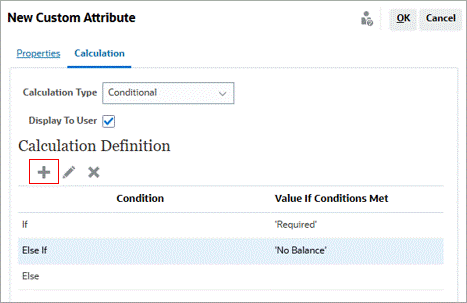
- Click (New).
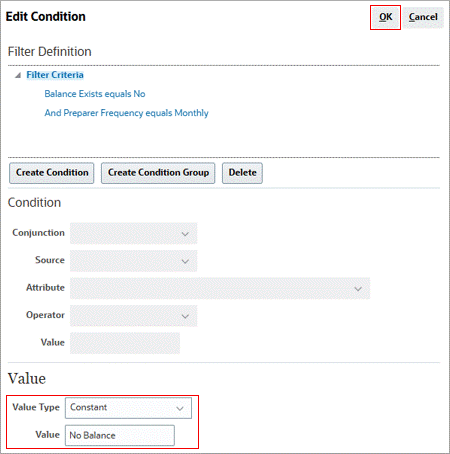
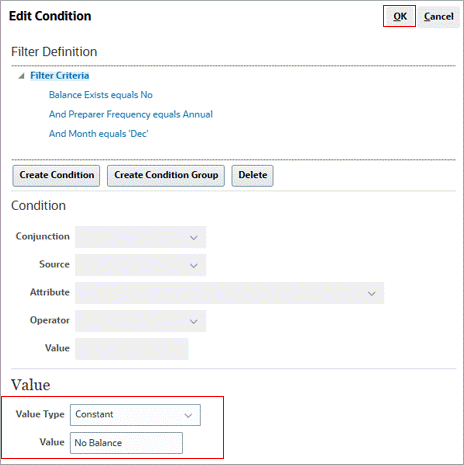
- Enter criteria for a No Balance account. In this scenario, a balance does not exist, and the preparer frequency equals Monthly. Click OK.
- Click (New).
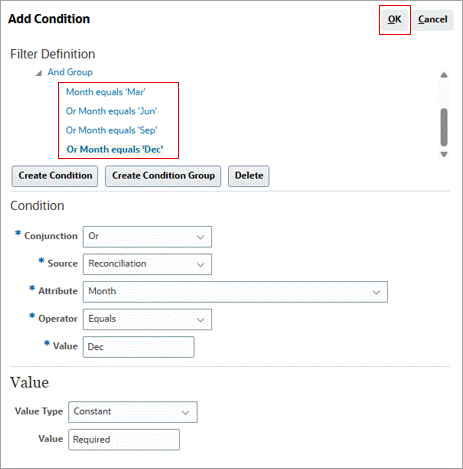
- Create a condition where if a balance exists, the preparer frequency is Quarterly, and the month attribute equals Mar or Jun or Sep or Dec, then the constant is Required. Click OK.
- Click (New).
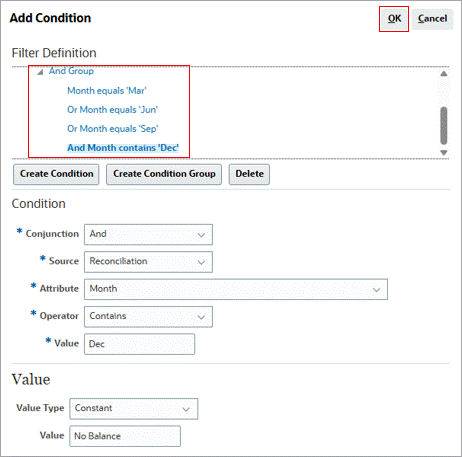
- Create a condition where if a balance does not exist, the preparer frequency is Quarterly, and the month attribute equals Mar or Jun or Sep or Dec, then the constant is No Balance. Click OK.
- Click (New).
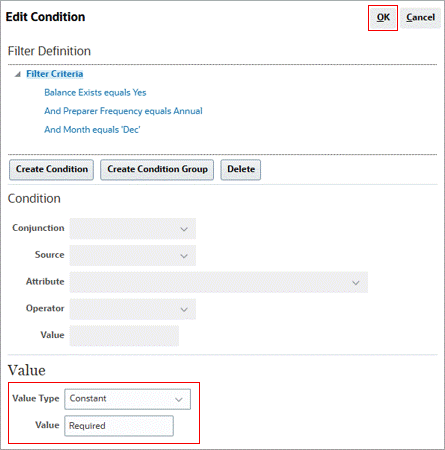
- Create a condition where if a balance exists, the preparer frequency is Annual, and the month attribute equals Dec, then the constant is Required. Click OK.
- Click (New).
- Create a condition where if a balance does not exist, the preparer frequency is Annual, and the month attribute equals Dec, then the constant is No Balance. Click OK.
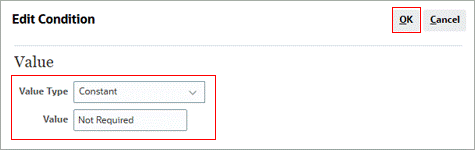
- Edit the row containing Else. Enter value as Not Required, and click OK.
IF_THEN_ELSE(MONTH ({Period End Date})=1, 'Jan',
(IF_THEN_ELSE(MONTH ({Period End Date})=2, 'Feb',
(IF_THEN_ELSE(MONTH ({Period End Date})=3, 'Mar',
(IF_THEN_ELSE(MONTH ({Period End Date})=4, 'Apr',
(IF_THEN_ELSE(MONTH ({Period End Date})=5, 'May',
(IF_THEN_ELSE(MONTH ({Period End Date})=6, 'Jun',
(IF_THEN_ELSE(MONTH ({Period End Date})=7, 'Jul',
(IF_THEN_ELSE(MONTH ({Period End Date})=8, 'Aug',
(IF_THEN_ELSE(MONTH ({Period End Date})=9, 'Sep',
(IF_THEN_ELSE(MONTH ({Period End Date})=10, 'Oct',
(IF_THEN_ELSE(MONTH ({Period End Date})=11, 'Nov',
(IF_THEN_ELSE(MONTH ({Period End Date})=12, 'Dec',
'recon not found')))))))))))))))))))))))
Note:
This calculation looks at the numerical month of the Period End Date and assigns it the monthly text abbreviation that corresponds with the number. For instance, January is month 1 so it will show as Jan. February is month 2 so it will show as Feb. This attribute will be used in another attribute to mark the reconciliation as Required or Not Required, or No Balance based on the frequency.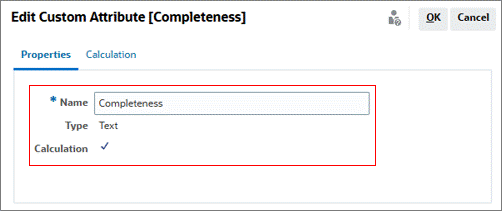
Note:
Any combination of frequencies can be used in these examples. The purpose of this attribute is to identify which recons would be required, which have no balance, and which would not be required if all profiles had reconciliations created in each period. This would give you a completeness check in each period.Creating a rule
To create a rule in Account Reconciliation, perform the following steps:
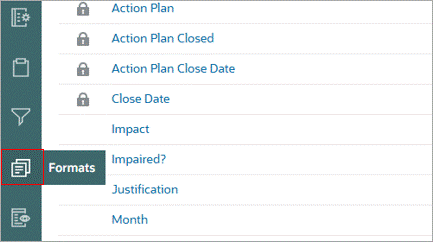
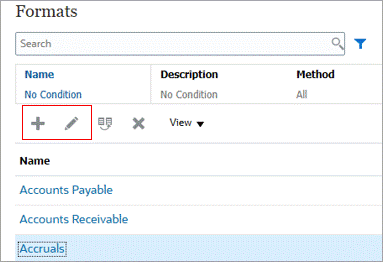
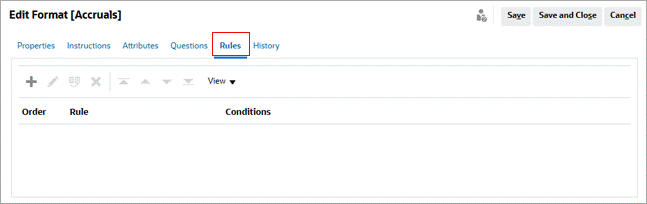
- From the Configuration page, click the Formats tab.
- Create a format or select an existing format.
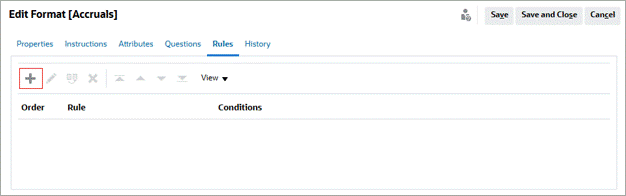
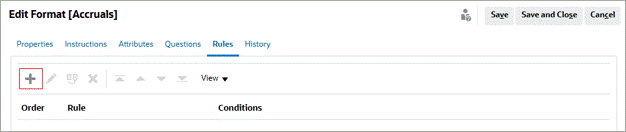
- Click the Rules tab.
- Click (Add) to add the newly creating custom attribute to a rule on the reconciliation.
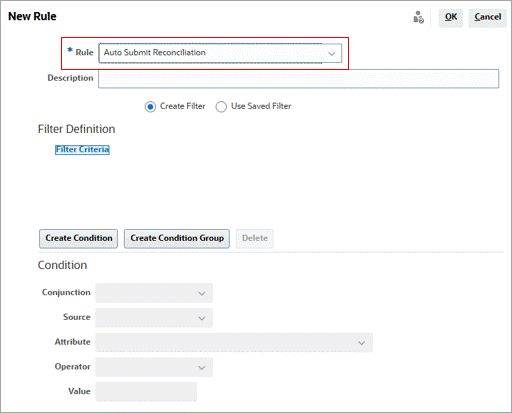
- Select the Auto Submit Reconciliation rule type.
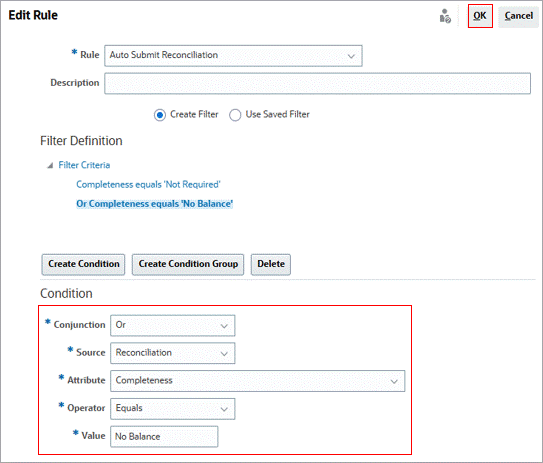
- Create the condition to auto submit if the completeness attribute equals Not Required or No Balance. Click OK.
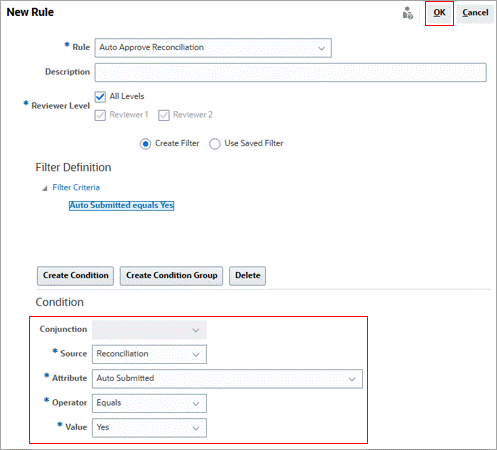
- Click (Add) to add a rule.
- Create the condition to auto approve if Auto Submitted equals Yes. Click OK.
Click Save and Close.
Updating periods
In order for the attribute to properly identify which reconciliation is required in each period or required with no balance, all frequencies must be enabled on each period. This creates reconciliations in each period for every active profile. The reconciliations with the completeness attribute of Not Required or No Balance are auto submitted and auto approved. So, they don’t need to be manually reconciled. To update periods, perform the following steps:
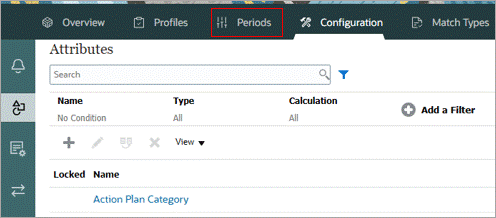
- From the Configuration page, click Periods.
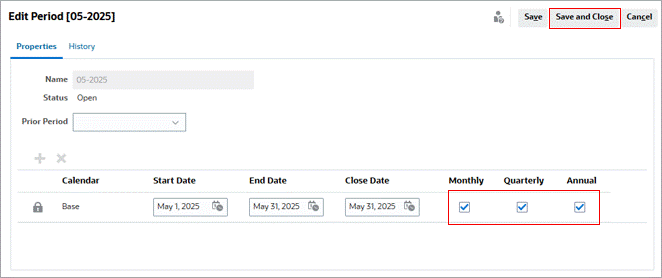
- Create a period or select an existing period to edit.
- Click the checkbox to enable all frequencies for each period. Click Save and Close.

Repeat Step #3 for all periods.
Review the completeness check
To review a completeness check, perform the following steps:
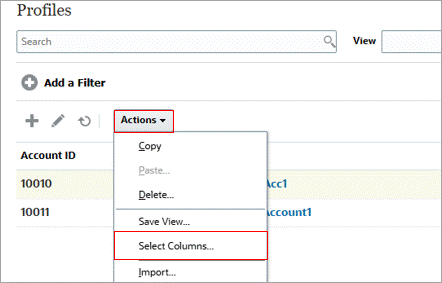
- From the Configuration page, click Profiles.
- Click Actions, and then click Select Columns.
- Locate Created On and Completeness, and move them to the selected columns. Click OK.
- A blank field in the Created On row signifies that no reconciliation was created for the period selected. This is the final check to ensure that all Required reconciliations are created.


Related Links
Performing a Completeness Check in Account Reconciliation
G40425-01
Aug, 2025