Importing Multiple Periods from a File
To create periods covering a large span of time or to create daily periods, you can import multiple periods from a flat file rather than go through a manual configuration.
Period Import File Format
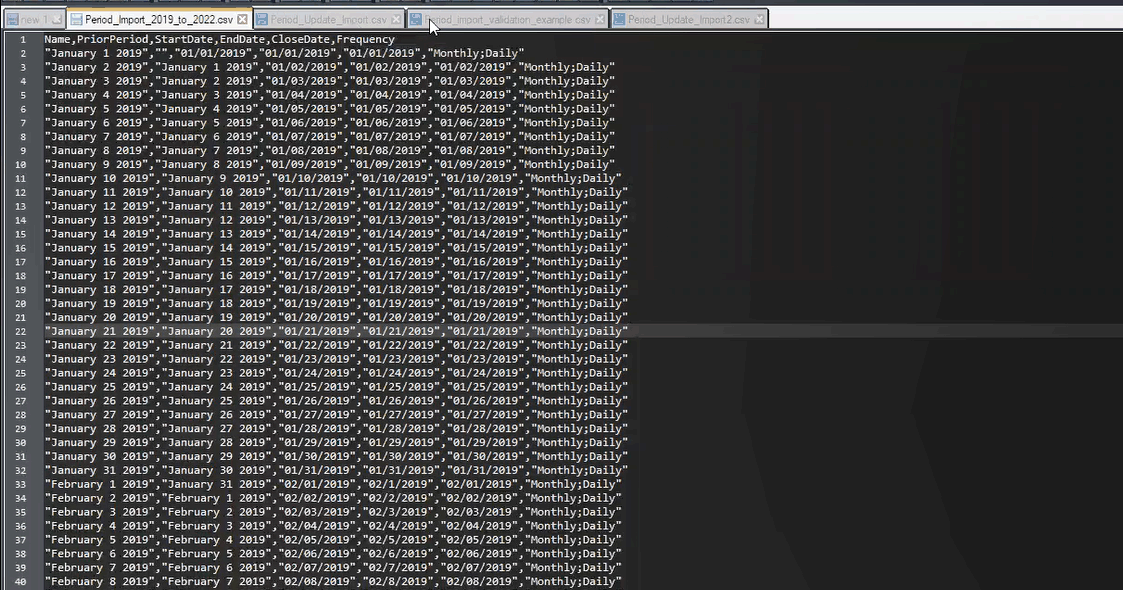
The import file format is as follows:
- Name - name of the period. Required for both Replace and Update import mode.
- Prior Period - (Optional) name of the prior period.
- Start Date - - Start Date of default base calendar (Required for Replace import mode)
- End Date - End Date of default base calendar (Required for Replace import mode)
- Frequency - Frequency of default base calendar. You can have multiple frequencies separated by a semi-colon (for example, Monthly; Yearly (Required in Replace import mode)
- Calendar Name 1 - Name of the calendar if additional calendars are being added. (Optional)
- Start Date 1 - Start Date for Calendar 1 (Optional)
- End Date 1 - End Date for Calendar 1 (Optional)
- Frequency 1 - Frequency for Calendar 1. You can have multiple frequencies separated by a semi-colon (for example, Daily, Monthly (Optional)
Note:
To get started with creation of an import file, you can perform an export of a period or two so that you get a sample file with correct headers. Then make your additions to that file and import it.Here is an example of an import file for daily periods:
Here is another example of a periods import file for a different calendar.
Importing Periods from a File
To import periods from a file:
- From Home, then Application, then
Periods.
The Periods dialog displays.
- Click Import
 to display the Import Periods dialog.
- From File, browse to and select your import file.
- Select one of the following options for Import Type:
- Replace - create new periods or update any existing periods. The following required columns must be specified: Name, Start Date, End Date, and Frequency.
- Update - input just the columns that need to be updated. Only the Name is required for existing periods. If you use update and include new periods, the required columns need to be specified (Name, Start Date, End Date and Frequency.
Note:
Any existing period that matches Period Name will be modified. - Select your Date Format from the drop down list.
- Select a file delimiter for the import file (for example, comma or tab). Or, choose Other to specify any single character as the delimiter.
- Click Import.
You will be notified if there are errors.
- Click OK and the system displays a progress dialog while the periods and the prior periods structure is generated. Do not close your browser while the periods are generating.
This is an example of the list of periods after the periods have been generated.

Performing an Update of Multiple Periods Using Export
You can also use the Export feature to export all periods or selected periods. A .CSV file is created that can be opened or saved in Excel. This allows you to update the periods and then re-import them.
To export all or selected periods:
- From Home, select Application, then Configuration, and then Periods.
- Click Export
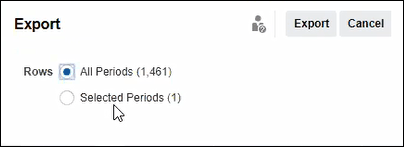
 and the Export dialog displays.
- Select either All Periods or Selected Periods and choose the periods you want to export.
- Click Export.
You will be prompted to either Open or Save the .csv file.