Define and Assign Custom Security Contexts

As a security administrator, you can define custom security contexts and assign them to data roles. This enables you to assign additional security assignments to users along with the ready-to-use security assignments.

Security configurations for application roles enable you to define the data security filtering for an application role directly from the Security page. For example, if you want to secure GL data by county, which isn’t a ready-to-use security context, you can create a custom security context.
  1. If you've the User Administrator role in the identity domain associated with your Oracle Fusion Data Intelligence instance, create a group such as "CustomSecContextGroup" in the identity domain. See Create a Group.
  2. Sign in to your service.
  3. In Oracle Fusion Data Intelligence Console, click Security under Service Administration.
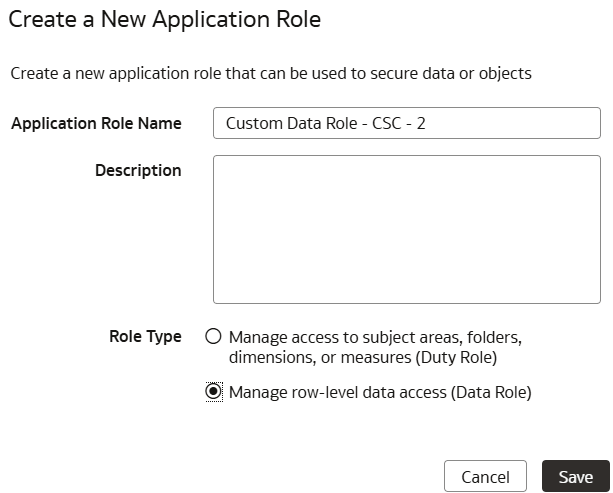
  4. In the Application Roles tab, create a custom application role such as "Custom Data Role - CSC - 2".
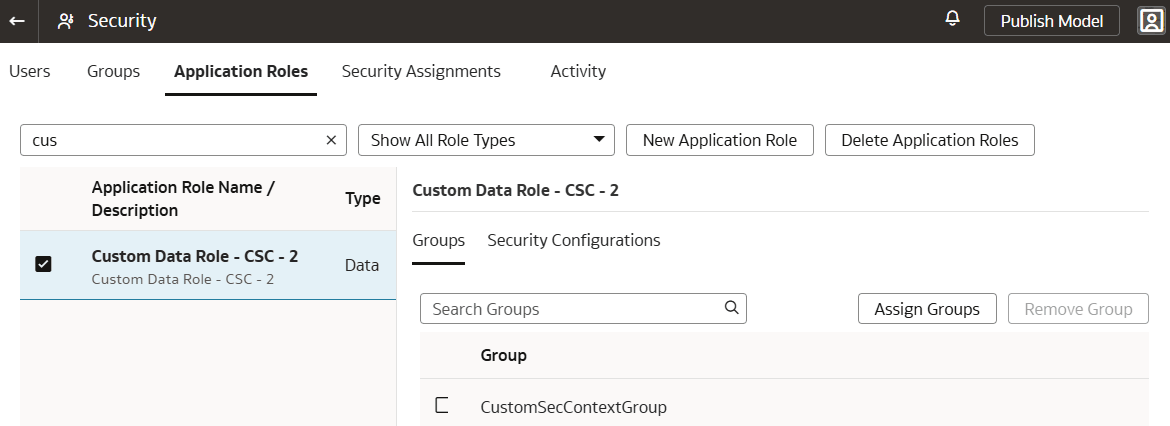
  5. In the Application Roles tab, select the applicable role such as the "Custom Data Role - CSC - 2", click Groups, and then click Assign Groups to assign "Custom Data Role - CSC - 2" to "CustomSecContextGroup" that you created previously.
  6. In the Application Roles tab, select the applicable role such as the "Custom Data Role - CSC - 2", and click Security Configurations.
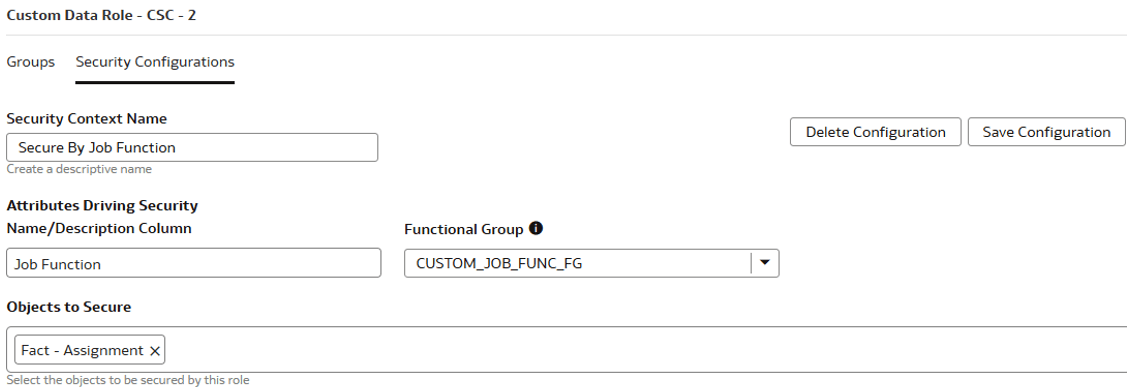
  7. In the Security Configurations tab, add the custom security as follows and then click Save Configuration:
    • Security Context Name: Provide a name for the custom security context, such as Secure By Job Function.
    • Attributes Driving Security: Click and in Select an object dialog, search for an object and select the attribute to drive the security, such as a Job Function.
    • Functional Group: Select a prebuilt functional group or enter a unique functional group name in the text box to create a custom functional group such as CUSTOM_JOB_FUNC_FG.

      Note:

      The functional group drives the query. If you've selected an existing functional group, the query creates the OR condition and if you've selected a new functional group, the query adds the AND condition.
    • Objects to Secure: Click and in Select an object dialog, search for an object, such as Fact - Assignment, and select it secure by the custom application role that you created.

    Security configurations set up

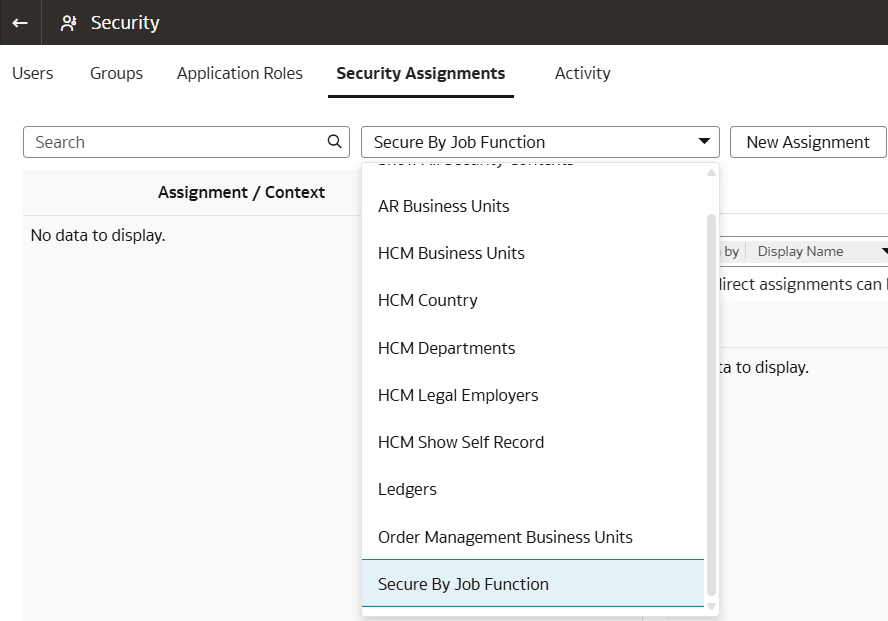
  8. In the Security Assignments tab, click the Show All Security Contexts dropdown list to verify that the custom security context that you created, such as Secure By Job Function is visible in the list.

    Custom security context visible in the Show All Security Context dropdown list

  9. On the Security page, click Publish Model to make the custom configurations available in the semantic model.
  10. Navigate to the Semantic Model Extensions page, and click the Activity tab to know whether the custom security configuration has been published.
  11. Assign the custom security context to a user.
  12. Publish the semantic model. See .