Extend a Ready-to-use Dimension with Custom attributes
Follow these steps to extend a ready-to-use dimension with custom attributes.
Consider a scenario where a user needs to extend the Ledger Dimension with additional business-specific attributes to support custom reporting and analytics. To meet this requirement while preserving the Oracle-delivered implementation, you can extend the Ledger Dimension using a custom mapping derived from the ready-to-use mapping. The following approach, seen in the high level flow, enables user-specific enhancements while maintaining upgrade compatibility: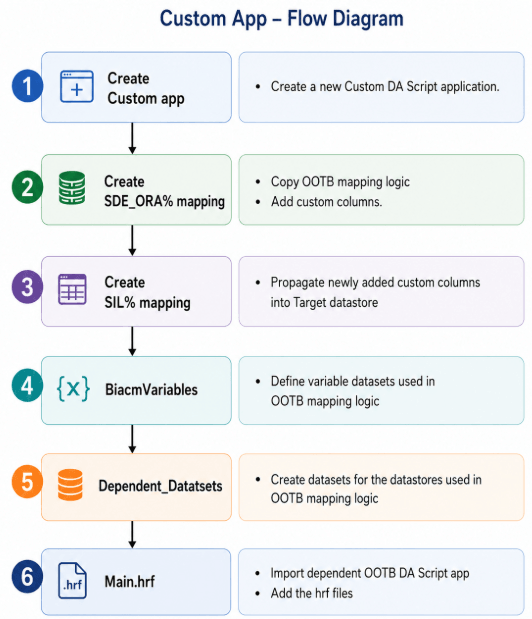
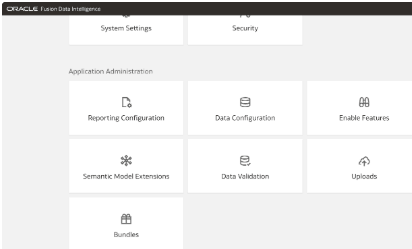
- In Oracle Fusion Data Intelligence Administration Console, click Data Configuration.
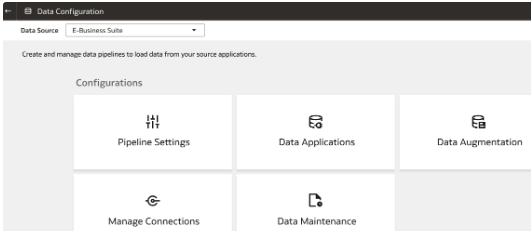
- On the Data Configuration page, select E-Business Suite in Data Source and click Data Applications.
- On the Data Applications page, click Create and select DA Scripts.
- On the DA Scripts page, under Source, click New, click File, select Code to create a code file.
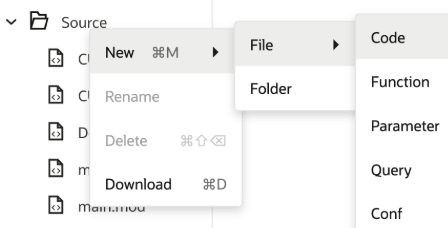
- Specify the Code file name as SDE_ORA_LedgerDimension.

- Copy the SDE_ORA_LedgerDimension Mapping logic from the ready-to-use DA Scripts application.
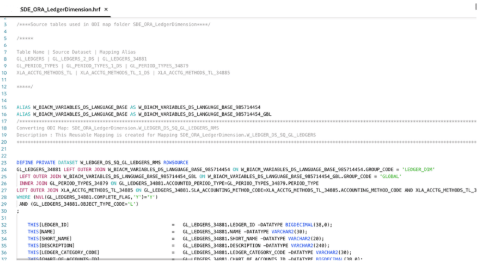
- The ready-to-use mapping doesn't include the required
IMPORT SOURCEstatements. Review the source aliases used in the mapping and add the correspondingIMPORT SOURCEentries from the ImportSource HRF file.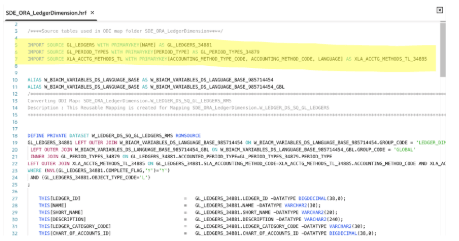
- Add the required custom columns to the mapping logic. Define the appropriate data type and length based on the source system.

- If custom columns are added in the temporary datasets, then add those newly added column(s) in TEMP_KEY column.
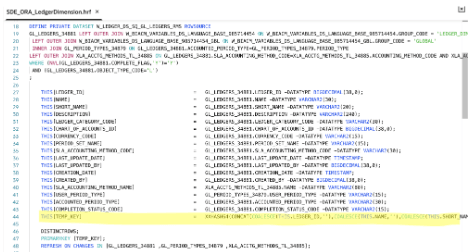
- Propagate the newly added columns from temporary dataset to the target dataset.
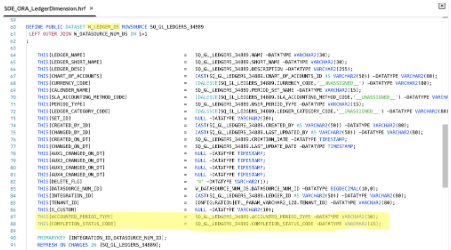
- After adding the new attributes to the staging data store, create a custom SIL mapping named SIL_LedgerDimension for the Ledger dimension by copying the ready-to-use mapping. For the target data store, retain only the key columns and the newly added columns in the custom mapping.
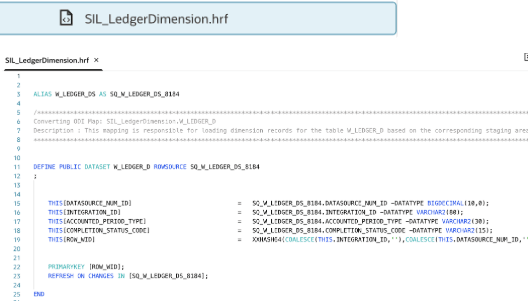
- Review the mapping logic to identify all referenced variables, lookup datasets, and dimensions and ensure they are included in the custom DA Script application.
Regarding Variables, in the CUSTOM mappings, W_BIACM_VARIABLES_DS_LANGUAGE_BASE and W_DATASOURCE_NUM_DS datasets are used and are created based on the variables defined in the EBS_CONFIG app. For Variables, Create "BiacmVariables" code file and add the required data store. Always create the Variable datasets as PRIVATE VERSIONED to get latest data from the parent DA Script application.
Note:
PRIVATE datasets created in other DA Script applications aren't accessible with IMPORT MODULE, only PUBLIC datasets can be accessed. The W_BIACM_VARIABLES_DS_LANGUAGE_BASE and W_DATASOURCE_NUM_DS data stores are PRIVATE. Therefore, define these datasets by copying the logic from the parent DA Script application. Make sure the ROWSOURCE data store name is prefixed with the parent DA Script application name. For example, DW_EB_X_EBS_CONFIG_C_DATA_SOURCE_DS.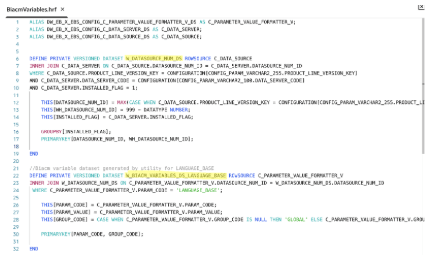
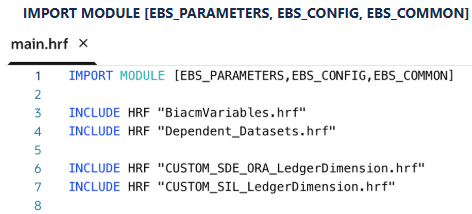
- In
main.hrf, add the hrf files.To refer the data stores from the ready-to-use DA Script application, you must import the corresponding module. The Custom mapping logic uses data stores created in EBS_CONFIG, EBS_COMMON modules and parameters defined in the EBS_PARAMETERS application. Hence include all of them in the IMPORT statement.
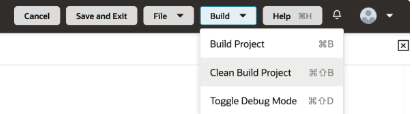
- Build the DA Script application and resolve build errors if there are any.
- Deploy the custom application and validate the data.