Set Up the From Field in Workflow Email Notifications
By default, the From field in workflow email notifications shows <your
pod>.fa.sender@workflow.mail.<your data center>.cloud.oracle.com. You can
change the email address, add a sender name, or do both.
For example, you indicate that Your Company is the sender name to display, and the from
address should be your.company@oracle.com. The From field in emails would
show: Your Company <your.company@oracle.com>. Your setting for the from
address also applies to the reply-to address.
Your users might get other types of email notifications, for example for things not related to workflow. Your setup here doesn't affect those emails, and you might not be able to specify the sender name for those emails.
Change the From and Reply-To Address
Before you define the address for the From and Reply-To fields, set a profile option to make that change possible. If you’re not using the default email address, you must do additional setup steps.
Here’s how you change the from and reply-to address for a specific workflow task:
Add Sender Name to the From Field
You can set up the sender name in application preferences for all workflow tasks, or have different setup for specific workflow tasks. If not specified at the task level, the sender name setting defaults from the preferences.
All Workflow Tasks
Here's how you define the sender name for all workflow tasks that have no other applicable setup. This setting applies to tasks that require action as well as FYI-only tasks.
-
If you're not in BPM Worklist:
-
Click the Notifications icon in the global header.
-
Click Show All.
-
On the Notifications page, click the Worklist button.
-
In BPM Worklist, click your user name and select Administration.
If you’re already in BPM Worklist, just open the Administration tab.
-
-
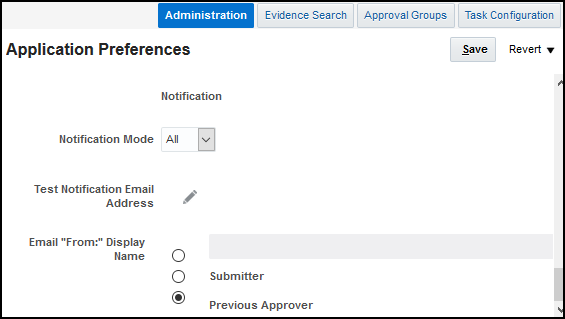
On the Application Preferences page that's on the Administration tab, select one of the Email "From:" Display Name options.
-
Select to specify the text to display. Enter your value or leave blank if you want nothing to appear in the From field.
-
Select Submitter to show the person who created the task.
-
Select Previous Approver to show the previous assignee in the approval chain. When the notification is sent to the first assignee in the approval chain, the From field shows the person who created the task.
-
-
Click Save.
Specific Workflow Task
To specify the sender name for a specific actionable or FYI task:
-
In the Setup and Maintenance work area, go to the Manage Task Configurations task or another approval setup task in the Application Extensions functional area or another functional area.
-
In BPM Worklist, on the Task Configuration tab, search for the workflow task in the Tasks to be configured pane.
-
Select the task from the search results and click the Edit task icon in the toolbar.
-
Open the Notifications subtab.
-
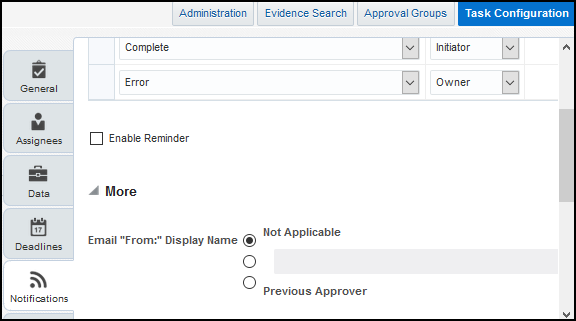
On the Notifications subtab, click the Expand More icon.
-
Select one of the Email "From:" Display Name options.
-
Select Not Applicable so that what appears in the From field depends on the application preferences that apply to all workflow tasks.
-
Select the second option and do one of the following:
- Enter the text to display, surrounded by quotes, for example "Oracle".
- Leave this field blank if you want nothing to appear in the From field.
- Follow these steps to display the task submitter's user
name, which is what they enter to sign in to the
application:
- Click the Sender Name icon after the field.
- In the Expression Builder, select task:creator.
- Click the Insert into Expression button, then OK.
-
Select Previous Approver to show the previous assignee in the approval chain. When the notification is sent to the first assignee in the approval chain, the From field shows the person who created the task.
-
-
Click the Save icon in the Tasks to be configured toolbar.