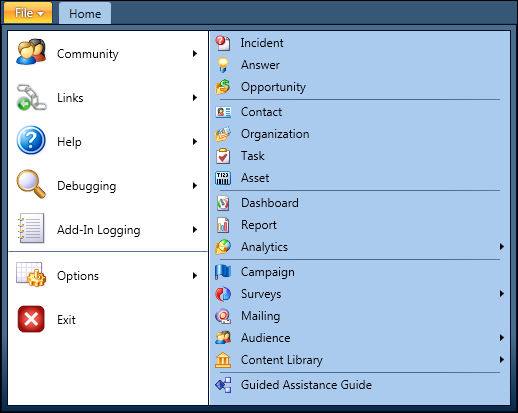
The file menu, accessed by clicking File next to the ribbon’s
Home tab, includes a section on the right for creating records and
items. This list is blank until you configure the file menu in navigation
sets.
After you've configured it, staff members can click File and use the
shortcuts you've added.
Tip: Use this same procedure to configure the Add a Record menu for staff
members working on the Agent Browser UI.
If you do not set any options for the file menu in the navigation set, staff members with
profiles that use that navigation set will not have the option to create items using
this shortcut. Also, if you set menu options for items that the staff member’s
profile doesn't grant permission for, those options will not appear in the file
menu.
- Click Configuration on the navigation
pane.
- Expand Application Appearance, and
then double-click Navigation Sets.
The Navigation Sets explorer opens on the content pane.
- Right-click the navigation set you want to configure the
file menu for and select Open.
- If File Menu is not selected at
the top of the upper portion of the right column, click it.
- Expand New Items in the left column.
- Select the items you want to add to the file menu and click Add.
You can also double-click items to add them. To add more than
one item at the same time, press Ctrl while selecting each item.
- To add a folder to the file menu to help organize menu
items, click New Folder.
- Enter the name you want for the folder.
- Drag menu items to the folder.
- To rename a folder, select the folder, click Rename, enter the new name for the folder, and click
outside the folder name to save the new name.
- To choose the order in which the menu options appear when
File is selected, click an item in the lower portion of the right
column and then click Move Up or Move Down to position it in the list.
- To group menu options, select File Menu, expand New Items on the left, and then select Horizontal
Separator from the bottom of the list.
- Click Add.
- Click Move Up and Move Down to position the horizontal separators.
- Click Save.