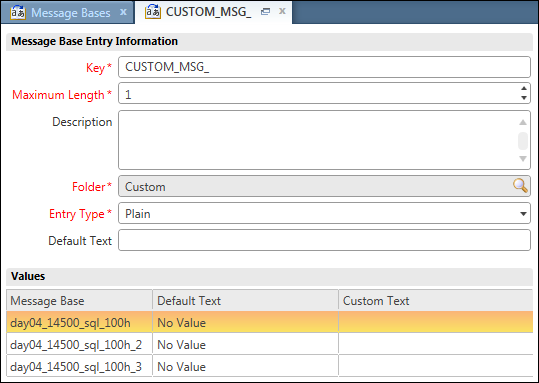
| Message Base Entry Information |
Fields in this section define the parameters
for the custom message base, including name, field length, description,
folder location, entry type, default text, and custom text. |
| *Key |
Enter the name of your custom message base after
CUSTOM_MSG_, which populates in this field. All custom message bases
must start with CUSTOM_MSG_. |
| *Maximum Length |
Enter the maximum length allowed in the Custom
Text field (1-300,000 characters). |
| Description |
Enter a description of the message base in this
field. |
| *Folder |
Click the Search icon
to define a folder location for your custom message base. By default,
all message bases must be located in the Custom folder or a custom
subfolder. Ten subfolders can be nested under the Custom folder.
Each subfolder can contain three child folders. |
| *Entry Type |
Select from the drop-down list to add a plain, HTML, or keyboard shortcut
attribute to your message base. Both the Default Text and
Custom Text fields accept plain, HTML, and keyboard shortcut
attributes. The HTML option lets you apply HTML to your
text. For example, if you want your text to display in bold,
you could enter <b>Bold text</> in
the fields. The Hotkey option lets you add a keyboard
shortcut to your text by prepending an ampersand (&) to
the text you enter in the fields. |
| Default Text |
This field is not required; however, if you plan to export and then import
your message bases, you must enter a value in this field (or
under the Values section). Otherwise, the data import will
return an error. Enter the default text that you want to
display on all interfaces. The text you enter in this
field populates the Default Text fields for all
interfaces under the Values section. Note: If you
want your interfaces to display different default text,
leave this field blank and enter your default text
values in each interface row under the Values
section. |
| Values |
This section displays the interface name and
lets you set your default text for each interface. |
| Default Text |
Enter the default text you want to display for
each interface. |
| Custom Text |
Enter the custom text you want to display on
each interface. If you define a value in this field, it overwrites
the value in the Default Text field. This field is disabled until
you save your new custom message base. In other words, this field
can be edited only on existing message bases. |