Step 1: Importing and Loading Chart of Account Data in Oracle Financials Cloud
- In Oracle Financials Cloud, click
 , and then under Tools, select File Import and Export.
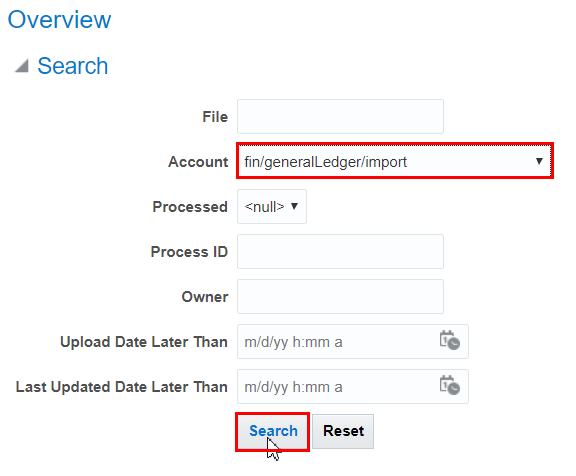
- From the Account drop down menu, select fin/generalLedger/import, and then click Search.
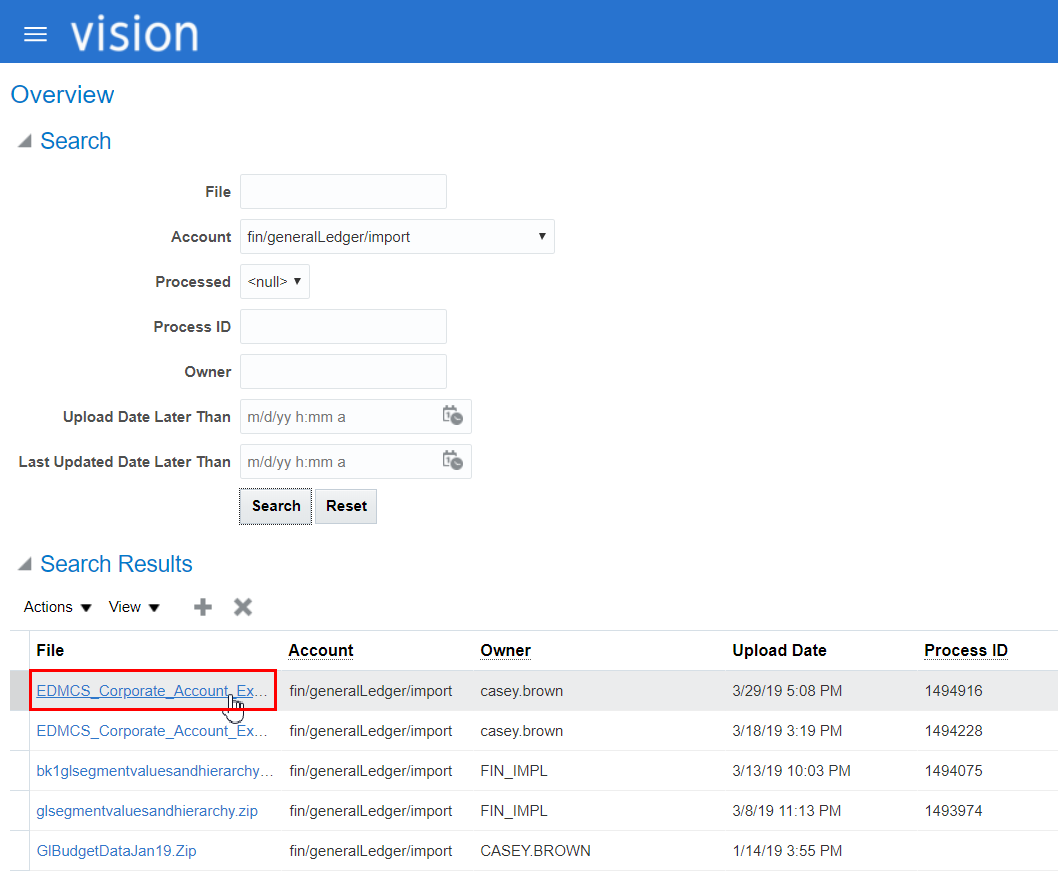
- Click the name of the export file from Oracle Fusion Cloud Enterprise Data Management to download the CSV files.
- Open and verify the contents of each CSV file to ensure that the correct data will be loaded.

- In Oracle Financials Cloud, click
 , and then under Tools, select Scheduled Processes.
- Click Schedule New Process.

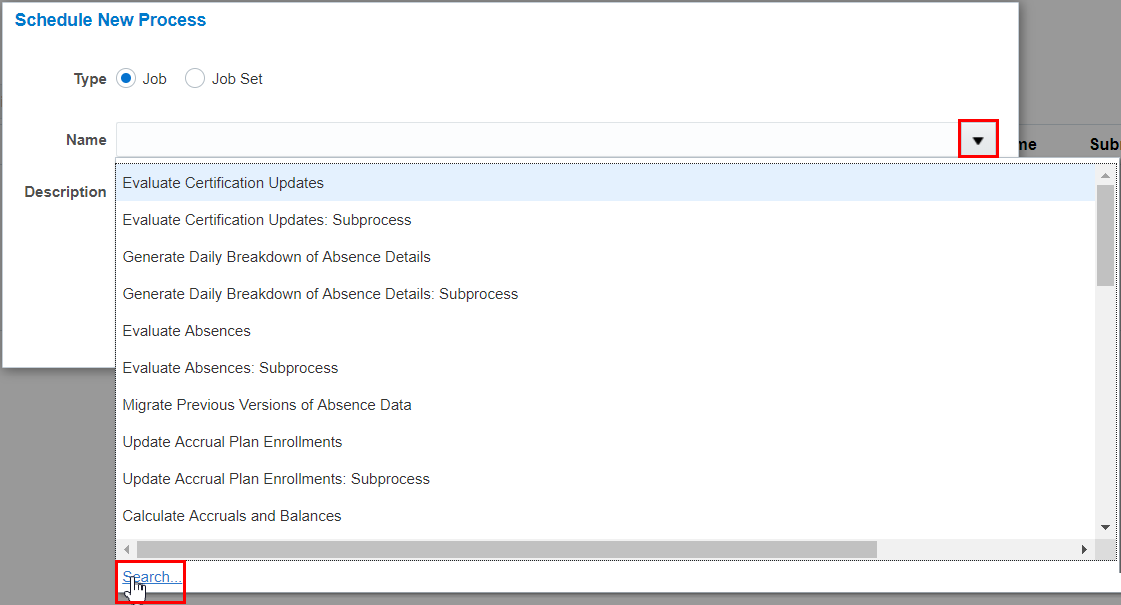
- Click the down arrow to the right of the Name field, and then click Search.
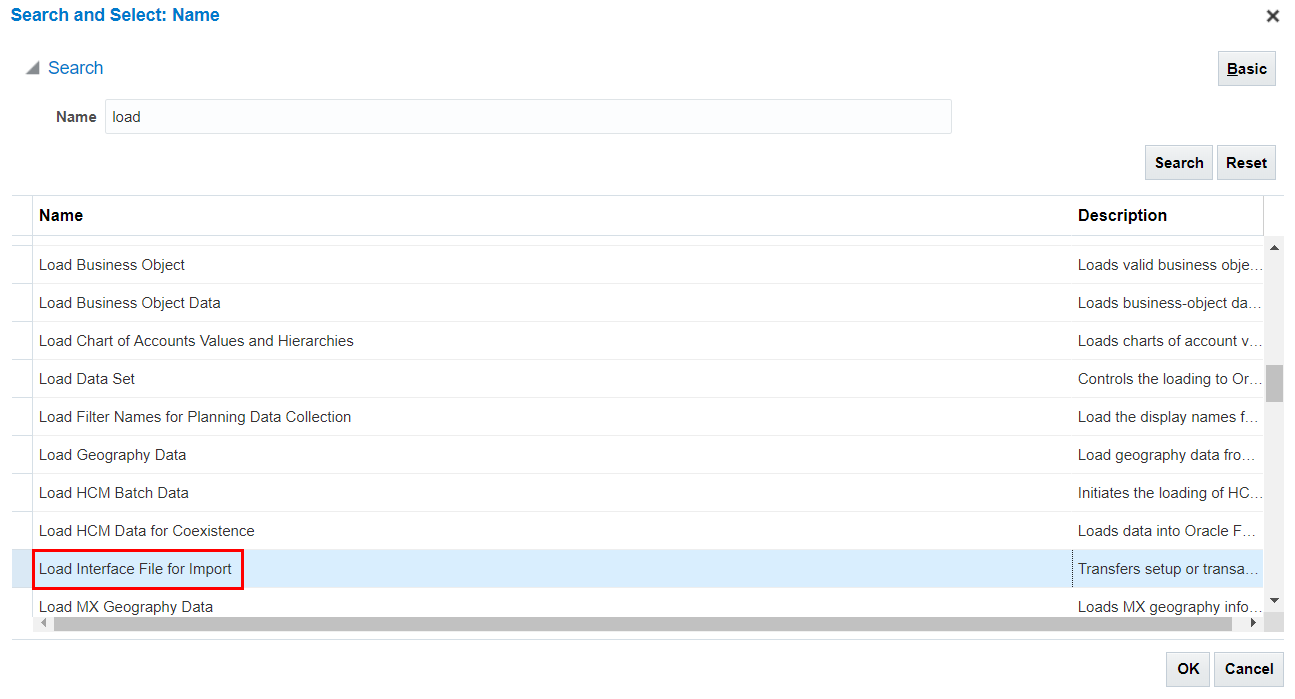
- Type load in the Name field, click Search, and then select Load Interface File for Import and click OK.
- Click OK.

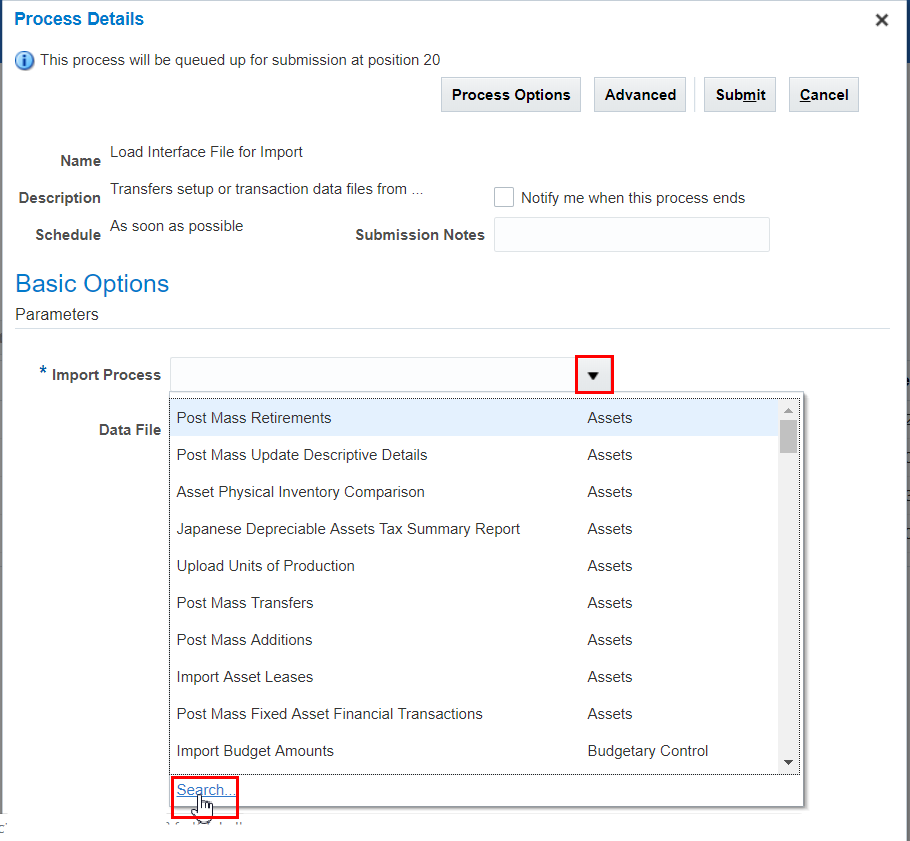
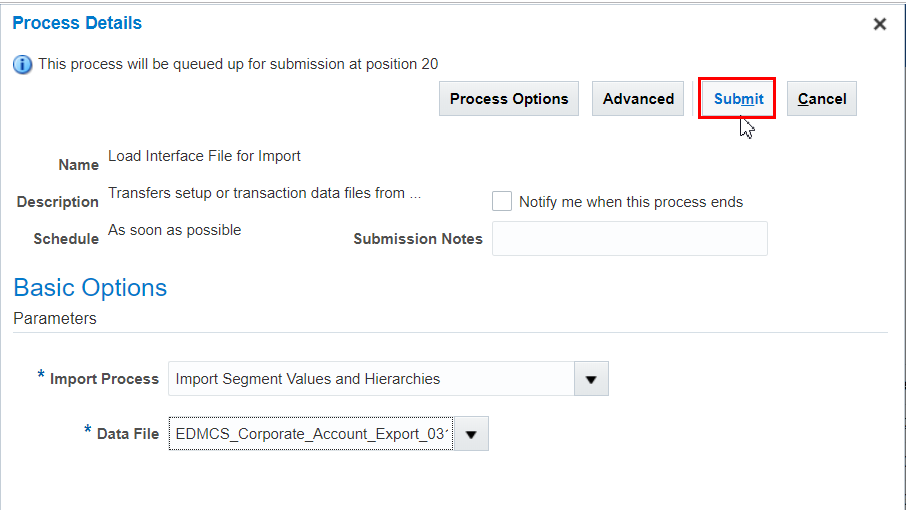
- In Process Details, click the down arrow next to Import Process, and then click Search.
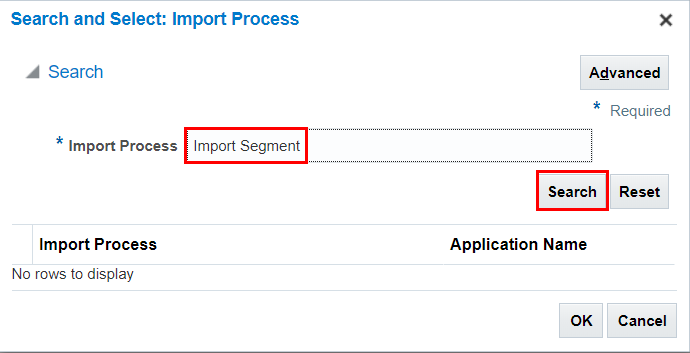
- In Import Process, type Import Segment and then click Search.
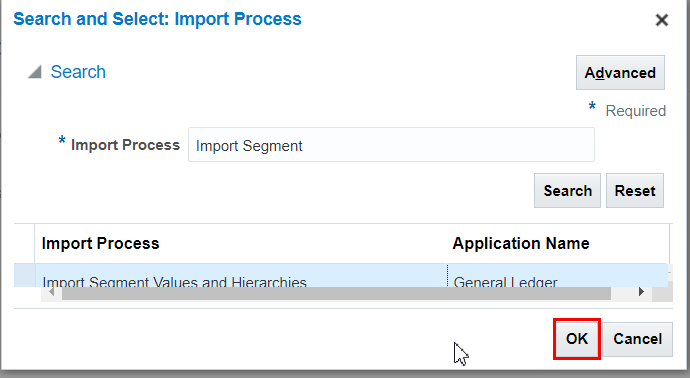
- Select Import Segment Values and Hierarchies, and then click OK.
- Click the down arrow next to Data File, and then select
EDMCS_Corporate_Account_Export_031819.zip.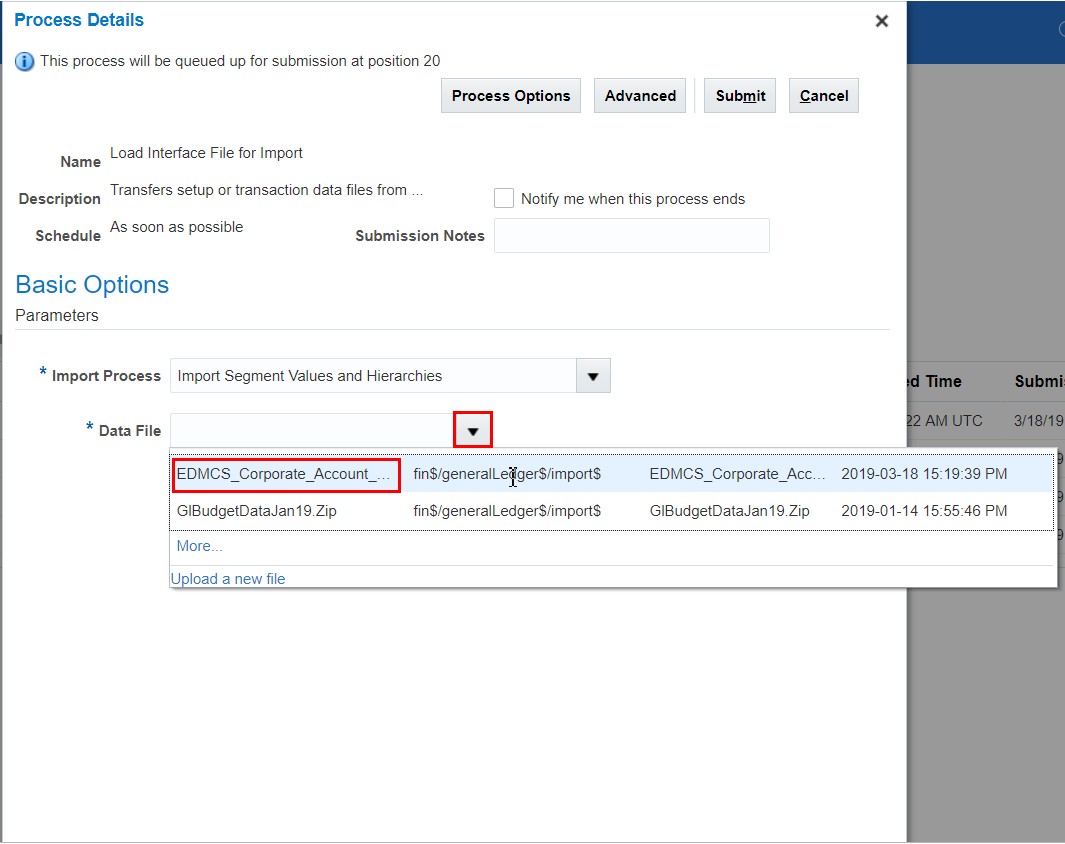
- Click Submit.
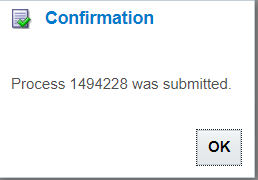
- Click OK on the confirmation dialog box.
- On the Overview screen, click
 to refresh the scheduled processes.
- Verify that all scheduled processes for the import completed successfully. There are six processes in total:
- Load Interface File for Import
- Transfer File
- Load File to Interface
- Load File to Interface
- General Ledger Segment Values and Hierarchies Import Process Launcher
- Import Segment Values and Hierarchies
