Introduction
This 15-minute hands-on tutorial shows you how to use an expression in a node type converter to find the parent of a node via a subscription request. You begin by creating a subscription and then add expressions to a node type converter to logically derive the node name and the parent name. Finally, you create and submit a request to test the logic, and sign in as the subscription assignee to view the subscription request results.
Background
When you add a node to the source, and submit the change via a subscription request, you want the Enterprise Data Management Cloud engine to find a specific parent in the target based on a property of the source node. You can accomplish this by creating an expression in the node type converter.
In the example in this tutorial, you are creating two expressions. The first expression calculates the node name in the target and the second epression finds the appropriate parent in the target. When you submit the change via a subscription request with auto-submit selected, and no approvals required, the change is automatically pushed to the target.
Prerequisites
Before starting this tutorial, you must:
- Have Service Administrator access to your Enterprise Data Management Cloud environment.
- Create a sample application. For more information, see the documentation.
- Create a user, and then add the user to the User group and to the Interactive User group. In this tutorial, this user is Barry Dylan.
Caution:
Please note that creating the sample application will remove all existing applications and artifacts in the environment. Back up your current environment before creating the sample applicationt. For more information on backing up, uploading, and importing applications and artifacts, refer to the Administering Migration for Oracle Enterprise Performance Management Cloud documentation.Identifying the source and the target
- Sign in as a user with the Service Administrator role, navigate to Views, and open the Account Maintenance view. The Corporate Account viewpoint is your source, and the Plan Account viewpoint is your target.

- Select the Corporate Account viewpoint, navigate to and then expand the 11000 node.

- Click
 (Side-by-Side Layout) to view the Corporate Account and Plan Account viewpoints.
- With 11000 selected in the Corporate Account viewpoint, click
 (Locate Node from Viewpoint Corporate Account) to locate the related node A_11000 in the Plan Account viewpoint.
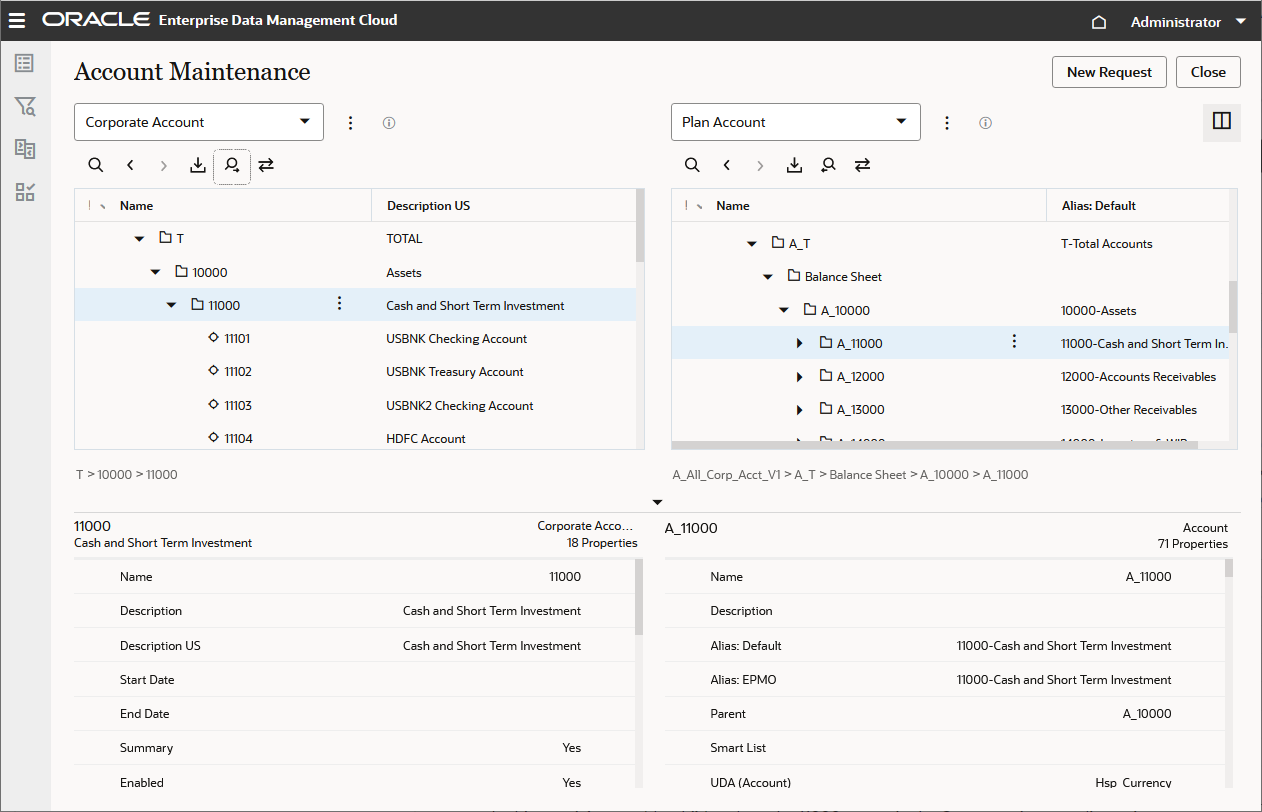
In this tutorial, you add a child node to the 11000 parent in the Corporate Account dimension, use separate expressions to calculate the target node name and to find the A_11000 parent in the Plan Account dimension, and then add the node to the parent in the target dimension via a subscription request.
Creating a subscription
- Click (Tabbed Layout) to turn off the Side-by-Side layout, and inspect the Plan Account viewpoint.

- Select the Subscriptions tab, and then click Create.

- Set the source viewpoint to Corporate Account in the Account Maintenance view, and then click Create.

- Select the Definition tab.

- On the Definition tab, click Edit.

- Add Barry Dylan as the Default Assignee, and then select Enabled and Auto-Submit.

- Save the subscription, and then select the Plan Account tab in the bottom left corner. Notice that the created subscription is listed on the Subscriptions tab

Setting up a node converter
- In the Plan Account viewpoint inspector, select the Data Chain tab.

- Select the Node Types data chain object, and then select the Account node type.

- On the General tab, notice that the node type includes the qualifier prefix A_.

- Select Converters, and then click Edit.

Creating an expression to calculate the node name
- In this section, you add the following expression to calculate the node name:
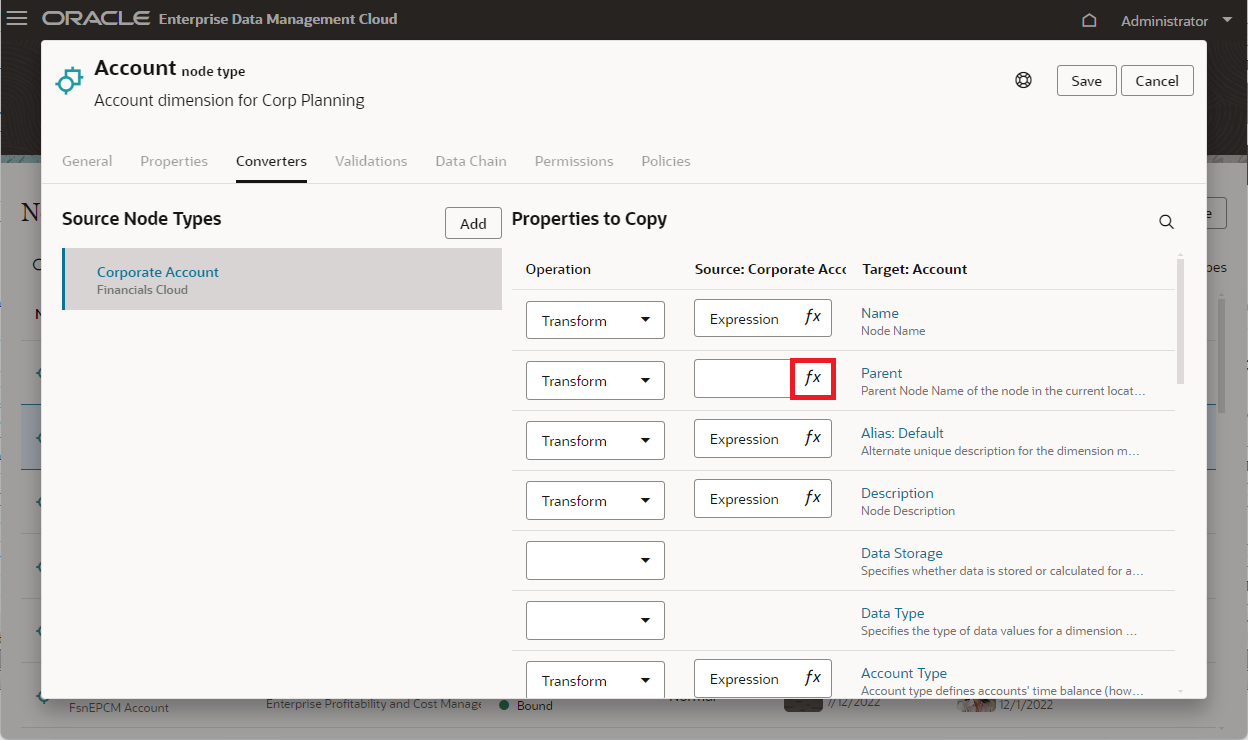
- For the Name property, change operation from Copy to Transform.

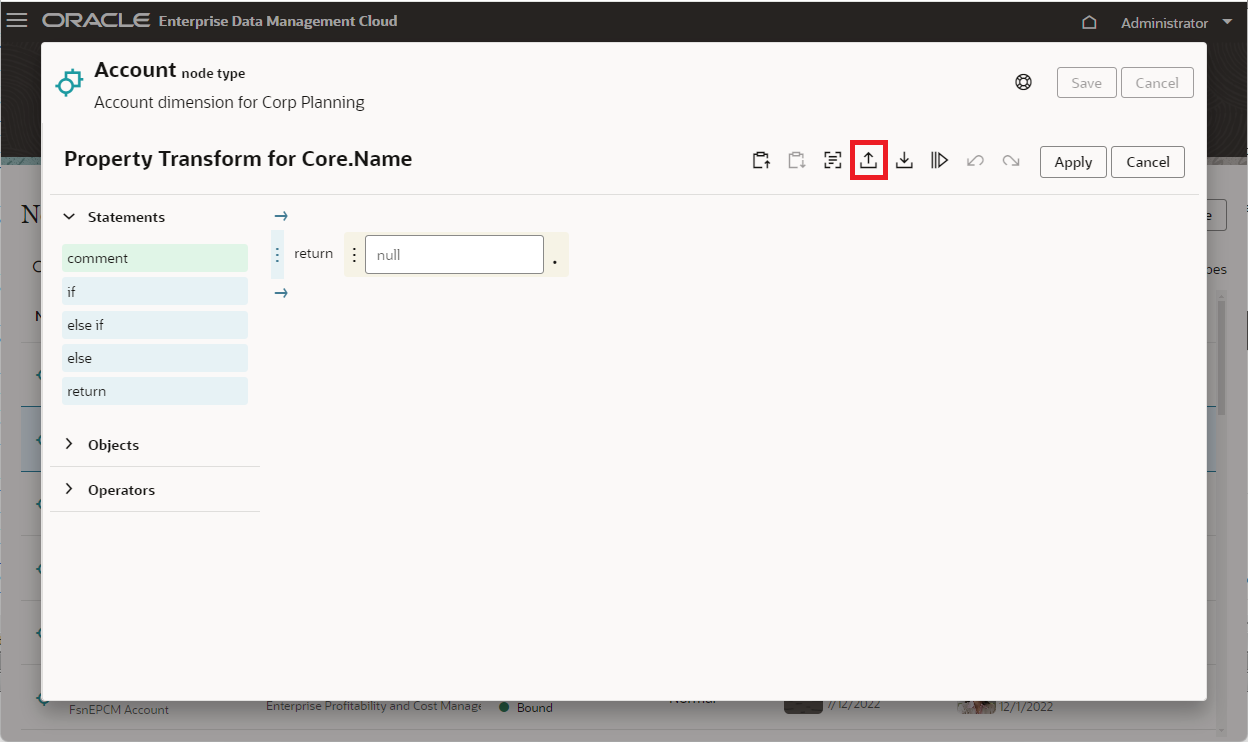
- For the Name node, click fx (Edit Expression) to open Expression Builder.

- Download the expression from the Property_Transform_Name.json
 (Load from File) button.
 - In the File Open dialog, select the downloaded
JSONfile, and then click Open. - Click Apply.

return "A_".concat(sourceNode.properties.Core.Name)
For example, you add a node named 11504 to the source dimension. The expression adds the A_ prefix qualifier to the node, and the node is added as A_11504 in the target.
For more information about creating expressions, please view our tutorial video Transforming Properties Using Expression Builder.

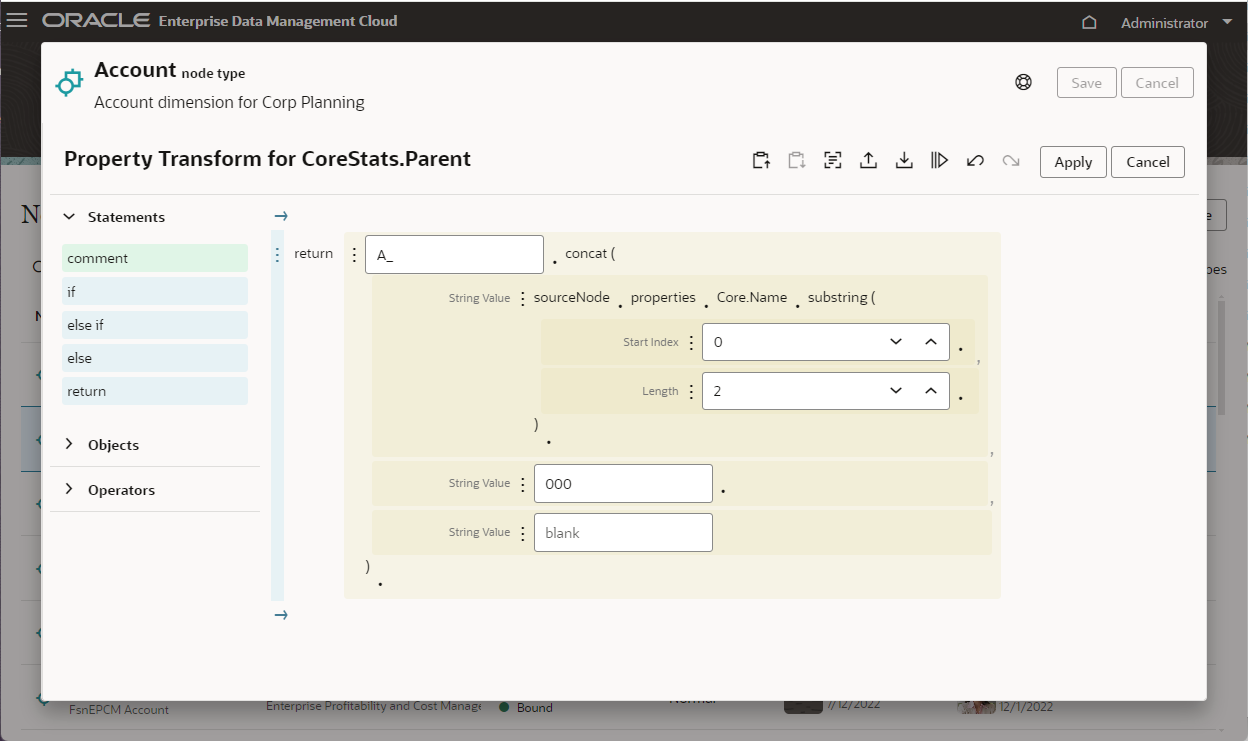
Creating an expression to derive the parent name
- In this section, you add the following expression to derive the parent node name:
- For the Parent property, in the Operation drop-down list, select Transform.

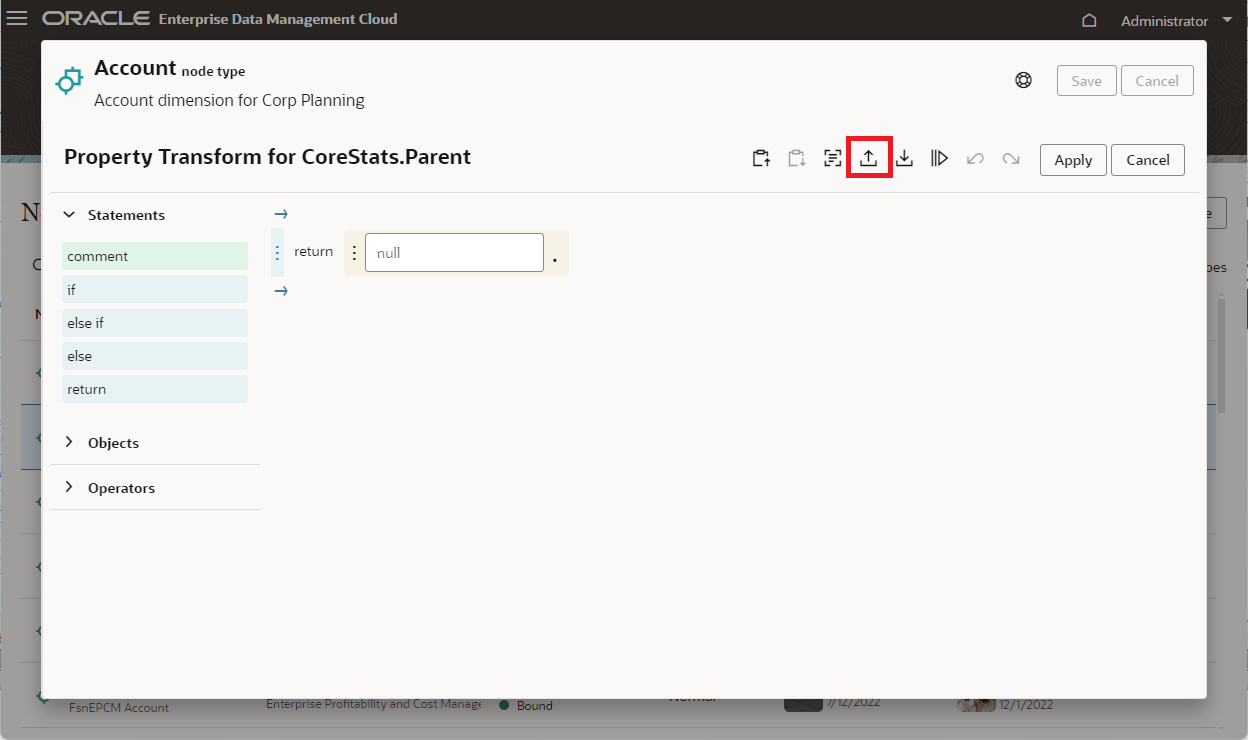
- For the Parent property, click fx (Edit Expression) to open Expression Builder.
- Download the expression from the Property_Transform_Parent.json
- In the File Open dialog, select the downloaded
JSONfile, and then click Open.
return "A_".concat(sourceNode.properties.Core.Name.substring(0, 2), "000")
For example, you add a child node named 11504 to the 11000 parent node in the source dimension. To find the parent node in the target dimension, the expression adds the A_ prefix qualifier, identifies the first 2 characters of the parent node name in the source dimension (11 in this example), and adds 000 to identify the parent as A_11000 in the target.
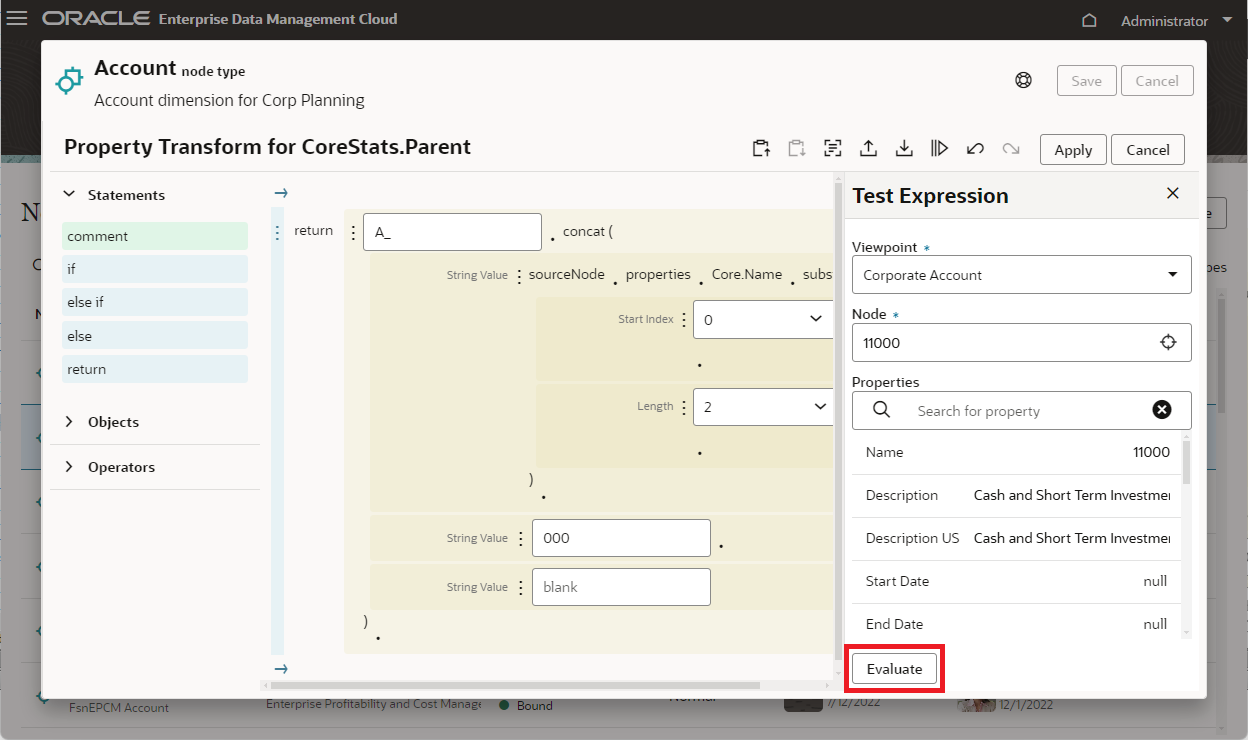
Testing the parent name expression
In this section, you test the expression to derive the parent node name.- Click
 (Test Expression) button..
- In the Test Expression pane, perform the following actions:
- For Viewpoint, select Corporate Account from the Account Maintenance view.
- For Node, select 11000 ( Cash and Short Term Investments).
- Click Evaluate.
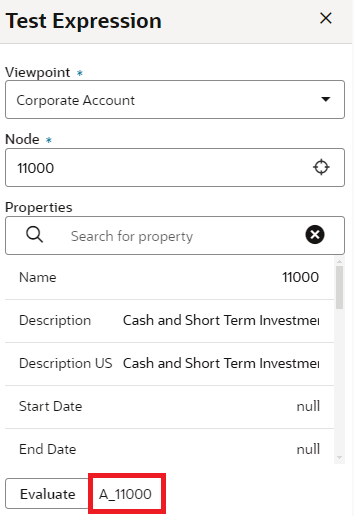
- Review the expression evaluation result, A_11000, and confirm that the expression derives the parent node name in the target dimension correctly.
- Close the Test Expression pane, and then click Apply.

- Save and close the inspector.
- Click OK to confirm the view has been modified.

Creating a request to test the expressions
- In the Account Maintenance view, click New Request.

- In the Corporate Account viewpoint, expand T > 10000 > 11000.

- Click
 (Node menu) to the right of the 11000 node to launch the context menu, and then select Add Child to create a new node as a child of the 11000 node.
- Define the child properties:
Property Definition Name 11504 Description Clearing USBNK3 Checking Account Description US Clearing USBNK3 Checking Account Summary No Enabled Yes Allow Posting Yes Account Type Asset Financial Category Cash

- In the request panel, next to All Items, click
 (Request Items Menu), and then select Validate.
You should receive a message of successful validation.

- Submit the request. You should receive a message that the request was successfully submitted.

- Close the view.
Viewing the request results
- Navigate to Requests, set the Request Type filter to Subscription, and confirm a request was sent to the request assignee: Barry Dylan. Notice that the request status is Draft because there is an issue with the request.

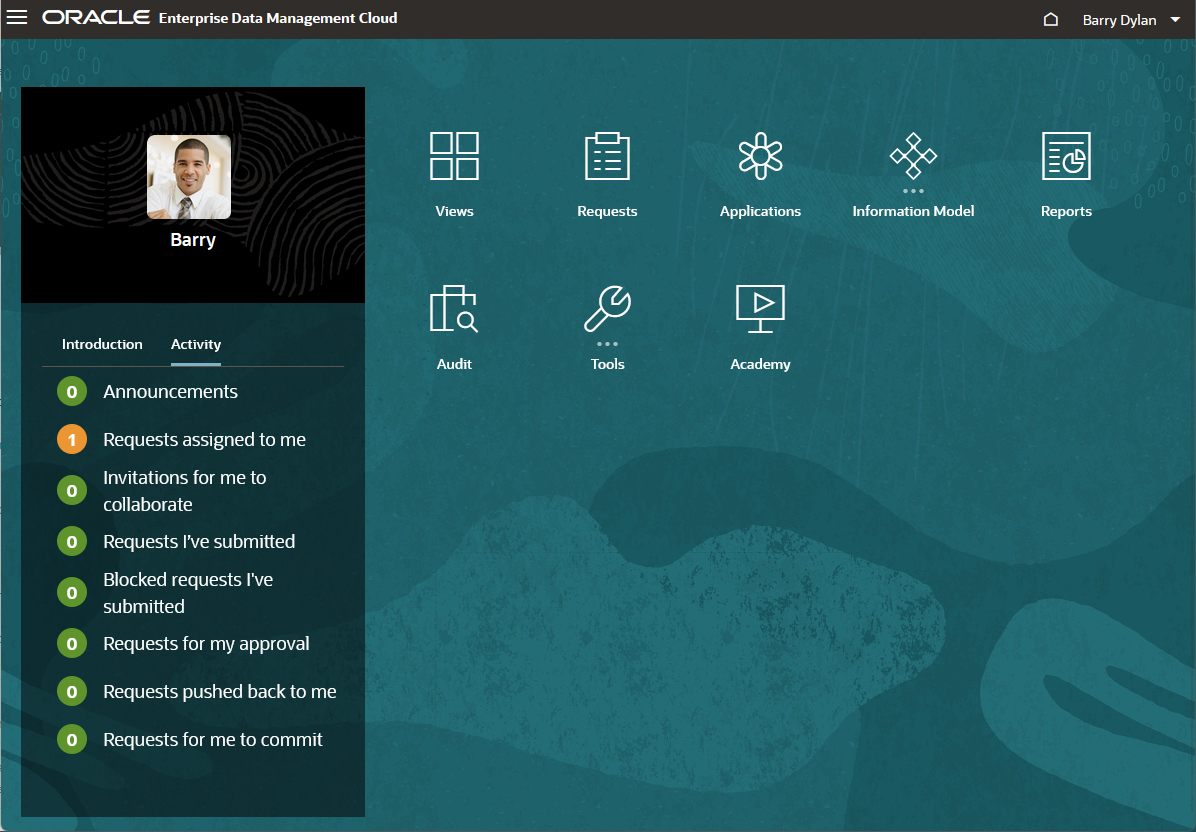
- Sign out and sign back in as Barry Dylan. On the Home page, select the Activity tab, and then click Requests assigned to me.
- In the Request Activity page, click the Request ID link to review the request issue.

- Notice a validation error with the A_11504 node.

- Fix the error by setting the A_11504 node properties as listed in the following table:
Property Definition Data Type Currency Exchange Rate Type Average
Confirm that the parent node is correctly calculated: Node A_11504 is added as a child to the A_11000 parent in the Plan Account viewpoint. - Validate and submit the request.

- Click Back to Requests. In the Request Activity page, set the Status filter to All and the My Activity filter to Submitted. Verify that the request status is Completed and the request stage is Closed.


Related Links
Finding a parent node using a node type converter expression
F82692-04
May 2025