Connecting to the Compute Instance Using WSCP
You can connect to a running instance by using a Secure Shell (SSH) or Remote Desktop connection. Most UNIX-style systems include an SSH client by default. Windows 10 and Windows Server 2019 systems should include the OpenSSH client, which you need if you created your instance using the SSH keys generated by Oracle Cloud Infrastructure. For other Windows versions, you can connect to the command line using a free SSH client called PuTTY available for download.
Before you begin, you'll need the following information to connect to the instance:
- The public IP address of the instance. You can get the address from the Instance Details page in the Console. Open the navigation menu and click Compute. Under Compute, click Instances. Then, select your instance. Alternatively, you can use the Core Services API ListVnicAttachments and GetVnic operations.
- The default username for the instance. If you used a platform image for Linux,
CentOS, or Windows to launch the instance, the username is
opc. If you used an Ubuntu platform image to launch the instance, the username isubuntu. - For Linux instances: The full path to the private key portion of the SSH key pair that you used when you launched the instance. For more information about key pairs, see Managing Key Pairs on Linux Instances.
- For Windows instances: If you're connecting to the instance for the first time, you will need the initial password for the instance. You can get the password from the Instance Details page in the Console.
To connect to the Compute instance:
-
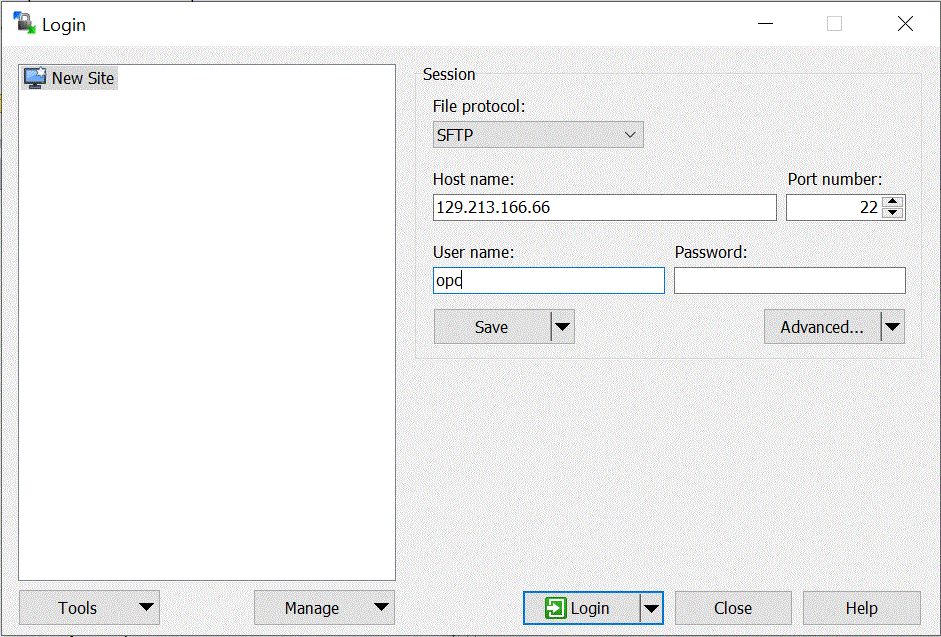
Launch WinSCP.
-
On the WinSCP page, select Session and then New Session.
-
On the Login page, and then Host Name, enter the Public IP Address that you copied and saved.
-
In Port number, leave the default value 22.
-
In User name, enter opc.
The
opcuser can perform operations that require root access to the compute node, such as backing up or patching; this user can use thesudocommand to gain root access to the compute instance.
- From the Advanced drop-down, select Advanced.
-
On the Advanced Site Settings page, select Connection and then Proxy.
-
From Proxy Type drop-down, select HTTP.
- In User name, enter the customer proxy server.
-
In Port number, leave the port number as 80.
-
Click SSH, then Key exchange, and then Authentication.
-
From Private key file, click
 and navigate to the private key that you saved.
-
Click OK.

-
On the Login page, click Login.
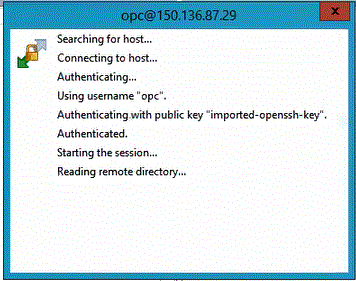
Messages are shown authenticating the
opclogin information.