Creating a Compute Instance
You create an Oracle Cloud Infrastructure Compute instance to which you install the EPM
Integration Agent and then load and write back data to the Oracle Autonomous Database.
In addition, you get local access to the other tools, utilities and other resources on
the host system. This implementation uses the Secure Shell (SSH) client software to
establish a secure connection and log in as an opc user.
Before you begin creating the Compute instance, you need the following:
-
An Oracle Cloud user account that has access rights to manage Compute instances in the given compartment, to use the given VCN and subnet, and to view information about the dedicated database you will be connecting to.
-
The name of the compartment, VCN and subnet to use when creating the Oracle Cloud Compute instance. Your autonomous database administrator or tenancy administrator should be able to provide you this information.
To create to a Compute instance:
-
Sign in from https://cloud.oracle.com.
-
In Cloud Account Name, enter your cloud account name and click Next.
-
Enter your user name in User Name and password in Password and then click Sign In.
-
On the Oracle Cloud Infrastructure page, click the Navigation menu in the upper left to show top level navigation choices.
-
Click Compute and then under Compute, click Instances.
-
On the Instances page, click Create Instance.

-
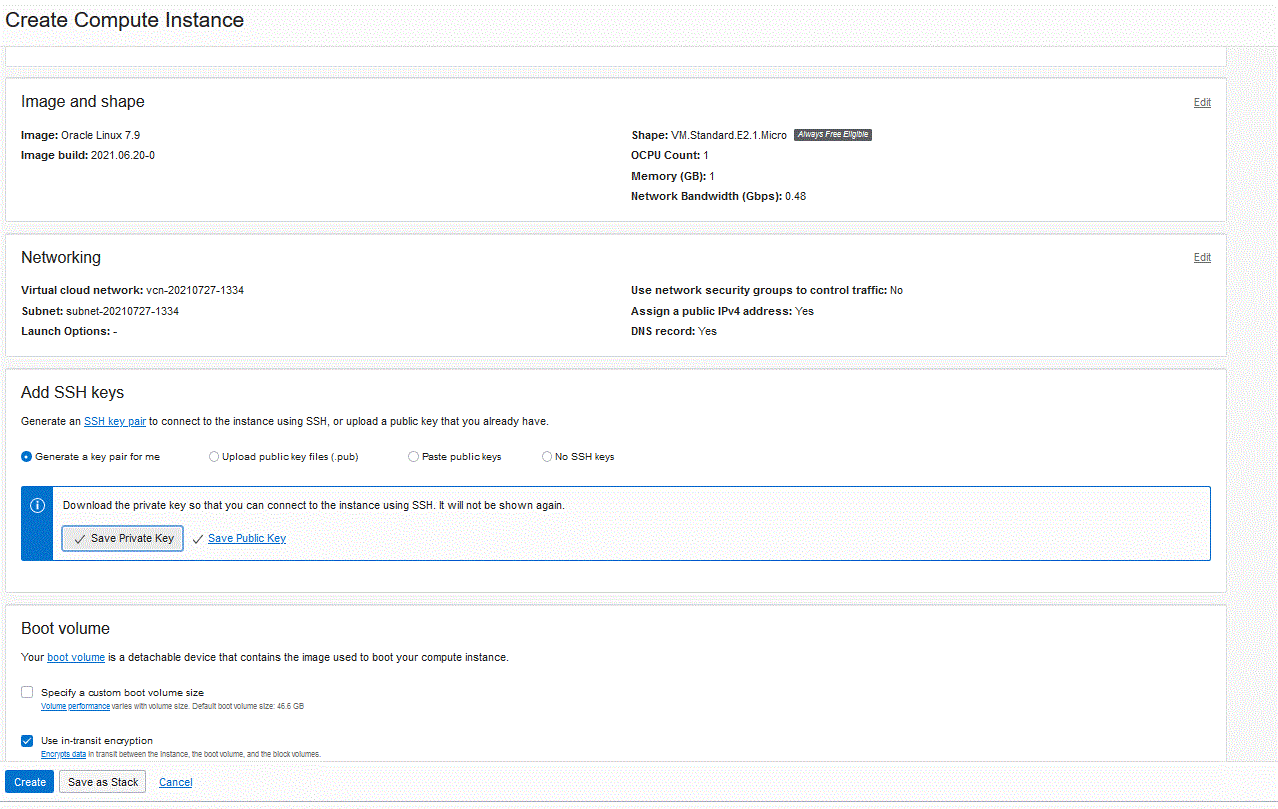
On the Create Compute Instance page, go to the Add SSH Keys pane, and then click Generate a key pair for me.
SSH is a cryptographic network protocol that uses two keys, a public key and a private key, to provide secure communication between two computers. SSH uses port 22 by default.
Private key stays with the user (and only there), while the public key is sent to the server typically with the ssh-copy-id utility. The server stores the public key (and "marks" it as authorized). The server will now allow access to anyone who can prove they have the corresponding private key. Private key stays with the user (and only there), while the public key is sent to the server.
-
Select the options to Save Private Key and Save Public Key and save both keys to a directory where you can reference them later.

-
Click Create.
-
On the Instances page, click the name of the instance to display the instance detail.
-
From Instance Access, under Public IP Address, copy and save the IP address.
You are required to specify the public IP address when connecting to the remote host.
