Practical Techniques for Writing Back to the EPM Integration Agent
This topic explains the steps required to use the EPM Integration Agent to load data into an on-premises data warehouse from a Oracle Fusion Cloud Enterprise Performance Management application. Two different methods are available for loading data:
-
Load data by a table name in the Application option and the table columns in Application Dimensions respectively. (Insert query is automatically generated by EPM integration agent),
-
Load data by a table name and columns using a custom SQL Insert Query.
To use the EPM Integration Agent to load data into an on-premises data warehouse from an Cloud EPM application:
-
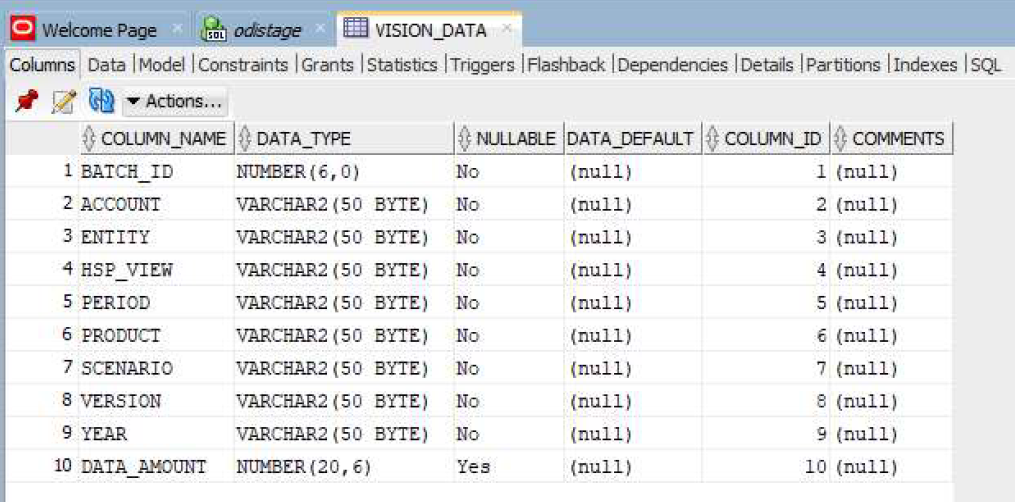
Create a RDBMS table where the data will be exported.
In this example, a table named VISION_DATA has all the dimensions of the Vision application and two additional columns called BATCH_ID and DATA_AMOUNT. The BATCH_ID column is used to populate the Data Integration Process ID from the Cloud EPM. The DATA_AMOUNT column is used to populate the Amount column.
-
Export the table contents to a CSV file for the application registration by including the header record for the column names.
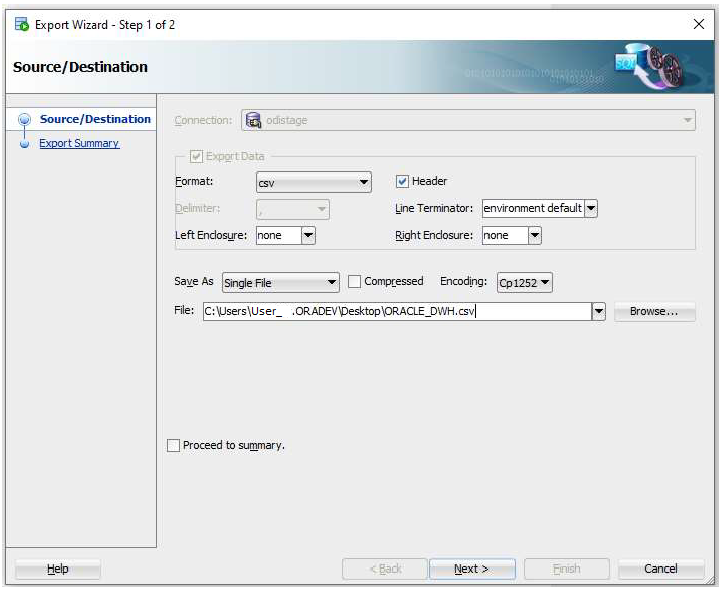
The CSV output file looks like this:

It is assumed that these columns are the exact representation of the target table columns. The SQL insert statement is generated based on the column names.
-
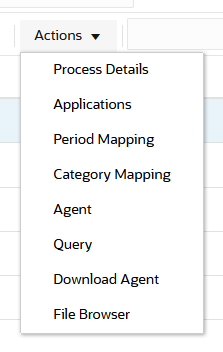
Navigate to Data Exchange, then Data Integration tab, then the Action menu, and then select Applications.
-
On the Applications page, register a Data Export application for the write-back process by completing the following:
-
In Category, select Data Export.
-
In Type, select Data Export to On Premise Database.
-
Upload and select the file created from Step 2.
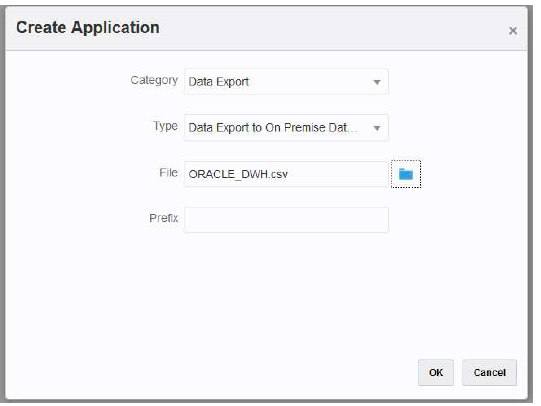
A "Data Export" application is created and the name of the application matches the file name used to register the application.

-
-
On the Applications page, click
 to the right of the application, and then select
Application Details.
-
Select the Dimensions tab.
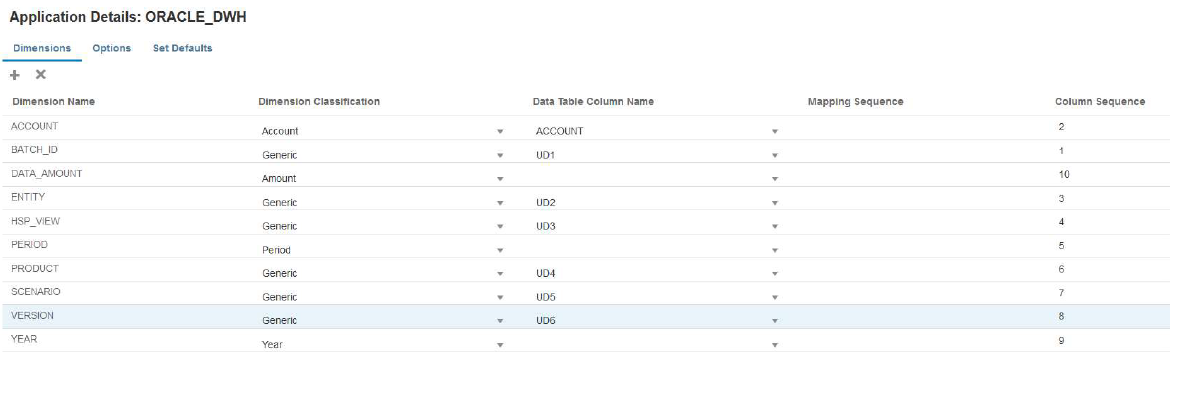
The application registration process automatically assigns "Generic" as a dimension classification for all columns in the CSV file and also assigns a "Data Table Column Name" accordingly.

-
Classify the Account, Amount, Period, and Year columns appropriately:
-
Classify a column as Account when it is mapped to a source column in the import format and always has a value in the source field. In the following example, the "ACCOUNT" column has been classified as "Account." The Data Table Column Name for this dimension has been classified as "ACCOUNT."
-
Classify DATA_AMOUNT as "Amount" and leave the Data Table Column Name blank.
-
Classify YEAR as "Year" and leave the Data Table Column Name blank.
-
Classify PERIOD as "Period " and leave the Data Table Column Name blank.
-
-
From the Applications page, click
 to the right of the application, and then select
Application Detail.
-
Select the Options tab.
-
Specify the Table Name, JDBC URL and database credentials.
Leave the Insert Query field blank. If you don’t specify "Insert Query," it is assumed that the application dimensions denote the exact same name of the target database columns. The application dimensions should contain each of the columns of the target table that needs to be populated in the write-back process. Otherwise, the integration fails.

-
Create the integration between the source application and the target Cloud EPM application.
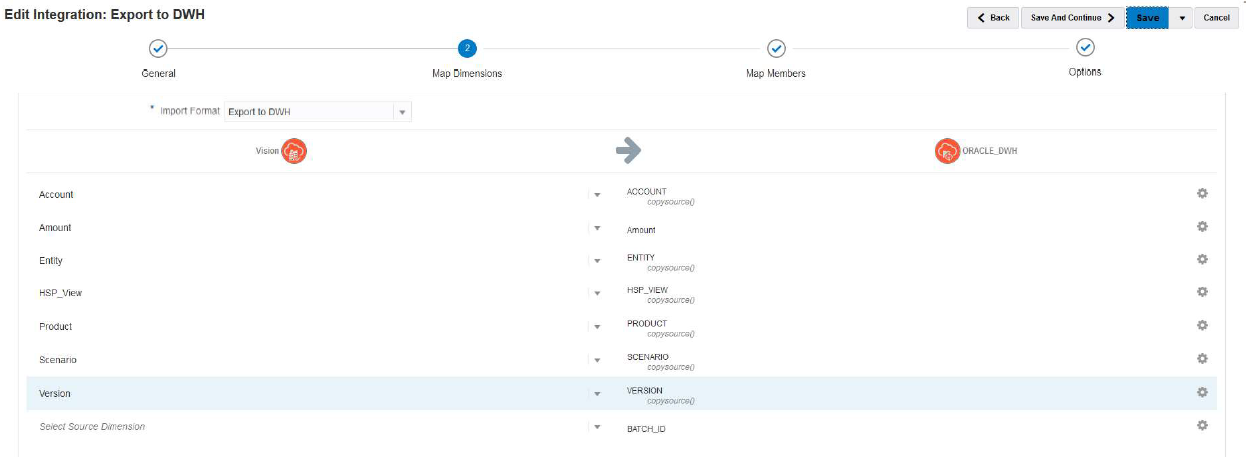
The following example shows a source "Vision Planning" application and a target Data Export application called "ORACLE_DWH."

-
Map all the columns and use "copysource()" as the target expression for all dimensions except "Amount" and "BATCH_ID."
An expression is applied to "BATCH_ID" in member mappings. The "Amount" dimension doesn’t have a target expression.
-
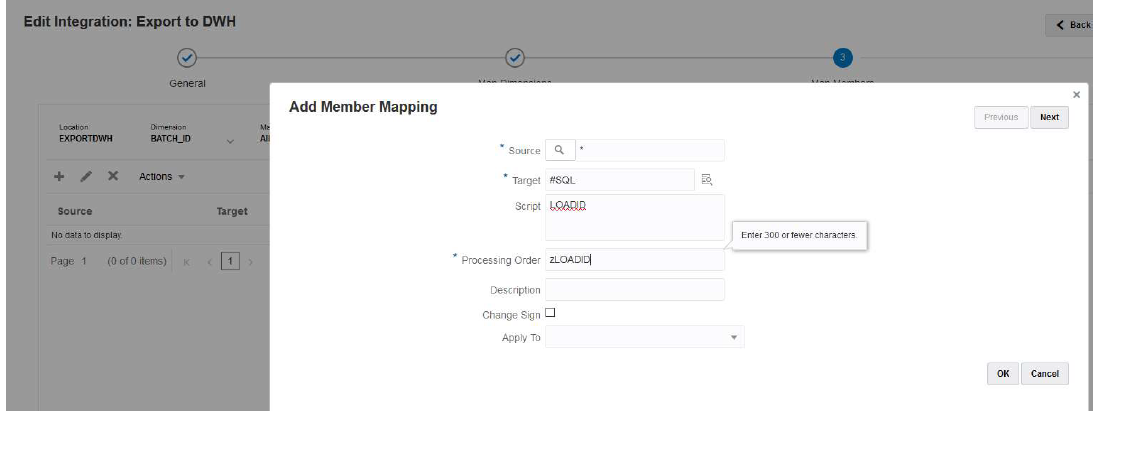
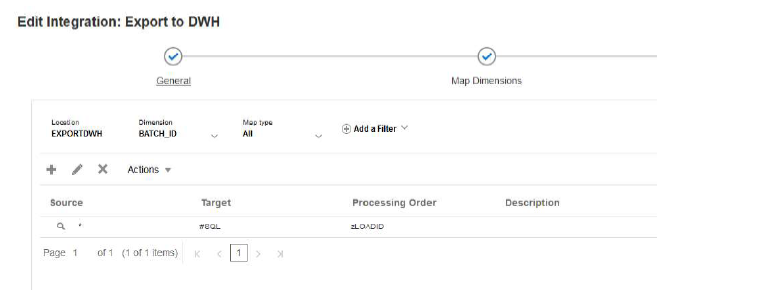
From Map Members, create an #SQL mapping for BATCH_ID using the LOADID column of the TDATASEG_T table.
-
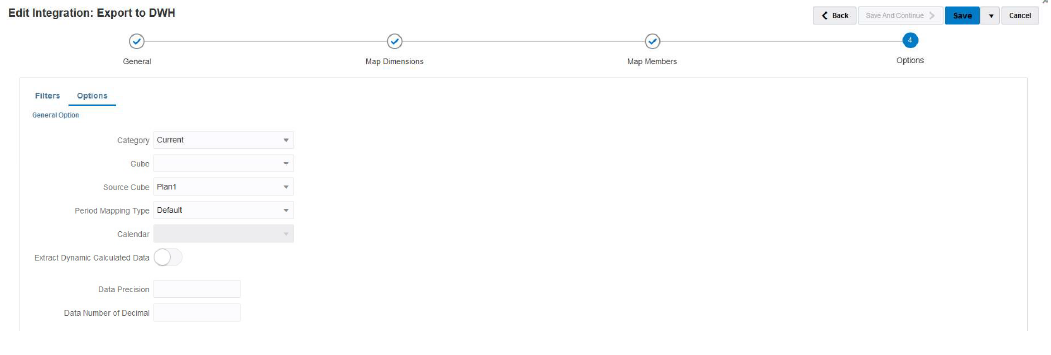
From Options, then Filters, specify any source planning application filters as needed.
In the following example, no filters were selected because all data from the Vision application (for the start/end period range) are imported and exported to the target application.

-
From Options, then Source Cube, specify the source cube (plan type). Then from Period Mapping Type, specify Default. Then click Save as shown below.
-
Start the EPM Integration Agent on the on-premises host where the target database is accessible.

-
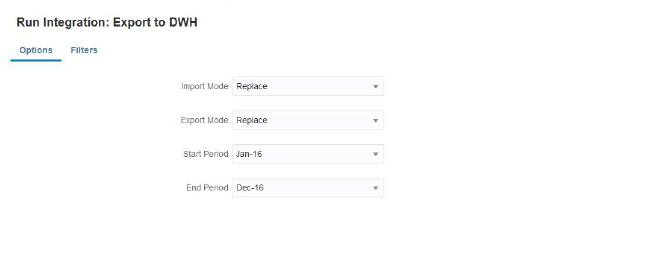
In Data Integration, run the integration for the given period range.
In the following example, the periods Jan-16 to Dec-16 were selected:
-
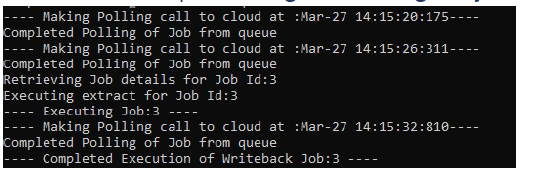
Observe the on-premises agent fetching the job details from Cloud EPM and wait until the process completes.
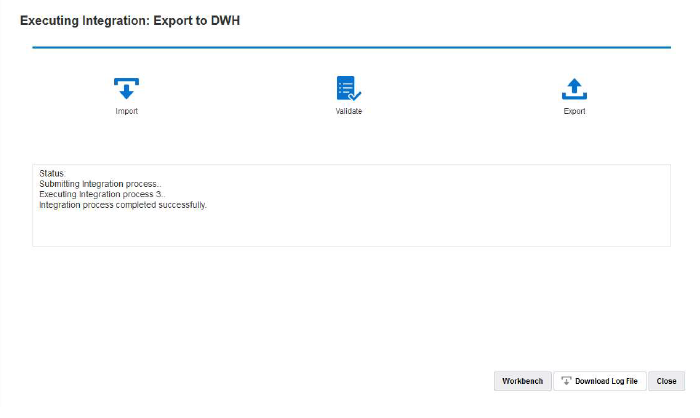
-
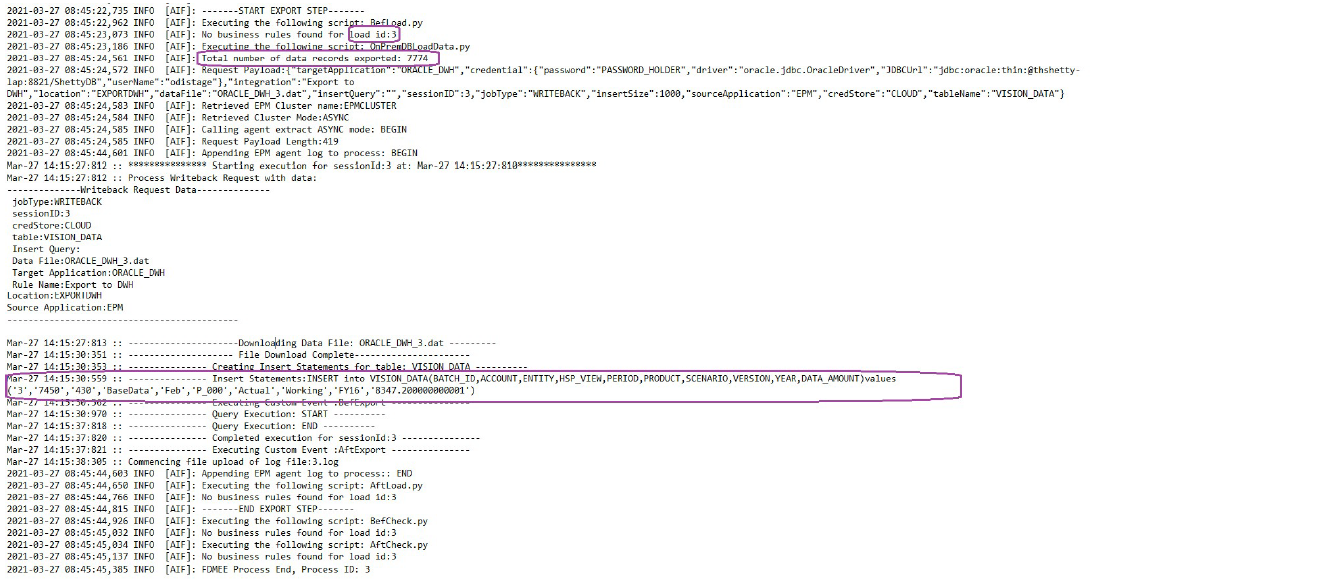
From Process Details, open the log file and note the total number of data records exported and the Insert Query statement:
-
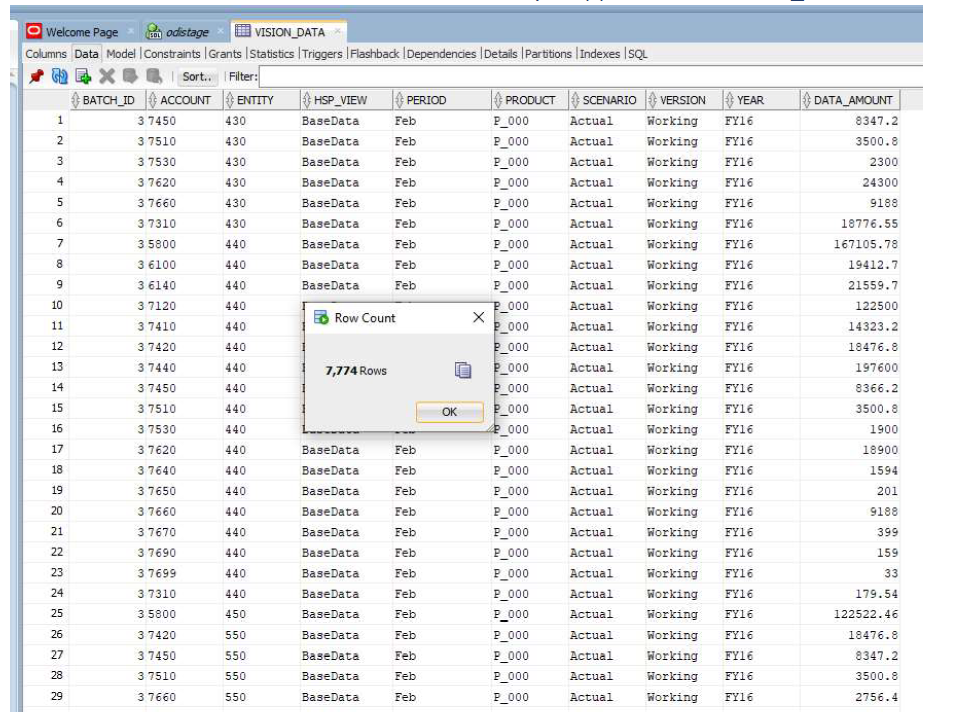
Verify that the records got exported successfully in the target database.
Note that the cloud Process ID is successfully mapped to the BATCH_ID column in the database.
-
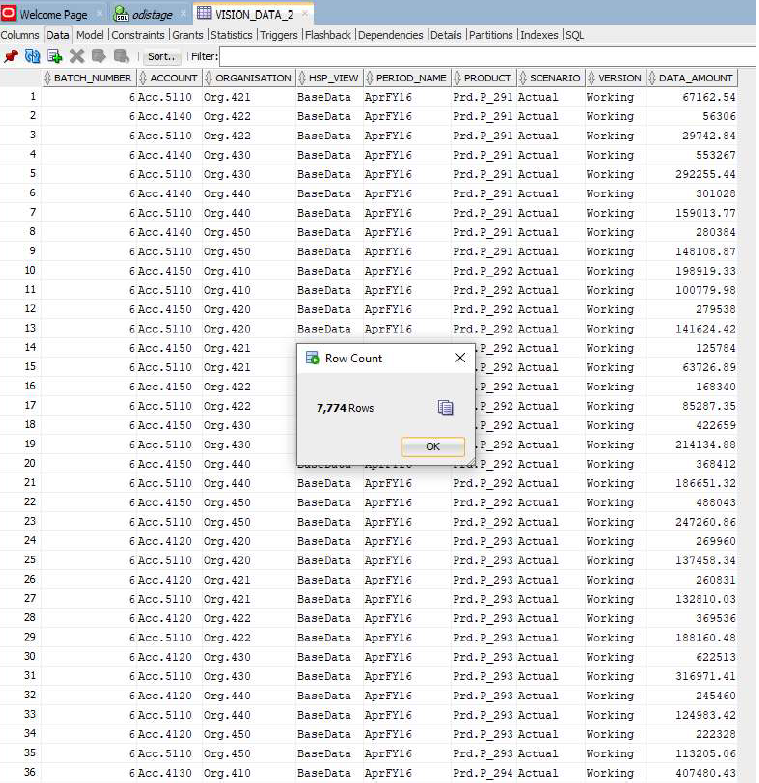
Export the same data to another table by the name VISION_DATA_2 using an Insert Query in the Cloud EPM.
The INSERT Query enables you to use complex SQL expressions for mapping the columns of the database. The SQL expressions are executed on the target database and not on the cloud database (Oracle). This gives you flexibility to use SQL expressions specific to the type of database, for example, MS SQL server, MYSQ, etc. You can also derive column values using a sub-query from another table.
In the following example:
-
BATCH_ID has been renamed to: BATCH_NUMBER.
-
ENTITY has been renamed to: ORGANIZATION.
-
The YEAR and PERIOD columns have been removed and a PERIOD_NAME column was created to populate both the Year and Period in the same column.
- The scale of the DATA_AMOUNT has been reduced to store only 2 decimal places.
You don’t need a CSV file to register the application because you already have an application registered with a different set of column names. The advantage of using the SQL Insert query is that you can use the column names of the registered application to map the actual column names using the SQL Insert query. Consequently, the application can contain dimensions that are completely different than the actual column names of the target database. The application dimensions can also denote only a subset of the actual columns that are populated in the target database table.
For more information, see: Writing Back with a Custom INSERT Query.
The values in the INSERT Query are denoted by enclosing the target dimension name inside ~~ (tildes). For example, if a dimension by the name ABC in the Data Export application needs to be mapped to a DEF column in the database, specify the value for DEF column as ~ABC~.
-
-
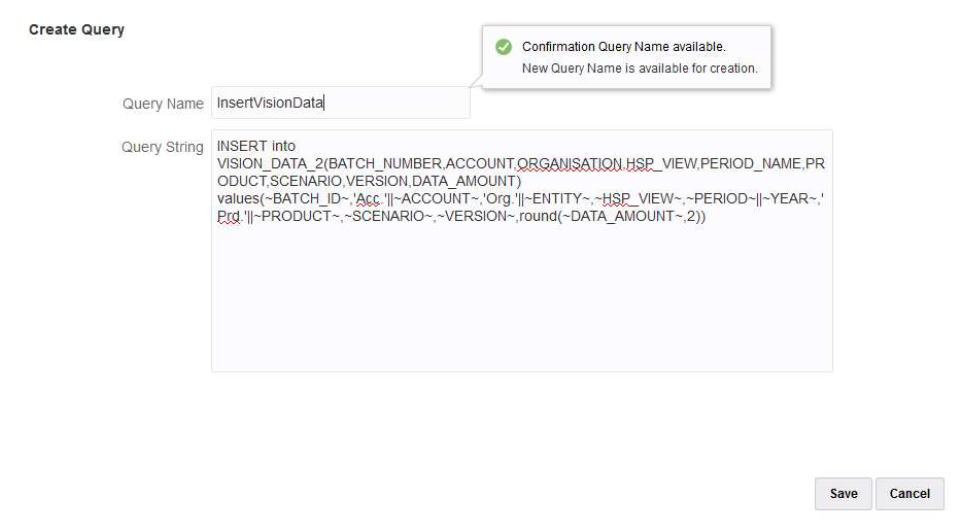
Create a new query with the following values:
-
Remap BATCH_ID to BATCH_NUMBER.
-
Use the prefix Acc, for example, ACCOUNT.
-
Use the prefix Org, for example, ORGANISATION.
-
Concatenate Period and Year into PERIOD_NAME.
-
Use the prefix Prd, for example, PRODUCT.
-
Round DATA_AMOUNT to 2 decimal places.
-
-
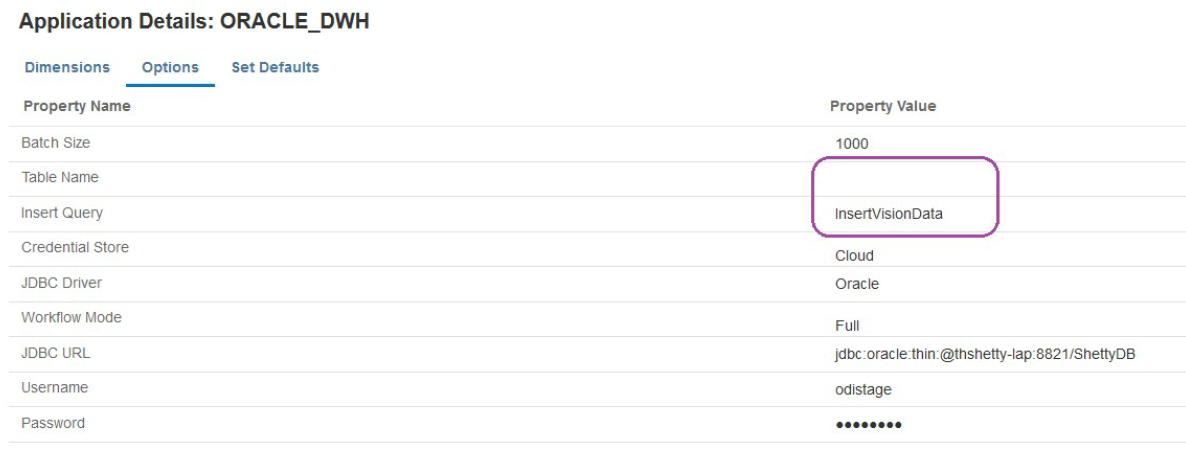
In Application Details, specify the query name in the registered Data Export application and leave the Table Name blank.
-
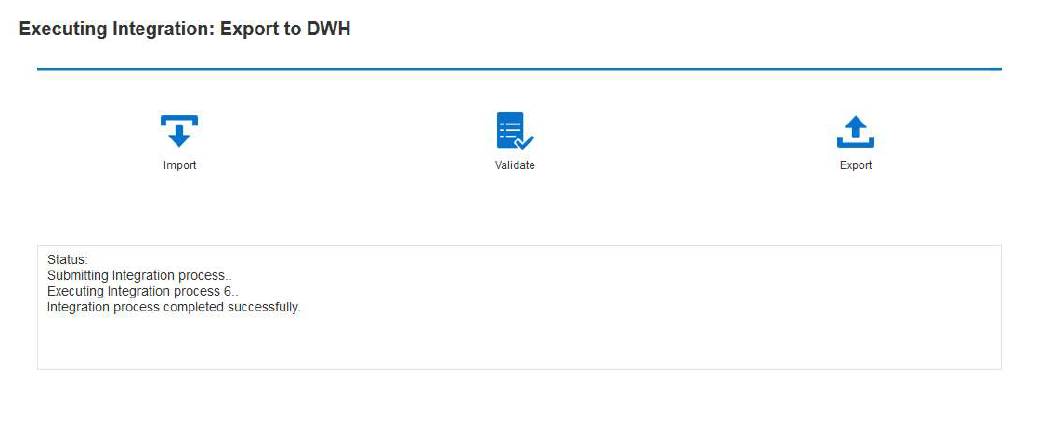
Run the integration process again for a period range and wait till the process is successful.
-
Validate the destination table has been populated correctly.
