Editing Options
You can add and edit application filters that are associated with a data source or data export to file application when the user selects integration options. You can specify a single filter condition or multiple filters conditions, and additionally specify the exact values that you want returned.
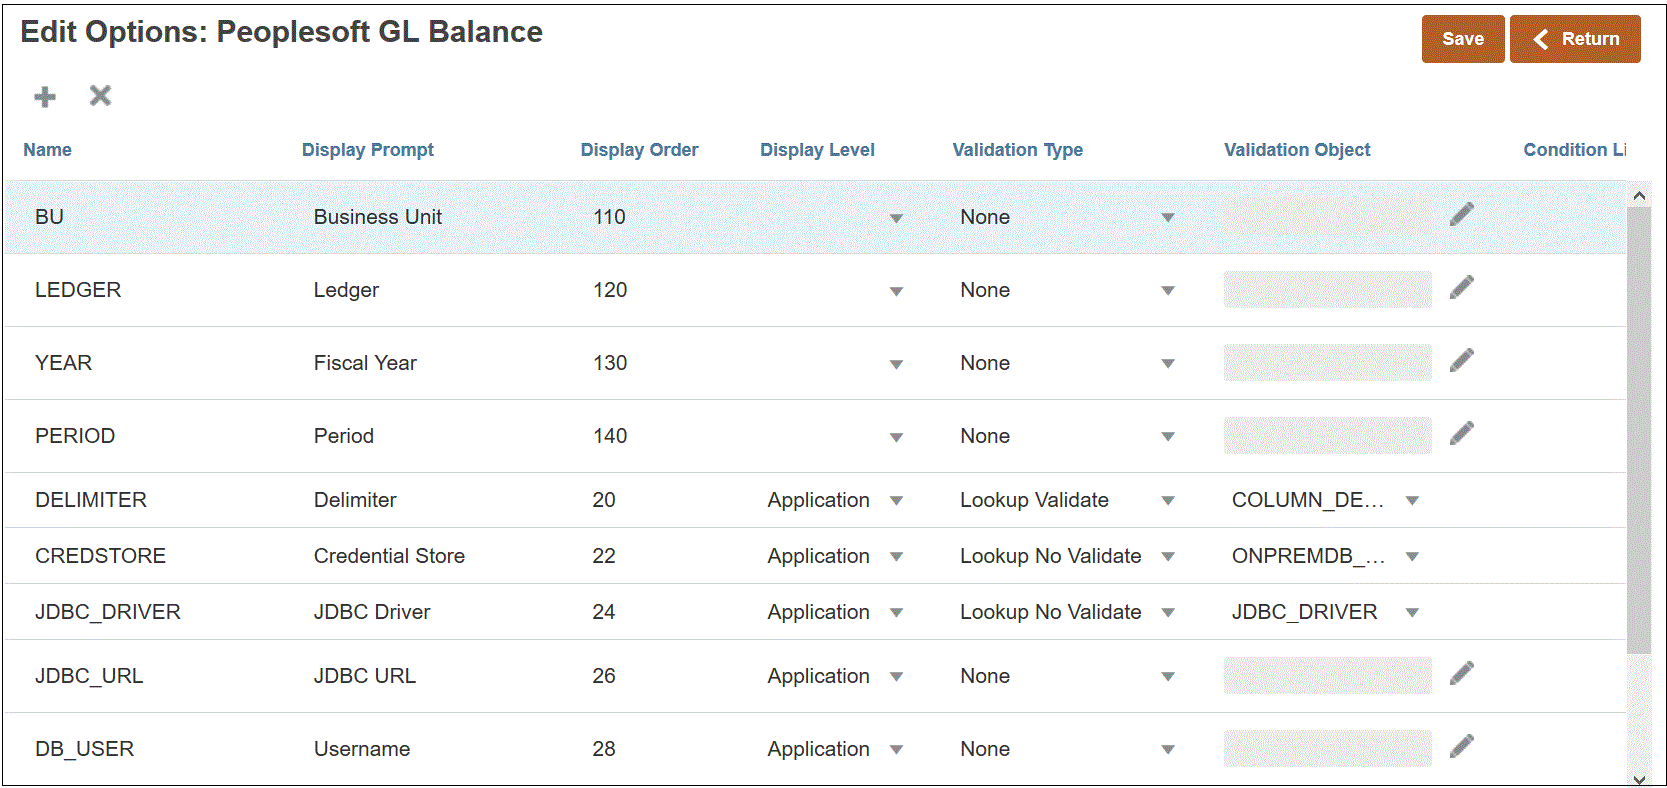
In the following example, filter input conditions have been defined for the "Business Unit," "Ledger," "Year," and "Period" on the Edit Options page.

Here are how the filters were defined for the data source application:

In some cases, application filters are defined explicitly for a data value. For example, if you are working with an Oracle Human Capital Management Cloud data source, it is recommended that you do not modify or change the filter definitions if you use the predefined integration with Oracle HCM Cloud.
To add a data source or data export to file application filter:
-
From the Application page, click
 to the right of the data source or data export to file application, and then select Edit Options.
-
From Edit Options, click Add (
 )
)
A blank entry line display.
-
In Name, specify the name of the display prompt in the user interface.
Note:
When you register an Oracle E-Business Suite, Peoplesoft, or a custom import database source application, the out-of-box setup automatically adds a filter for the "Period" with the display name shown as "Period." In this case, the system throws the error: "EPMAT-1:EPMFDM-ERROR: 'periodName' parameter format is invalid." As a workaround, select the application and change the display name for "Period" to another name on the Edit Options page. Additionally, you can use the new name in an EPM Automate command to pass it as a filter.
-
In Display Order, specify the display order of the filter on the Application Filters tab. If this field is blank, the custom filter cannot be displayed, and the default value is used as the filter value.
For example, enter 99 to show the filter in the 99th position sequence or position in a list of filters. Display orders are listed from lowest to highest.
-
In Property Level, select where to display the filter. Available options are:
- Application only
- Application and Integration
- Integration only
-
To provide a drop-down of values listed using the lookup type, in Validation Type, select one of the following:
- None
- Number
- Lookup Validate
- Lookup No Validate
- Yes/No
- Date
- Query
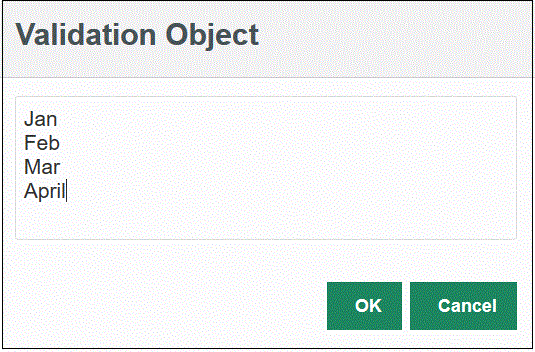
- Choice list— You can enter a list of values in the Validation Object field. Each value is entered on a new line. The list of values (LOV) on the Option page shows the values as a list.
-
In Validation Object, enter a list of lookup objects to be validated by type.
To enter a list of values if you chose the Choice list validation type above, click
 , then enter the list of values on the Validation Object page, and then click OK.

-
In Condition List, provide a condition list based on one or all the following:
- EQ (Equal)
- IN
- Like
The condition values can be
Equal,Like, orIn. The condition values are stored as a drop-down list in CONDITION_LIST field. If the value isEQ,IN, then show onlyEqualandInin the Condition drop down. If the value isEQ LIKE, then show only Equal, Like in the drop down. Any combination ofEQ,IN,LIKEare stored in the field. If only one value is provided in the Condition List, then the condition cannot be changed. The default value isEQ. When specifying multiple conditions, prefix the condition with a comma. For example, to use theINandLIKEconditions, enter:,IN,LIKE - Click Save.