Creating the Integration Definition Between Cloud EPM and the BI Publisher Report Extract
After you built the Oracle Business Intelligence Publisher report and registered it as an ESS job, you define the integration definition between Oracle Fusion Cloud Enterprise Performance Management and the BI Publisher report extract.
To create the integration definition:
-
In BI Publisher, run the BI Publisher report extract, and export it in CSV file format locally to your file system if registering for the first time.
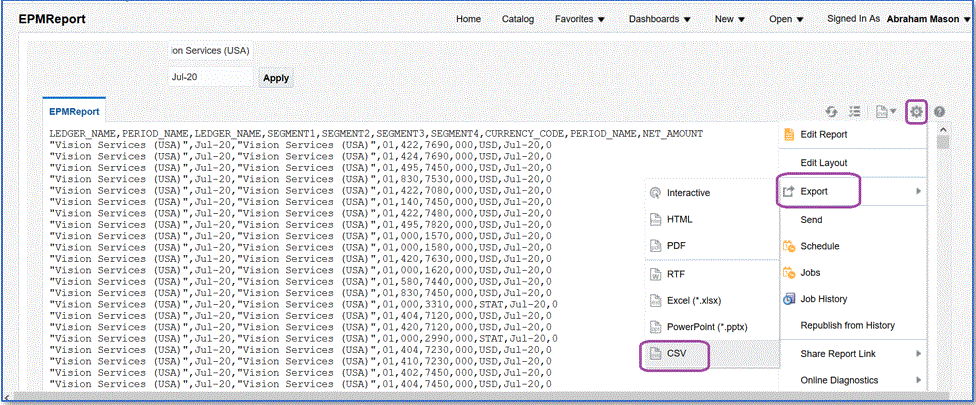
You may want to rename the downloaded CSV output file as <Appname>.csv where <Appname> is the name of the intended application for the data source application in Data Integration, which represents the BI Publisher report.
The the CSV file needs to be copied (uploaded) to the Data Integration inbox folder. For information about uploading files, see Using the File Browser.
-
From the Data Integration home page, and then Actions, select Applications.
-
On the Applications page, click
 (Add icon).
-
From Category, select Data Source.
-
From Type, select Oracle ERP Cloud (Custom).
-
From File, specify the name of BI Publisher report extract CSV file or click
 and navigate to the folder where you saved the BI Publisher
report extract CSV file, select it and then click
OK.
-
In Prefix, specify a prefix to make the application name unique.
The prefix is concatenated with the application name to form a unique application name. For example, if you want to name an application with the same name as an existing one, you can assign your initials as the prefix. -
Click OK.
-
Click Save.
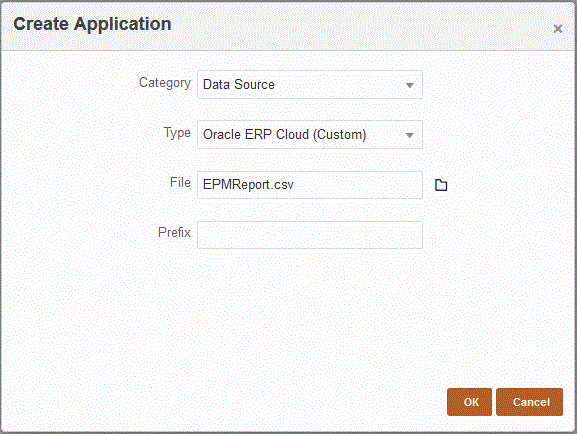
When the application is registered, the system returns the message: "Application registered successfully" and the application is available on the Application page as shown below:

Data Integration registers the application and returns all the columns in Dimension Details.
-
On the Application page, click
 next to data source application and then select
Application Details.
-
On the Application Details page, click the Options tab.
-
Complete the following fields and click Save.
-
Connection Name—Specify the source system name.
-
Execution Method—Specify the method for executing the job.
Valid options:
-
BIP Report—Executes the BI Publisher report in synchronous mode, which has a timeout limit of about 5 minutes within the Oracle ERP Cloud instance. This method is suitable for smaller data sets or for queries that execute quickly.
-
ESS Job—Executes the BI Publisher report in asynchronous mode, without encountering execution time restrictions.
Note:
If you encounter a timeout in Data Integration when using the ESS feature for a BI Publisher report, increase the batch timeout in Data Management. To do this, specify the maximum time a job can run in the Timeout field of the batch definition. For more information, see Working with Batch Definitions in Administering Data Management for Oracle Enterprise Performance Management Cloud.
-
-
Report Name—Enter the name of the report and the complete report path when the execution method is BIP Report. For example, enter /Custom/MyReport.xdo. Leave this field when the execution method is ESS Job.
-
ESS Job Path—Enter the path to the folder that contains the ESS job definition. The path begins with /oracle/apps/ess/custom/ for custom ESS jobs.
-
ESS Job Name—Enter the ESS job name.
-
Report Parameter List—Specify the report parameters of the custom query.
Make sure you specify a random string such as "ABC" in Report Parameter List that will be passed to the bind parameter you created in the report definition. If you create a report with a query that doesn’t have bind parameters passed from the Cloud EPM, the process fails on the Oracle ERP Cloud side.
If you need to identify report parameters, complete the following:
-
Navigate to Oracle ERP Cloud, and from the Overview page, select the report and click Resubmit.
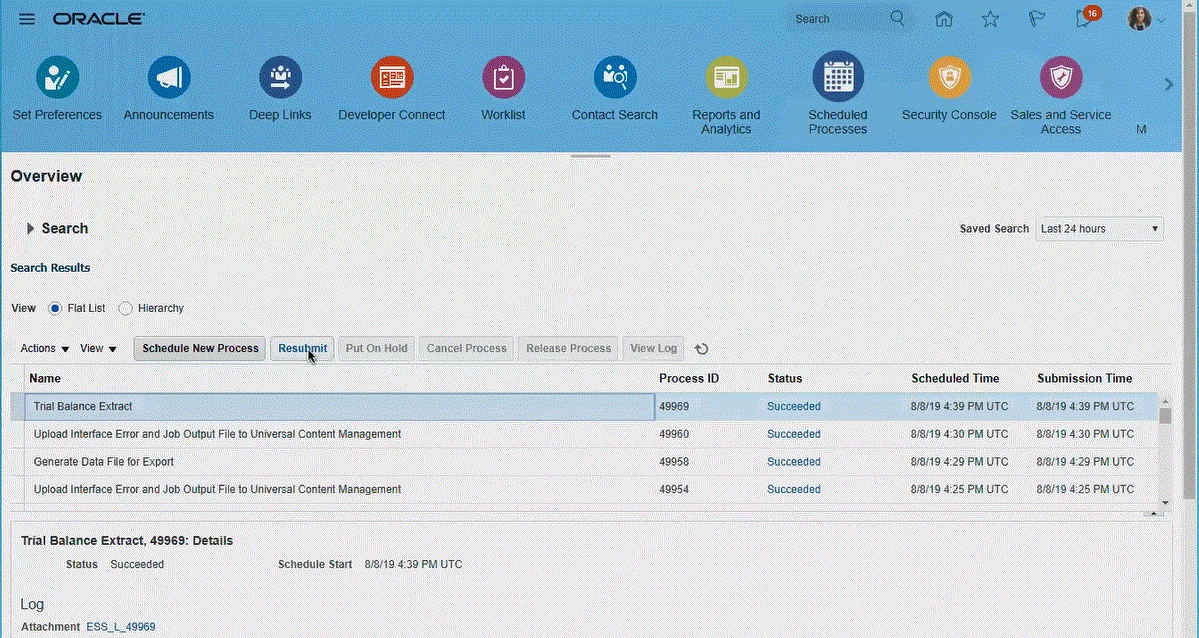
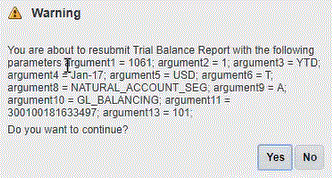
A list of report parameters is generated.
-
Copy the report parameters shown in the Warnings window.
-
Navigate to Data Integration and paste the report parameter list from the Warnings window into the Report Parameter List field of your custom query.
Make sure you specify a random string such as "ABC" in the "Report Parameter List" that will be passed to the bind parameter you created in the report definition. If you create a report with a query that doesn’t have bind parameters passed from the Cloud EPM, the process will fail on the Cloud EPM side.
-

-
-
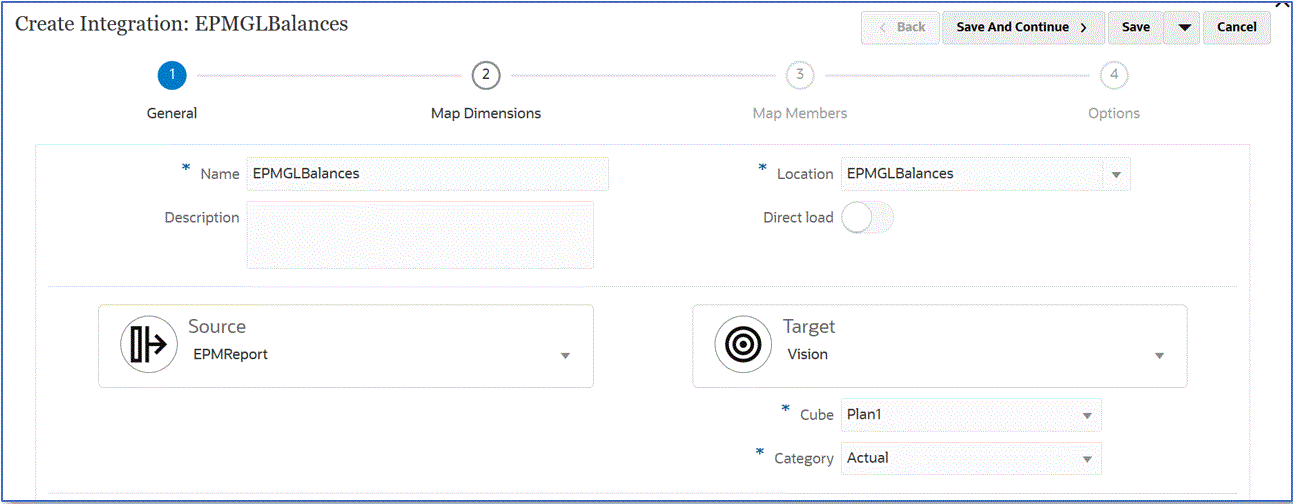
Create a new integration and select the data source application as the source and the target application. Then create the remaining steps to create the integration.
-
Set up the integration mapping between the Oracle ERP Cloud data source and the target application by building an import format, location, and dimension mappings.
See Mapping Dimensions.
- Map members from the source to target.
See Mapping Members.
-
Select any source and target options.
-
Run the integration.
-