Using Multi-Dimensional Mappings
When using multi-dimensional mapping, the source needs to be less than or equal to 75 characters.
To add a multi-dimensional mapping:
- From the Data Integration home page, click
 to the right of the integration, and then select Map Members.
 - Click
 .
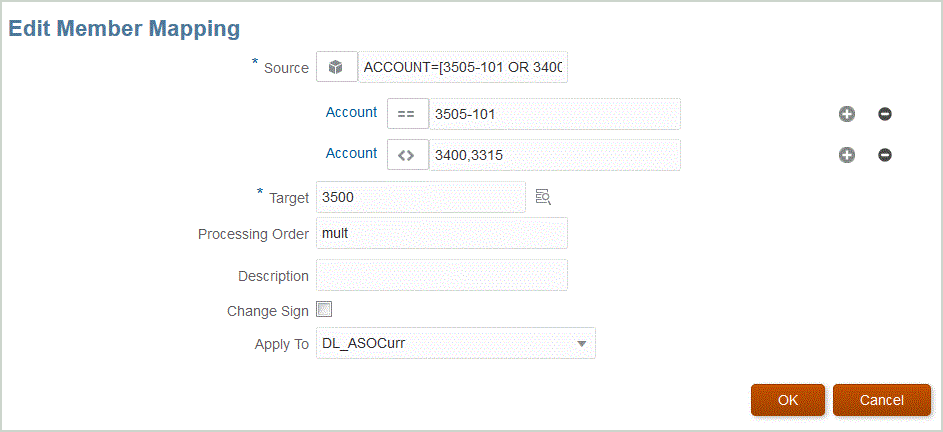
. - From the Add Member Mapping page, in Source, select Is Multi Dimensional.
- Click Dimension and select the dimension of the source column value.
- Click the Member Mapping Type icon to select the method to use for mapping source column values.
Available types include:
-
Explicit
-
Between
-
Like
-
In
-
Multi Dimensional
For more information on these types, see Adding Member Mappings.
-
- In the entry box, specify the source value string.
-
Click
 (Add icon) to add a new member mapping type to the multi-dimensional
condition.
- In Target, enter the target dimension member for which you are defining a map.
You can also click
 on the Select Members page.
The target values for multi-dimensional mapping must be an explicit member name. Wildcard or special characters are not supported.
- In Processing Order, specify the order in which the processing of maps occurs.
The order can be alpha or numeric. If you specify an alphabetical order, mappings are processed in alphabetical order by the name within a mapping type.
You might use an alphabetical order to process maps using the integration name so that maps are processed in alphabetical order of the name within a mapping type. Numbers may also be used to help with ordering. For example, if numbering by tens or one hundred, insert new integrations between existing ones. For example, if integrations are numbered 10, 20, and 30, add an integration that starts with 25 so that you do not need to rename other integrations.
Note:
When processing the source values for transformations, multiple mappings may apply to a specific source value. The order of precedence is Explicit, Between, In, Multi-Dimensional, and Like. Within Between and Like types, mappings can overlap. - In Description, enter a description of the mapping.
- Select Change Sign to reverse the sign of the selected target account.
The Change Sign option is often used with General Ledger source data when the trial balance has negative signs for Revenue and Liability/Equity source accounts. In EPM applications, positive numbers are often loaded as credits and all negative numbers are loaded as debits. Consequently, you can reverse the sign.
Note:
The Change Sign option is not supported for Quick Mode loads. - In Apply To, select the integration to which to apply the selected mapping.
By default, mappings specified at a location are applicable to all integrations associated with the location.

- Click Save.