Registering the EPM Planning Projects Application
The first step in defining the integration is to register the primary EPM Planning Projects application and select the input cube from the EPM Planning Projects module.
To register an EPM local application:
-
From the Data Integration home page, and then from the Actions menu, then from the Setup actions drop-down, select Applications.
-
On the Applications page, click
 (Add icon).
-
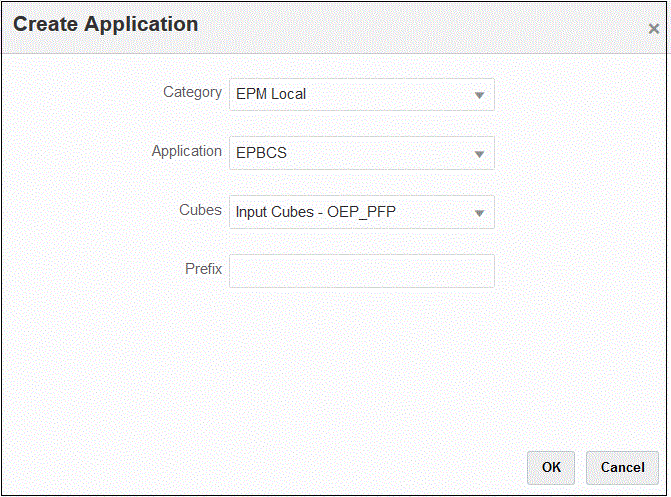
On the Create Application page, and then Category, select EPM Local.
-
From Application, select the primary Planning Projects application.
-
From Cubes, select Input Cubes - OEP_PFP.
The OEP_PFP input cube has the only dimension applicable for Project Financial Planning (PFP). To show all dimensions across the input cube, select All Input Cubes.
-
Optional: In Prefix, specify a prefix to make the application name unique.
If you are registering the application for the out of box integration, you do not need to specify a prefix.
The prefix is concatenated with the application name to form a unique application name.
Typically, you prefix an application name when you want to associate it with a selected integration. Multiple integration definitions can be created that address different business requirements. For example, you could have one integration that references the default calendar periods from Project Management and another that has custom mappings for an alternate calendar. If you are initializing the out of box integration, you do not need to specify a prefix.

-
Click OK.