Creating a Named POV
To create a Named POV:
-
Select an existing Report or create a new Report, if you want to insert the Notes text function.
Note:
The report does not need to have a grid defined to create a Named POV.
-
In the Report Designer, click Actions
 menu, and then select Manage Named POVs.
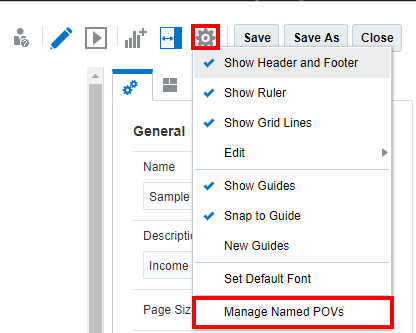
The Manage Named POVs dialog is displayed.
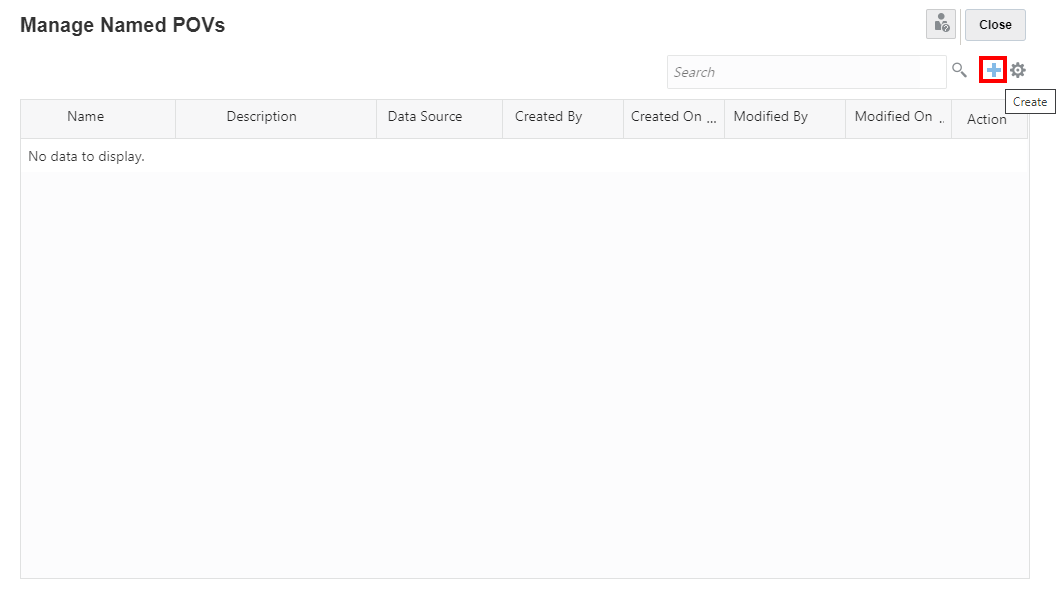
You can Create a new Named POV.
-
In the Manage Named POVs, under Actions -
 menu, you can:
-
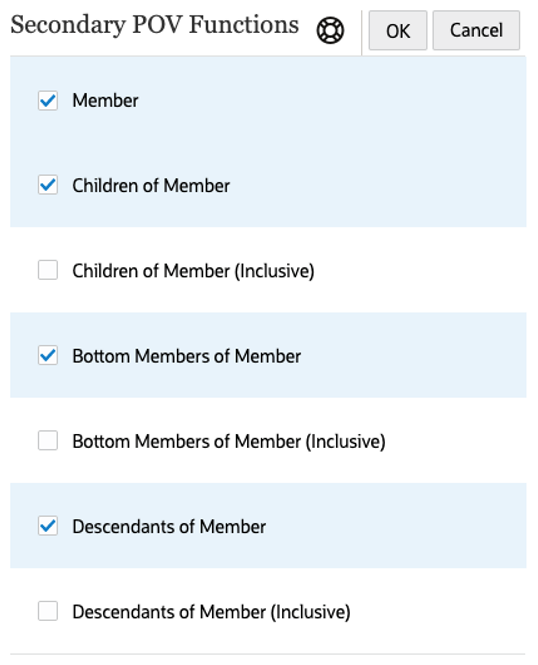
Select POV Functions to display these member selection functions in the Note text box secondary POV.
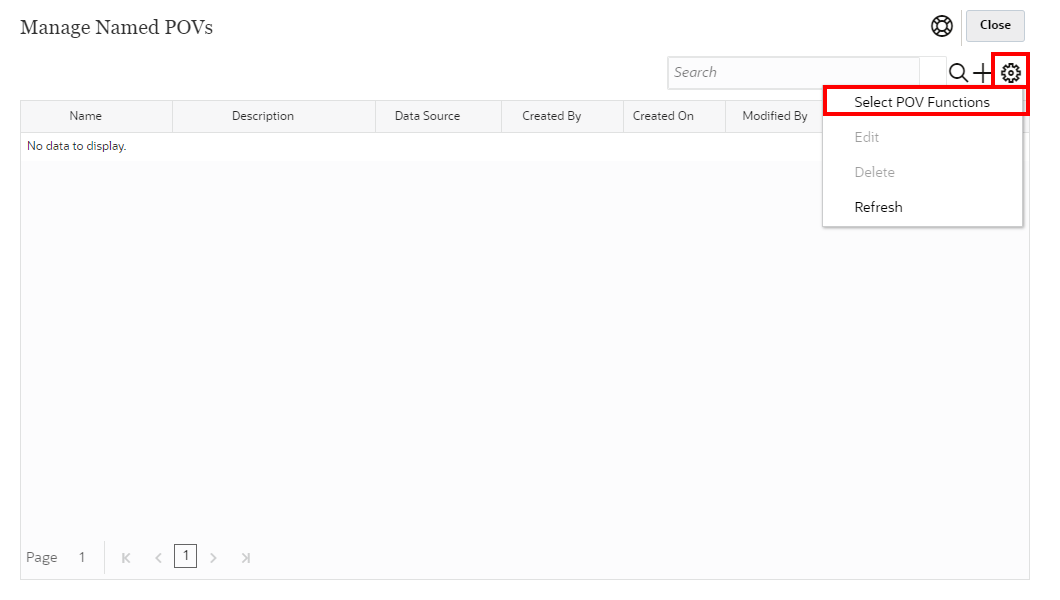
In the Secondary POV Functions dialog, you can select or deselect member selection functions.
Note:
These selections apply to all dimensions and all Named POVs in the report.
-
Edit an existing Named POV.
-
Delete a selected Named POV.
-
Refresh the Manage Named POVs view.
-
-
In Manage Named POVs, click
 to add a new Named POV.
-
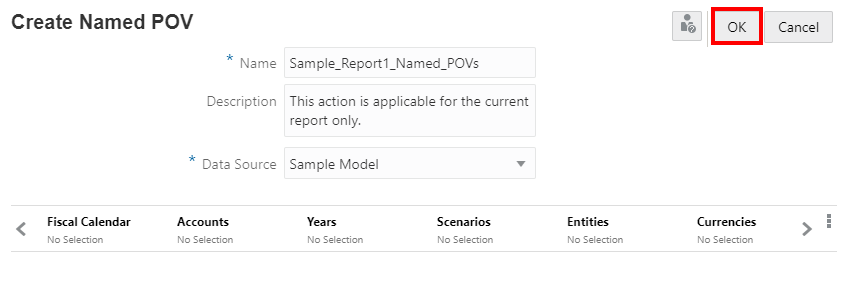
In Create Named POV:
-
Enter a Name for the Named POV.
Note:
Once a Named POV is created, you cannot change its Name.
-
Enter an optional Description.
-
Select a Data Source from the drop-down menu.
All defined Reports data sources are listed. The POV bar will be populated for all dimensions in the data source.
Note:
The data source selection is not dependent on grids or charts in the report.
-
-
All dimensions display No Selection, by default, which means that no members have been selected and all Notes for that dimension’s members will be displayed. Click on a dimension label to open the member selector for that dimension.
In the Select Members dialog box, in the drop-down list, either select Members, Recent, Substitution Variables, Functions or Lists to assign members to the selected dimension.
Use the following conventions to select members.
-
Click Expand
 to drill into a parent member.
-
Click Select
 to select and deselect a member.
Note:
A blue checkmark indicates that a member is currently selected. A gray checkmark when hovering over a member indicates that the member is not currently selected.
-
Click Function
 next to a member to select the member using a function. See Assigning Members Using Functions.
-
Click Actions
 in the Selector Pane to sort the members.
-
Click OK.
Note:
Repeat steps above for any additional dimensions.
-
-
For any dimensions that you do not want to filter members on, you can leave the selection at No Selection or remove the dimension from the Dimension Layout.
To remove dimensions:
-
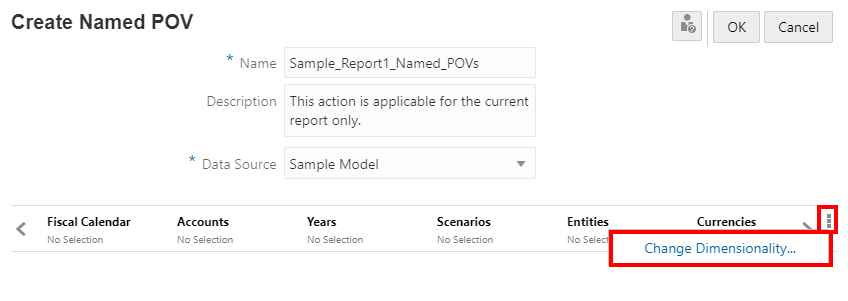
In Create Named POV, click POV Actions menu, and then select Change Dimensionality.
-
In Dimension Layout, click
 next to a dimension. Repeat for other dimensions, if needed.

-
Click OK to close Dimension Layout, and to return to the Create Named POV.
Note:
We recommend you remove any unnecessary dimensions, where you are not going to specify a selection, from Dimension Layout.
This makes it easier to specify the Ordinal parameter in the
NotePOVDimensionandNotePOVMemberLabelfunctions. For more information, see Using Note Format Text Functions.Note:
You can always add dimensions back using the Add Dimension button:

-
-
You can also reorder dimensions to more easily refer to them when using the Ordinal parameter in the
NotePOVDimensionandNotePOVMemberLabelfunctions.For example, in a Named POV, if Segments is the first dimension and Fiscal Calendar is the second dimension, and Ordinal parameter of
"1"refers to the first dimension (Segments) and an Ordinal parameter of"2"refers to the second dimension (Fiscal Calendar).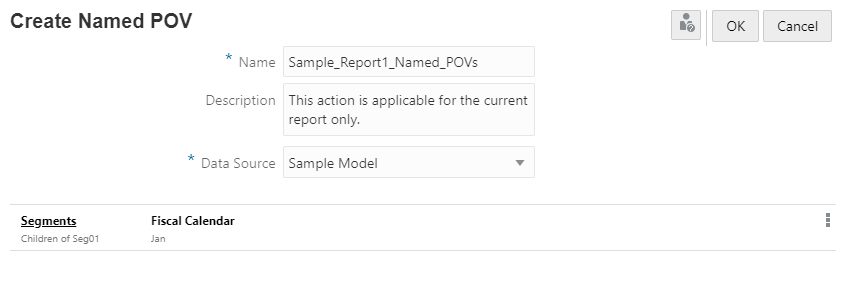
For more information, see Using Note Format Text Functions.
To reorder dimensions for the Named POV:
-
In Create Named POV, click POV Actions menu, and then select Change Dimensionality.

-
In Dimension Layout, click on a dimension and drag and drop it to the desired location. Repeat for other dimensions, if needed.
-
Click OK to close Dimension Layout, and to return to the Create Named POV.
-
-
To specify one or more report POV dimensions to control the Notes text function display, optionally with a secondary POV in the text box:
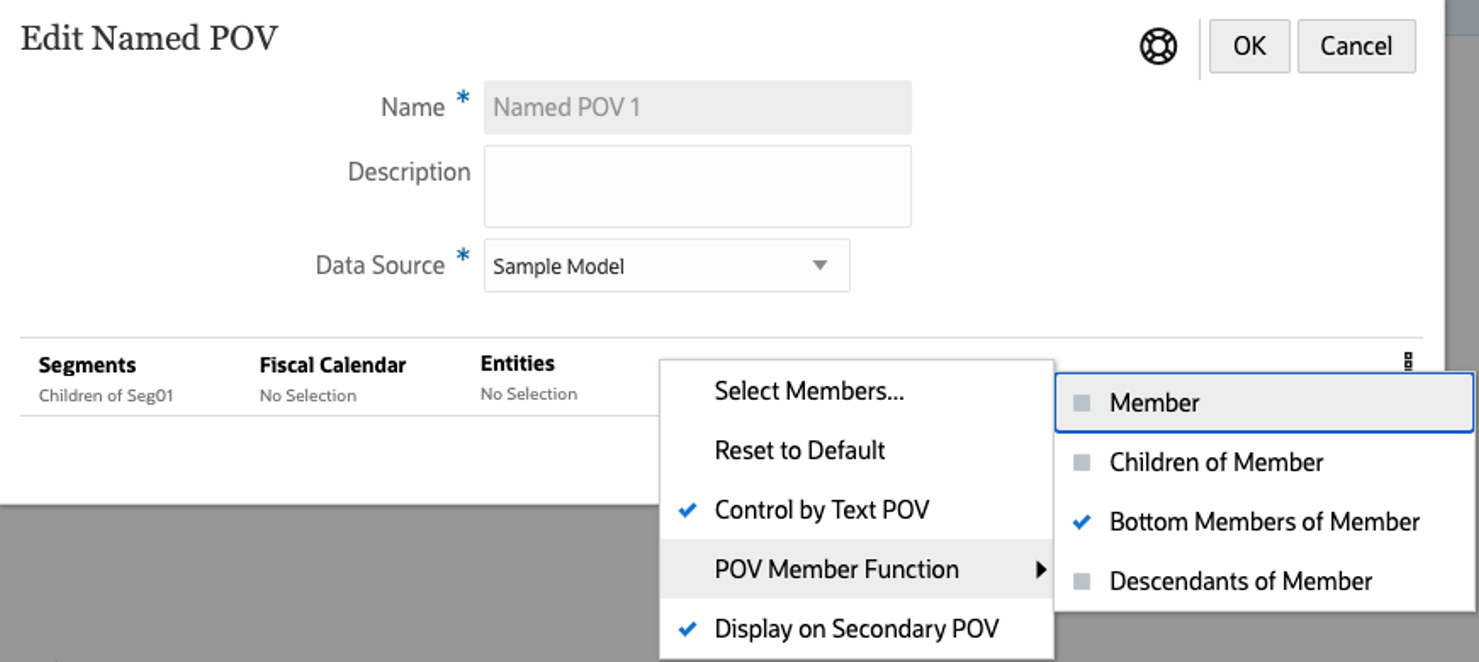
Click on POV Dimension Actions
 for a dimension:
-
Select Control by Text POV. This allows the report POV for the dimension to control the Notes text function display.
-
To display the dimension on the text box’s secondary POV, select Display on Secondary POV.
-
To optionally set the default member selection option that appears when a user previews the report, select POV Member Function and choose one of the available member selection options. The other member selection options will still be available to users, depending on the selections made in the Secondary POV Functions dialog, and the default option is displayed when previewing the report.
-
-
After you are finished defining the Named POV, click OK to save your changes.