Creating a Book
- In Create a Book, under Select a Folder, select the desired Library folder, and then select the documents that are listed in the Available pane on the left.
Note:
Reports, other Books, Word, and PDF documents are supported.
- Select one or more documents from the Available list in the left pane, and click the Move Right button -
 to move the desired documents to the Selected pane on the right.
Note:
You can add or remove documents within the Selected documents pane on the right using the Move Right -
 and Move Left -
  buttons.
-
After performing initial selections of documents, you can add the same document again multiple times, if needed.
-
The Data source section displays the data sources for the selected reports and Books.
-
- Optional: Under Section Details, select Create Default Section, and then enter a Name of the section to group all the selected documents.
- Optional: To add POV dimensions to the data source, select the required data source from the Data source drop down, then click Select Dimensions to open the Dimension Layout, and then select the desired POV dimensions for the Section.
Note:
The dimensions available under Select Dimensions or Dimension Layout are based on the selection in the Data source drop down.
Sections can be used to group multiple documents under a common Table of Contents entry and run reports for a common Point of View.
- Click OK. The page navigates to the Book Designer window.
-
Using the Book Designer, you can create more sections.
-
The POV for the Default Section can be defined later in the Book Designer.
Note:
If the Book contains multiple data sources, in the Book Designer you will need to manually add the additional data sources using the Actions menu and select Manage Data Source, otherwise you will get a validation error for any reports or Books with additional data sources stating "Data source
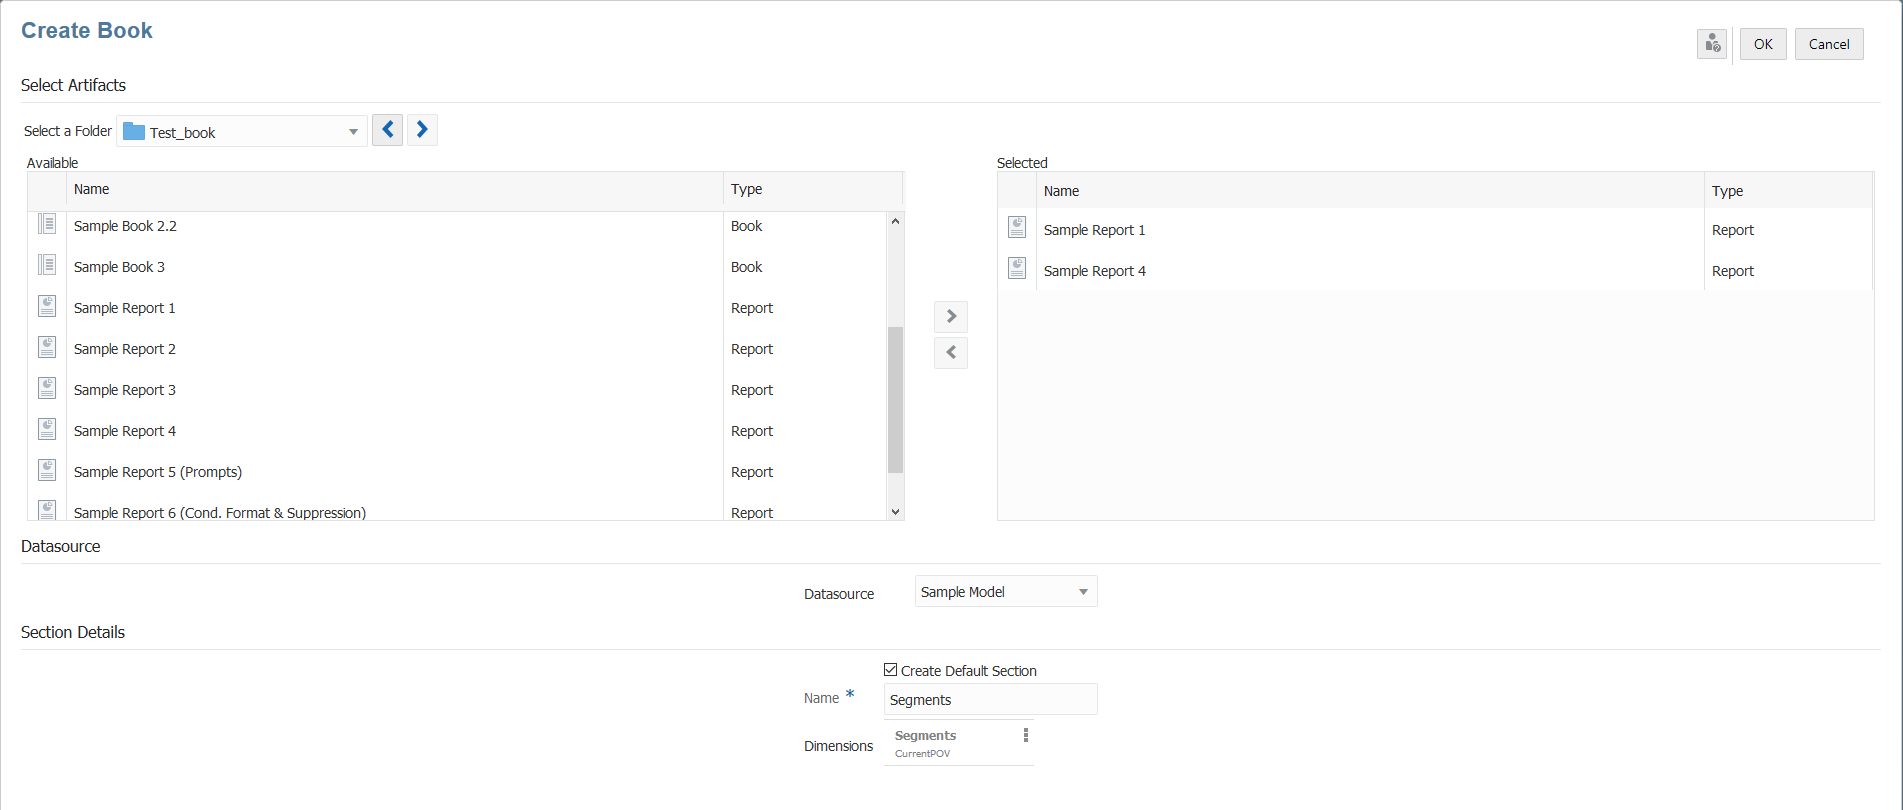
<data source name>is not in the allowed data sources". See Managing Data Sources.For example, in the following image, the documents Sample Report 1 and Sample Report 4 are selected and a default Section called Segments is defined in the user interface.

After selecting the reports, you can view the Book Designer window.
As a result, in the Book Designer layout displays two sample reports as child nodes, under the Section called Segments.
You can define the POV for the Default Section called Segments in the Book Designer.
Note:
When you add a document to a book, it references a link to the library. The actual document will not be copied to the book.
However, the TOC definition is copied to the book and is not linked to the source document in the Library.

Watch this tutorial video, you’ll learn how to create books.
 -- Creating Books in Narrative
Reporting.
Books provide the ability to group together one or more reports, books, and other documents, to generate a single PDF output. In this video, you learn how to create books in Narrative Reporting.
-