Add a Member and Assign a Smart List Data Type
In this step, we will add an ACCOUNTSL member to the Account dimension, assign a data type of Smart List to the ACCOUNTSL member, and assign Priority as the Smart List value.
-
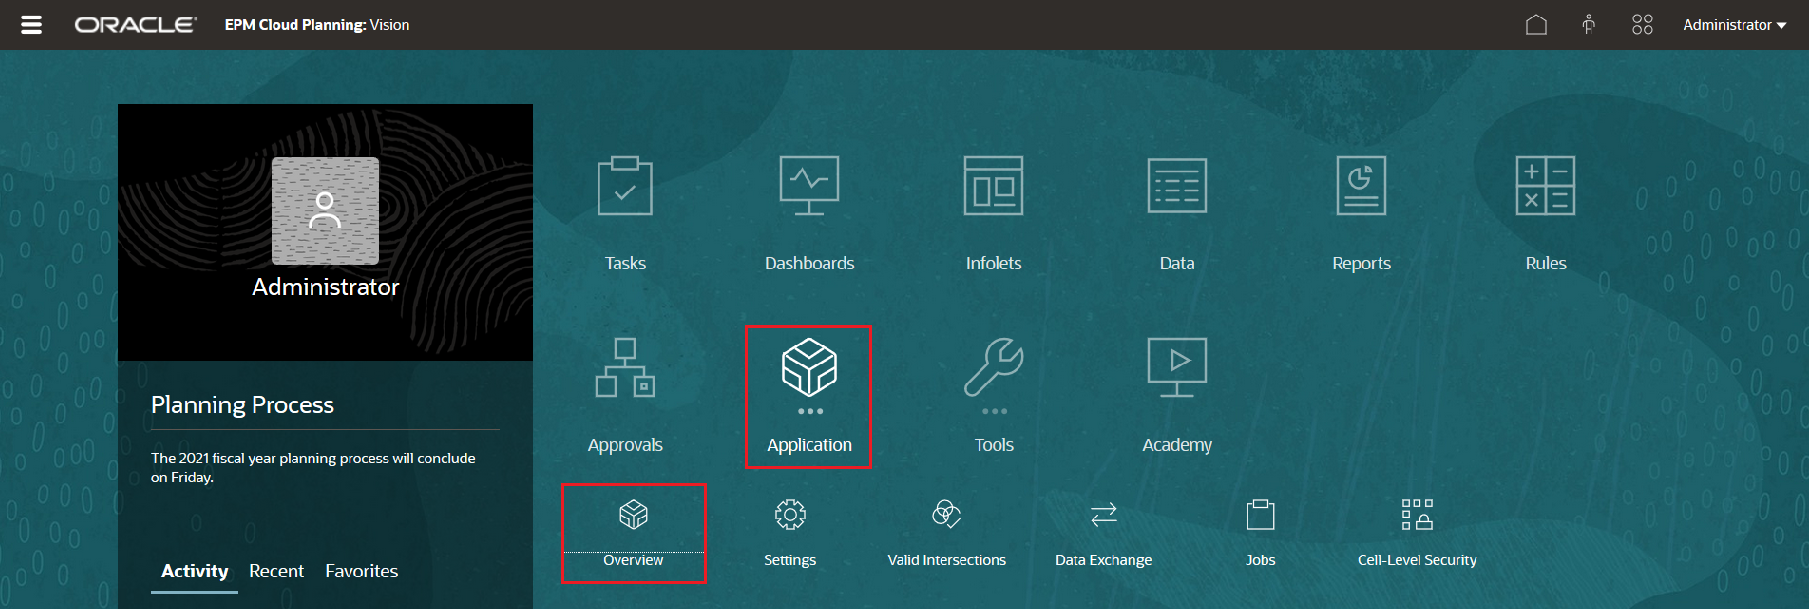
On the Planning Home page, select Application, and then select Overview.
-
On the Dimensions tab, select Account.

-
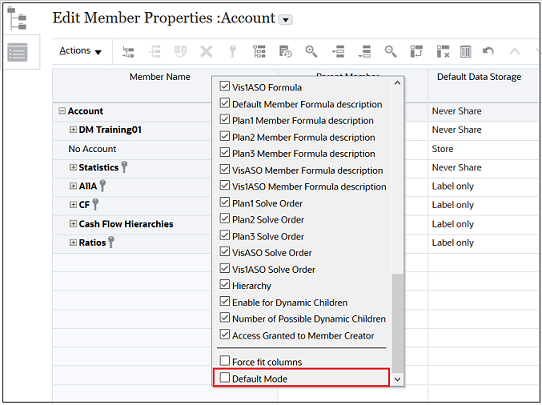
In Edit Member Properties: Account, right-click any heading, and uncheck Default Mode.
-
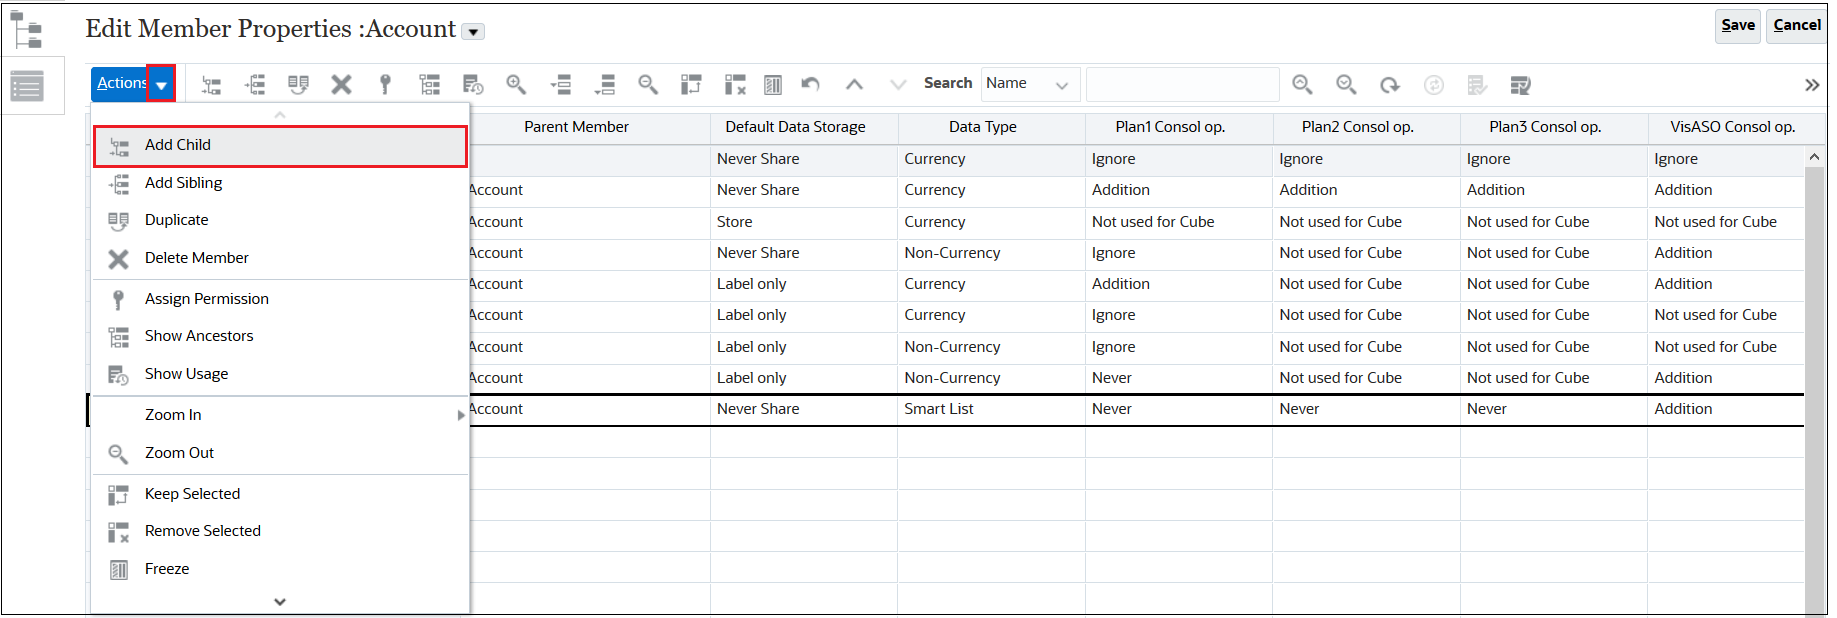
Select Account, then click the drop-down next to Actions, and select Add Child.
-
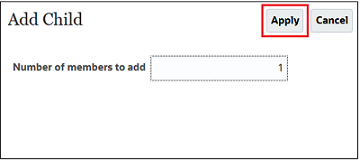
In the Add Child dialog box, click Apply to indicate that we are adding one member.
-
In the Member Name column, enter ACCOUNTSL.

-
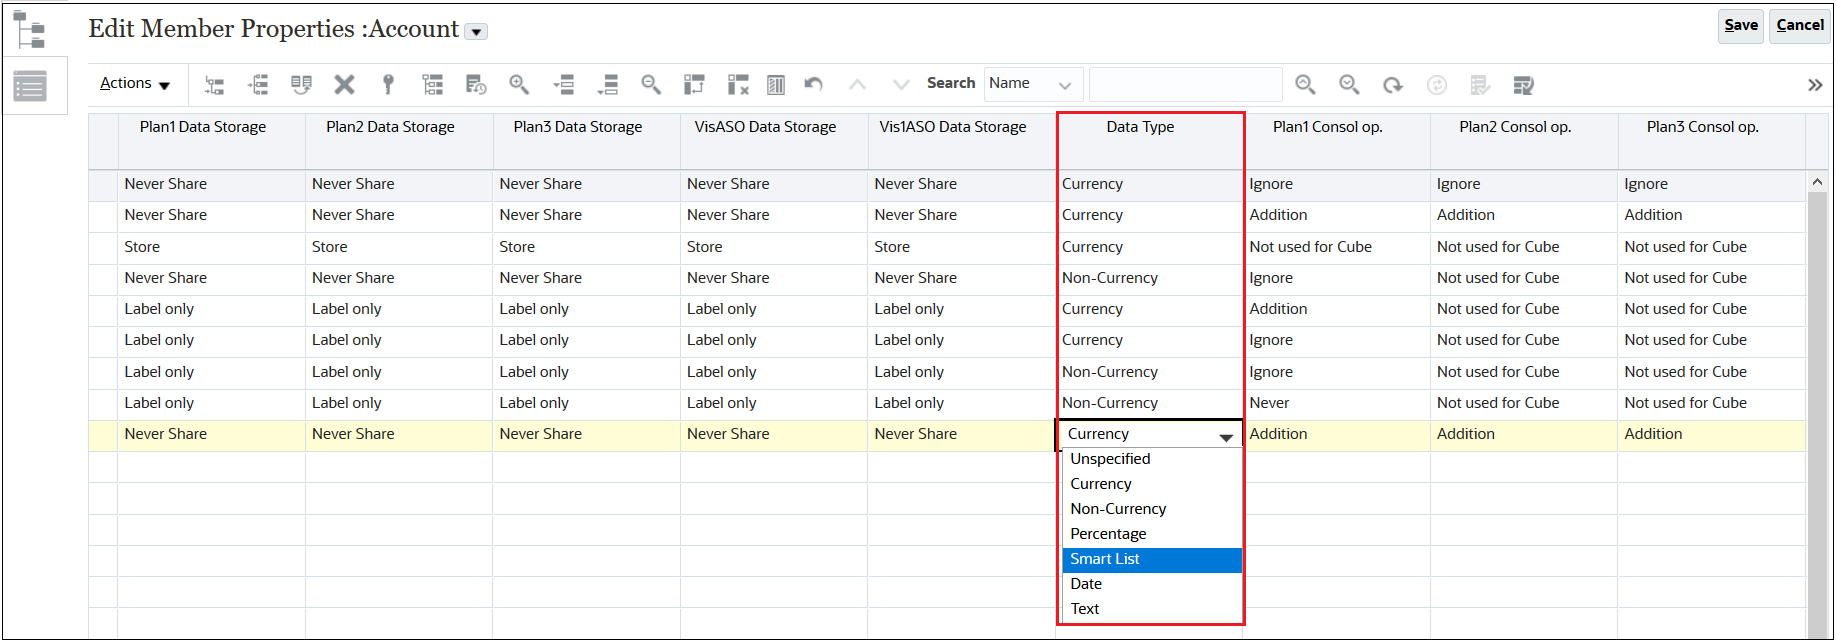
Scroll to the right, and in the Data Type column select Smart List.
-
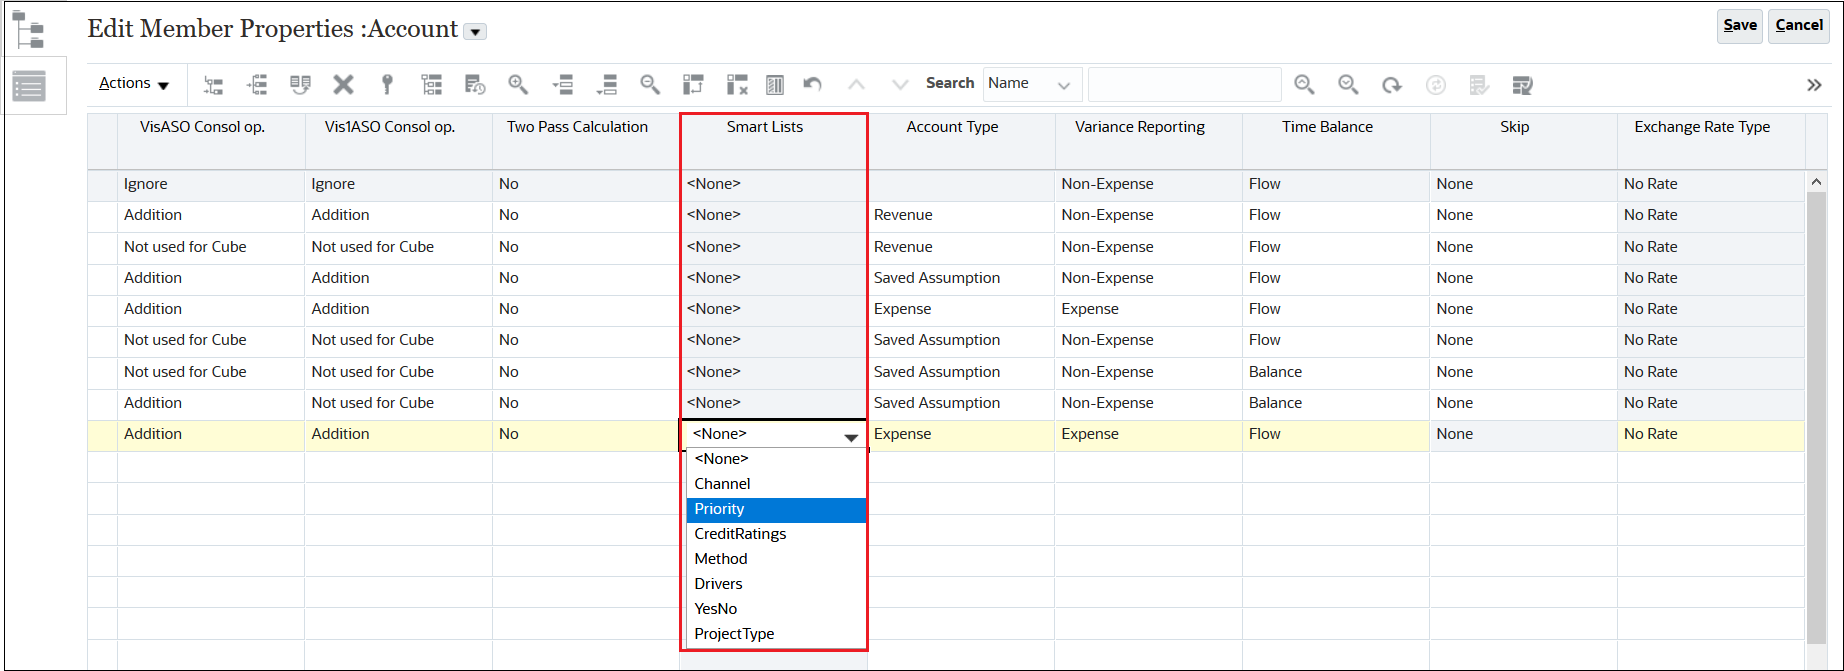
Scroll to the right, and in the Smart Lists column, select Priority.
-
Click Save and then Cancel to return to the Application screen.

- Click
 to return to the Planning Home page.