Add the Source File
When you enter a new location, you must provide the source and target. When you save the integration, the system creates the location automatically. For this integration, we will use the file named Sample_file_10000_Rows.txt as the source file. This file was provided in the Data Integration.zip file that you downloaded to your local drive when you set up your environment.
-
In Source, click the drop-down, and select File.

-
In the File Browser, double-click Inbox.

-
Click Upload, and then select Sample_file_10000_Rows.txt from your local drive.

-
Once the file is uploaded, select Sample_file_10000_Rows.txt in the File Browser, and then click OK.

-
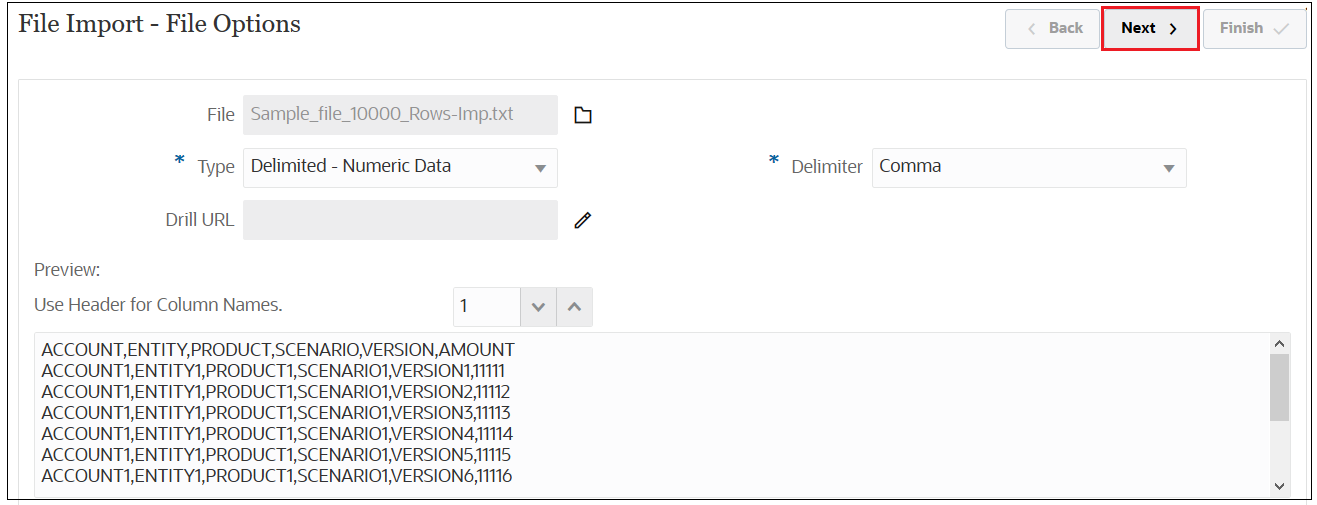
Click File Options to preview the file.

-
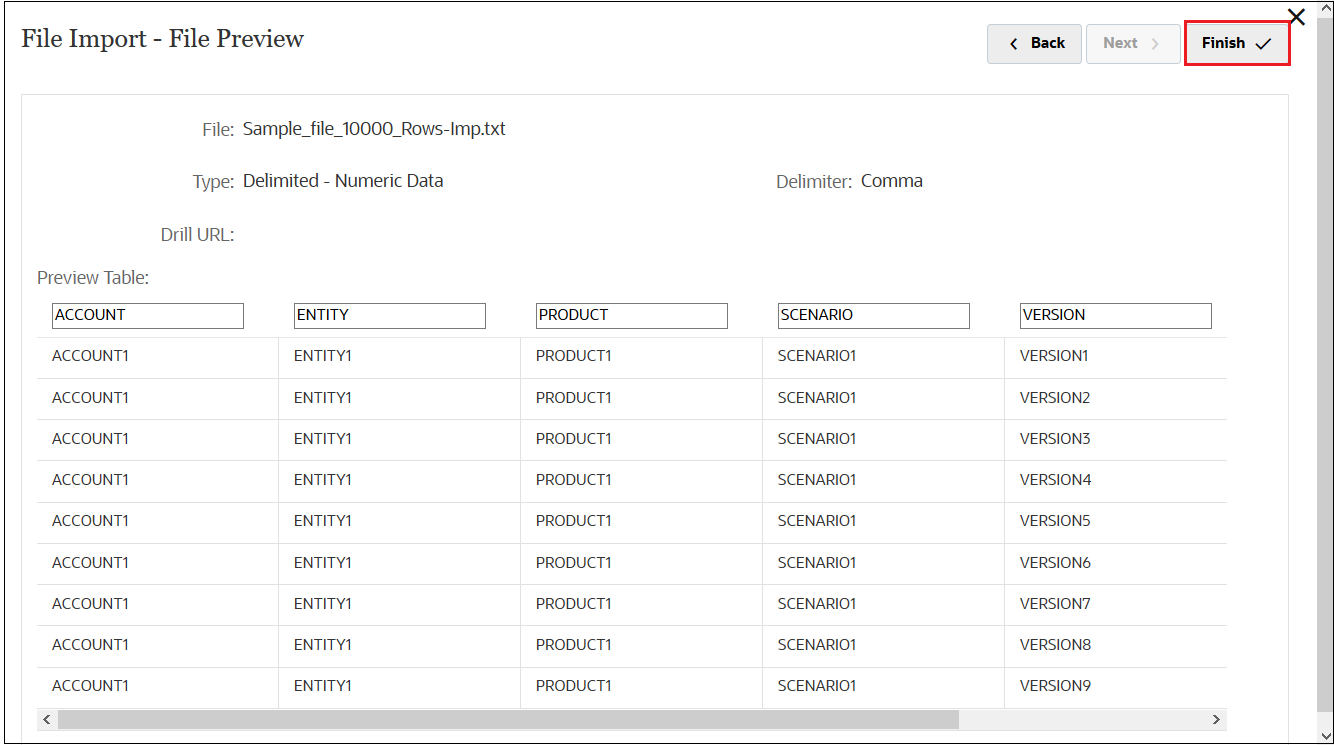
Click Next to see and adjust the column headers as desired.

In this example, we will not change any information.
-
Click Finish to return to the main Create Integration screen.
