Enter Mapping Rules
After the dimension mapping is complete, the next step is to enter mapping rules for all the dimensions except HSP_View and Amount. For this integration, we will use simple wild card mappings. Wild card mappings are fine for low volume integrations, but do not perform well for large data sets. (The HSP_View and Amount dimensions use the target and source expressions we set up when we mapped the dimensions instead of the wild card mappings.)
For each dimension (except HSP_View and Amount) we will enter * as the source, * as the target, and a processing sequence. As a standard practice, it is recommended to enter a different sequence for each rule.
For each dimension (except HSP_View) we will enter * as the source, * as the target, and a processing sequence. As a standard practice, it is recommended to enter a different sequence for each rule.
-
With the Account dimension selected, click
 (Add button) to add a new mapping rule.

-
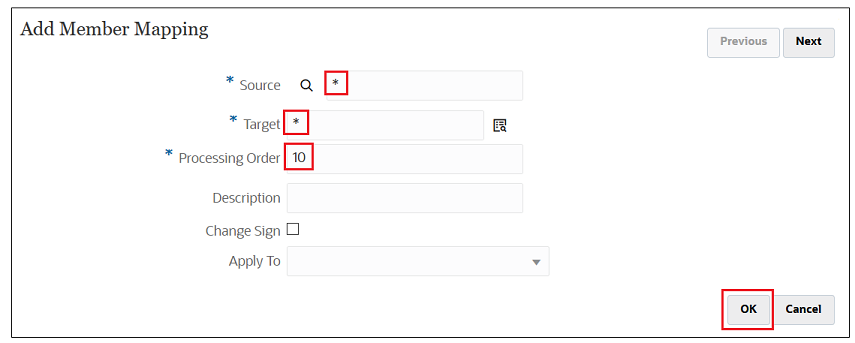
In Add Member Mapping, enter * as the Source, * as the Target, and 10 and the Processing Order, and then click OK.
-
Select the drop-down to change the dimension to Data, and then click
 (Add button) to add a new mapping rule.

-
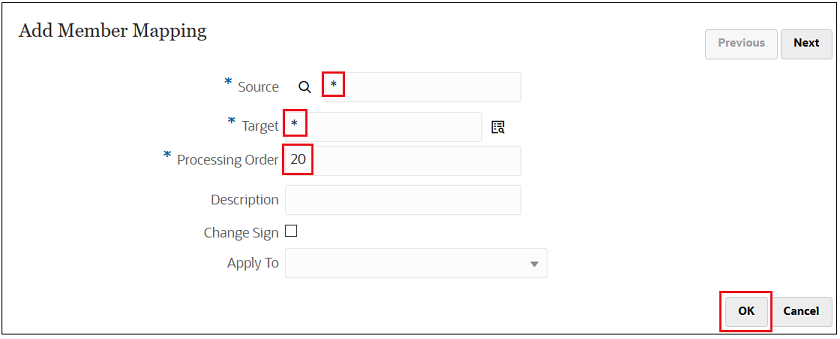
In Add Member Mapping, enter * as the Source, * as the Target, and 20 and the Processing Order, and then click OK.
-
Select the drop-down to change the dimension to Entity, and then click
 (Add button) to add a new mapping rule.

-
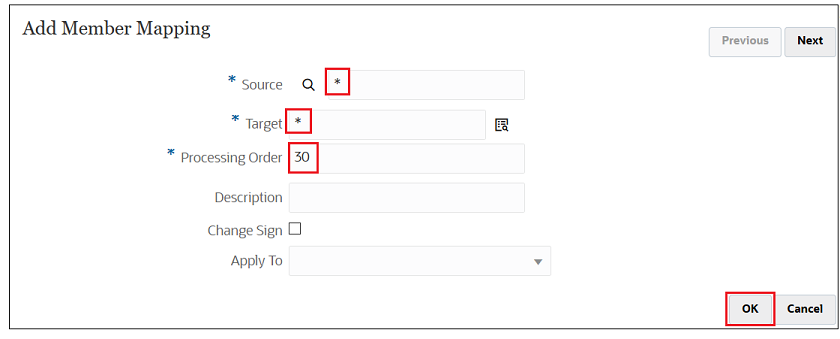
In Add Member Mapping, enter * as the Source, * as the Target, and 30 and the Processing Order, and then click OK.
-
Select the drop-down to change the dimension to Product, and then click
 (Add button) to add a new mapping rule.

-
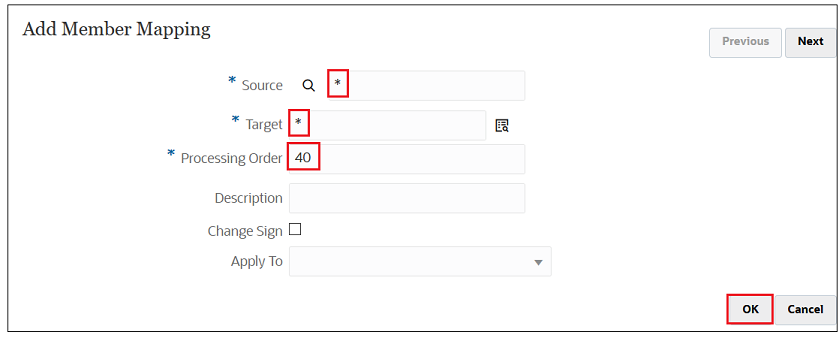
In Add Member Mapping, enter * as the Source, * as the Target, and 40 and the Processing Order, and then click OK.
-
Select the drop-down to change the dimension to Version, and then click
 (Add button) to add a new mapping rule.

-
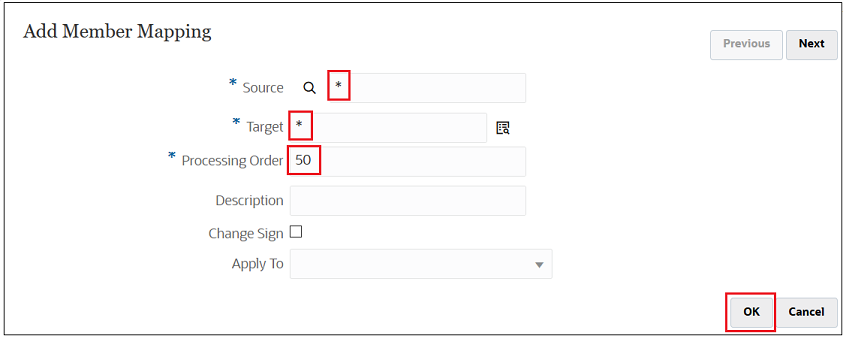
In Add Member Mapping, enter * as the Source, * as the Target, and 50 and the Processing Order, and then click OK.
-
Click Save and Continue to proceed to the next step in defining the integration.
