Map the Dimensions in the Source to the Dimensions in the Target
The next step is to map the dimensions from the Multi_Account_Column.txt file to the dimensions in the target Planning application. For this integration we will use a single expression for the HSP_view dimension and a driver feature for the Amount dimension.
-
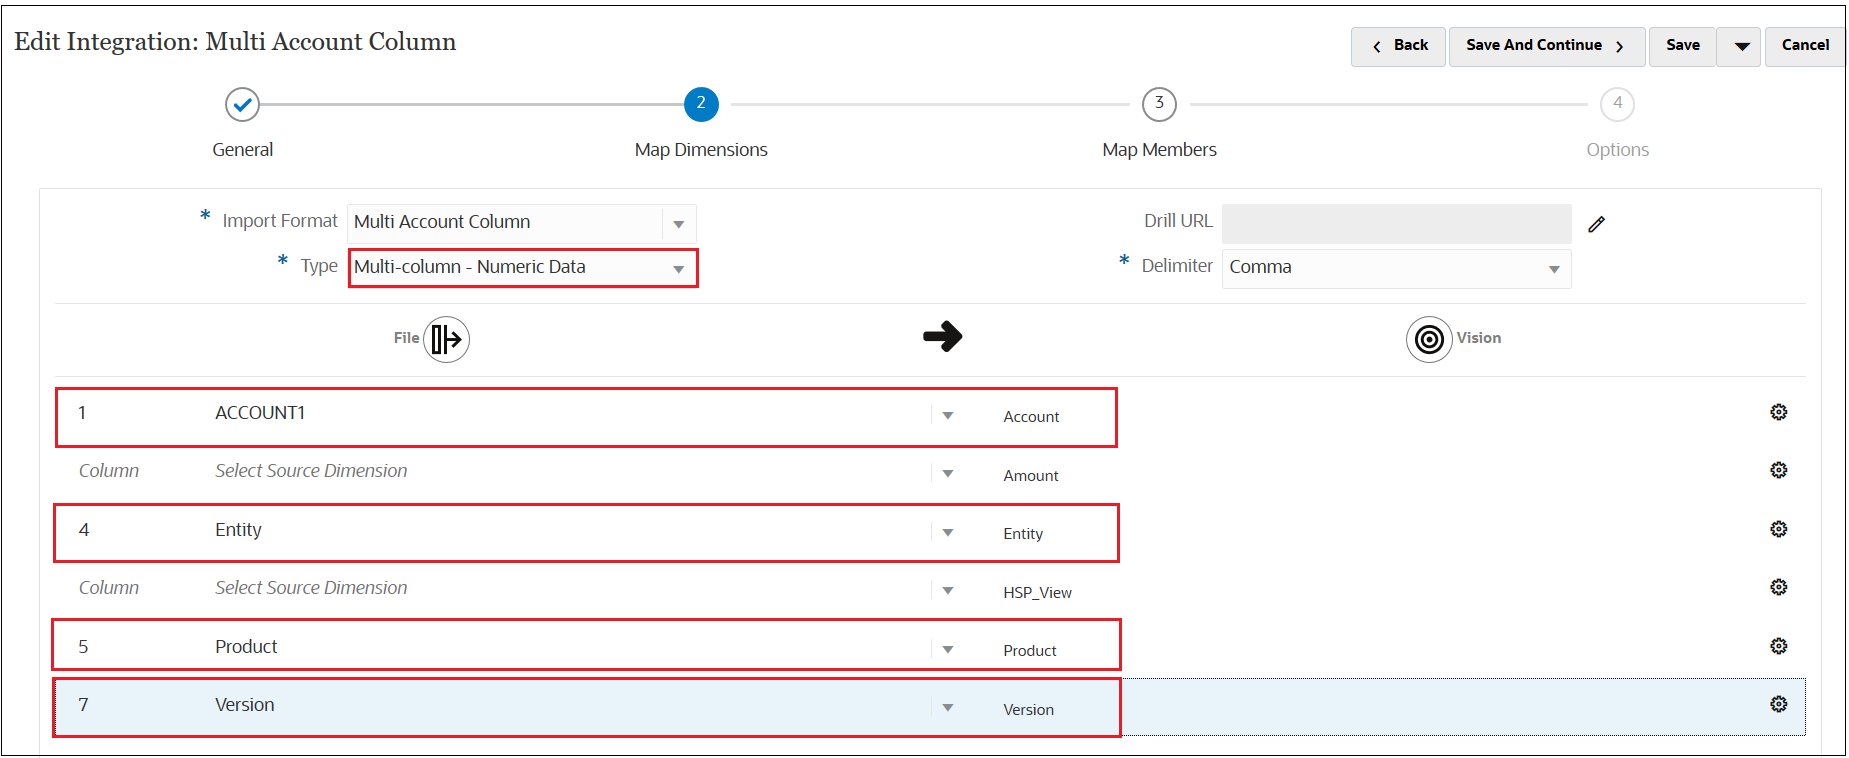
On the Edit Integration screen, change the Type to Multi-Column – Numeric Data, and map the source dimensions for Account, Entity, Product, and Version to the target dimensions as shown.
-
Enter an expression for the HSP_View dimension.
For the HSP_View dimension, we will use an expression instead of a mapping rule, and we will set a value of "BaseData" as the default.
-
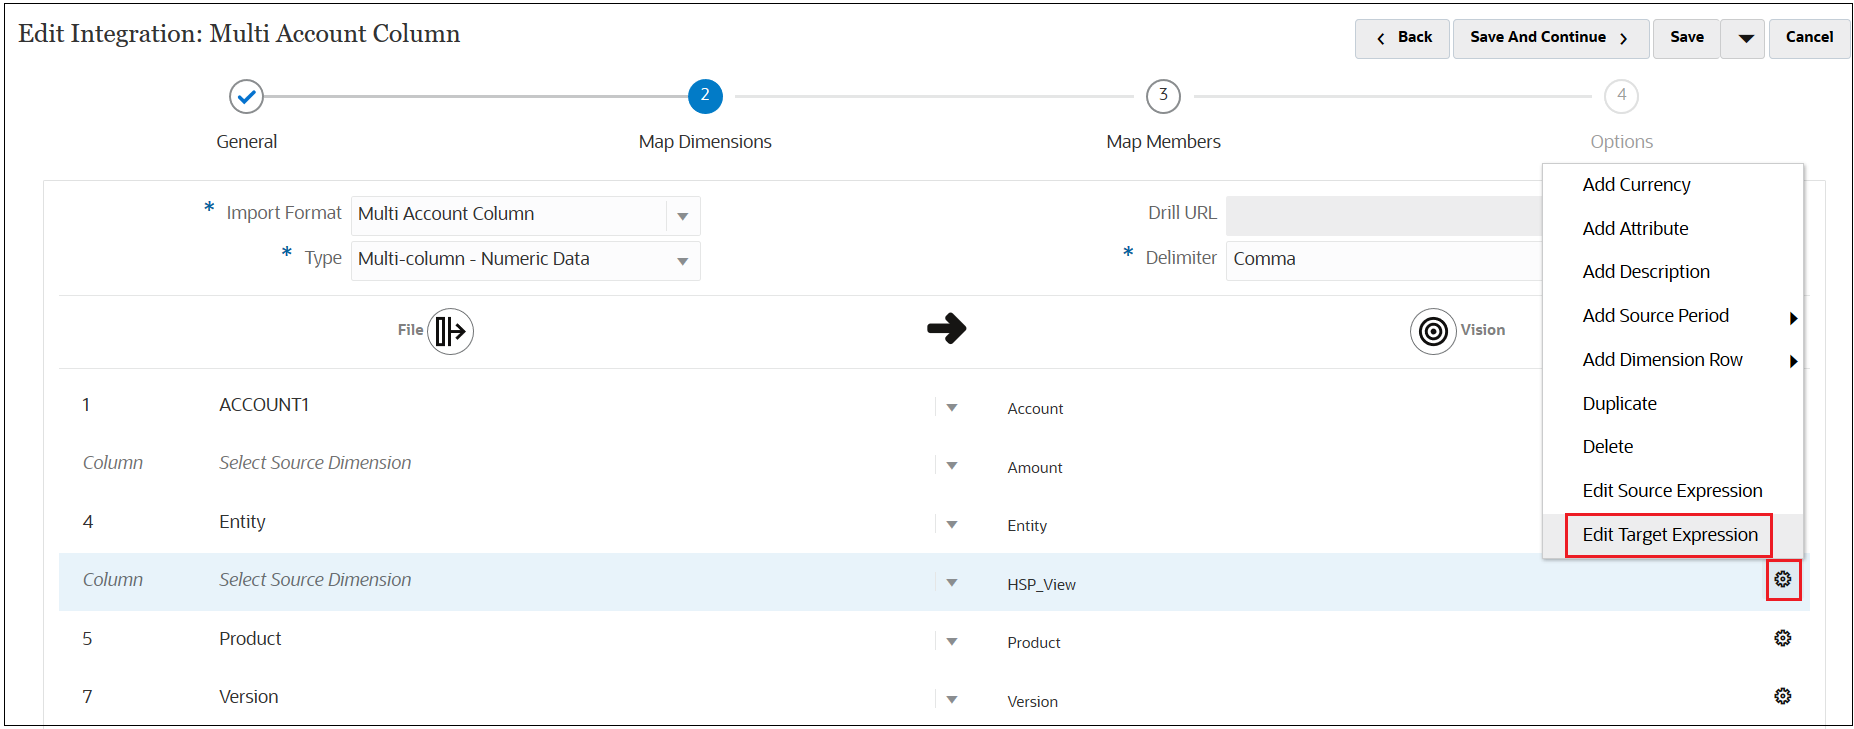
In the HSP_View row, select
 , and then select Edit Target
Expression.
-
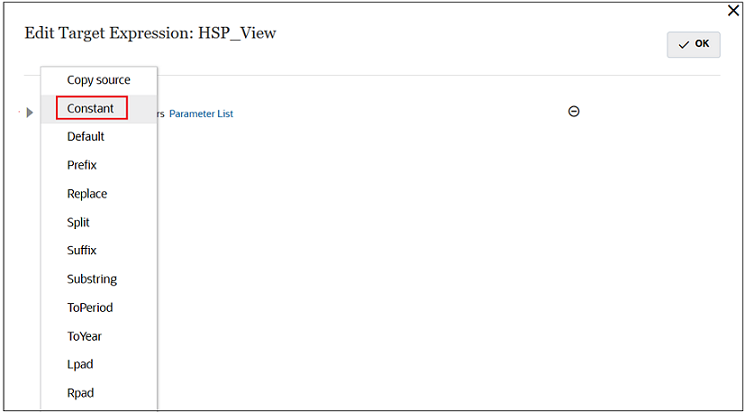
In the Edit Target Expression dialog box, select Expression Type, and then select Constant.
-
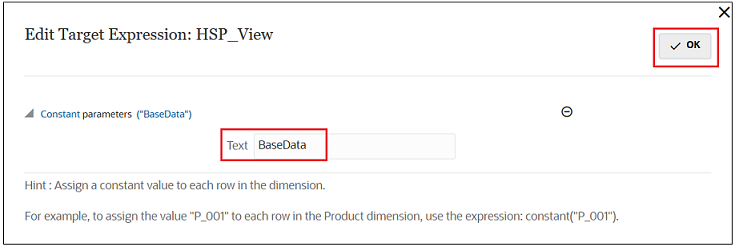
In the Text field, enter BaseData, and then click OK.
-
- Enter driver parameters for the Amount dimension.
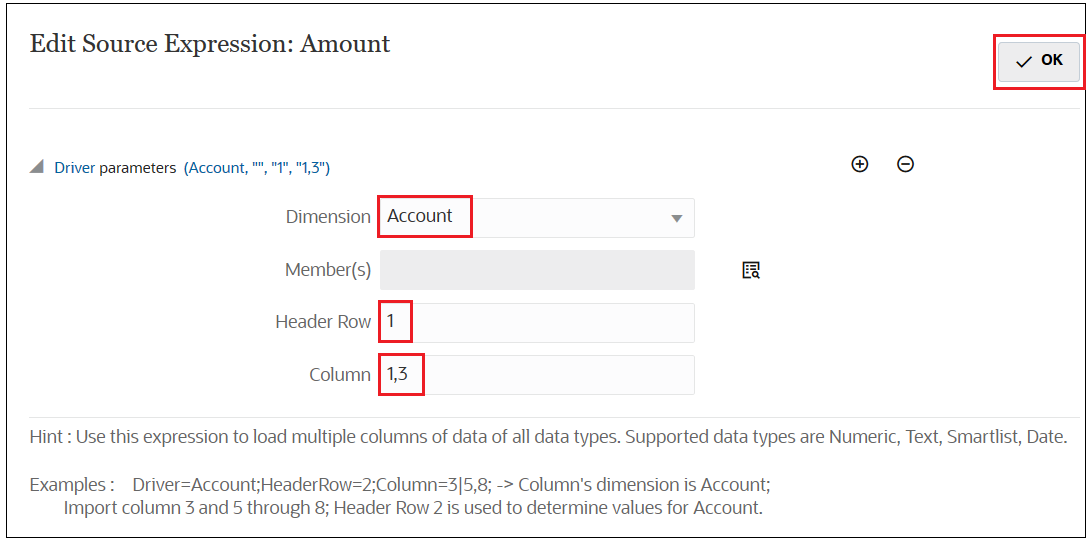
In this example, we will edit the source expression to set "account" as the driver, to specify that there is a header row, and to specify that the periods are in columns 1,2 and 3.
-
In the Amount row, select
 , and then select Edit Source
Expression.
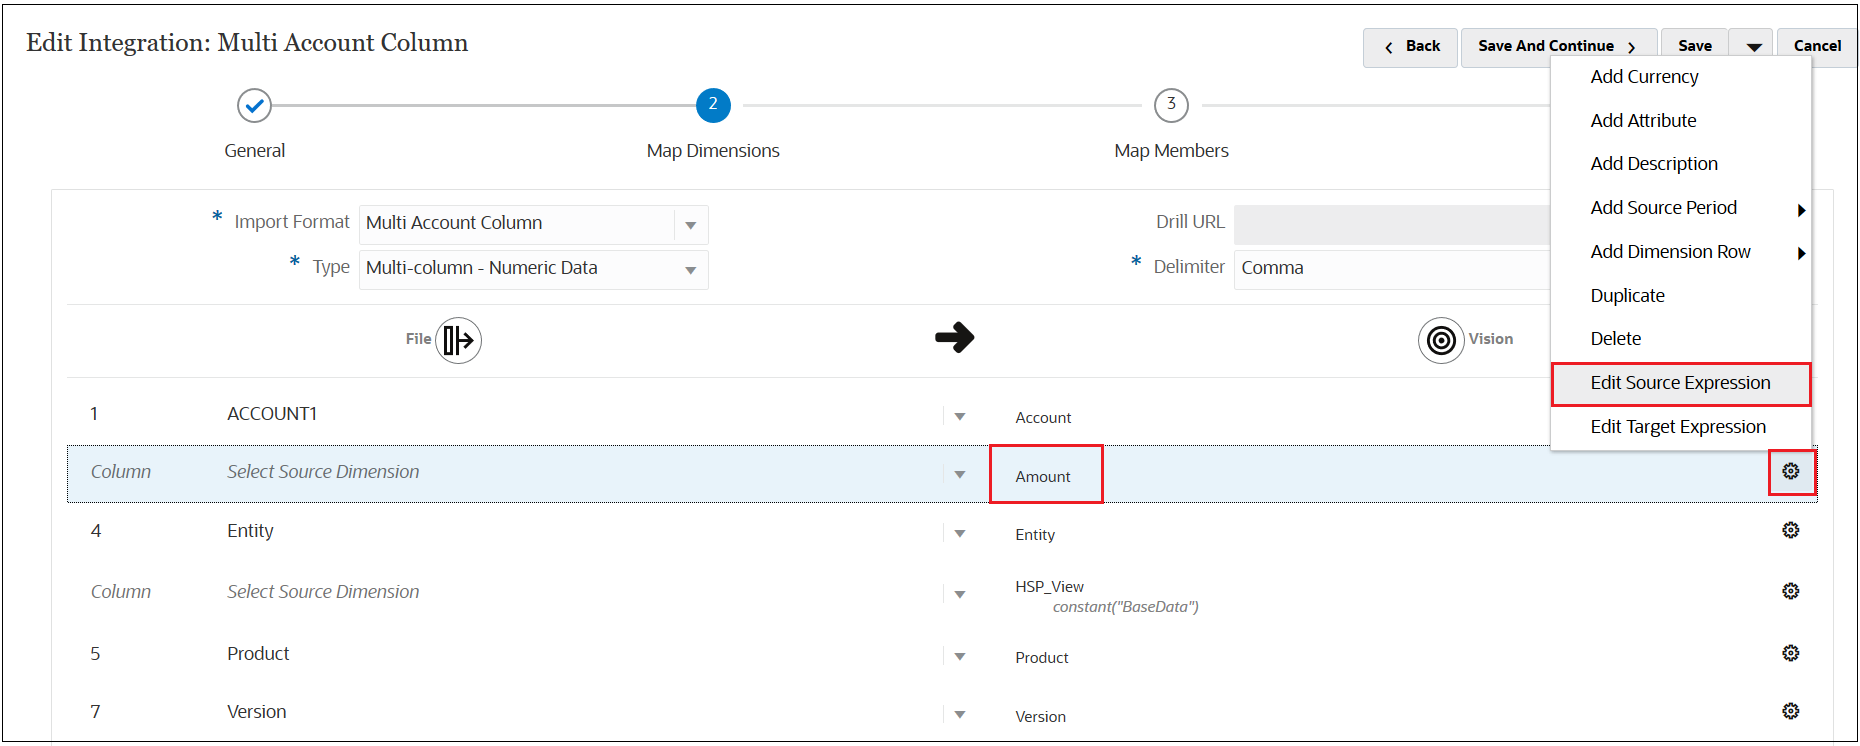
-
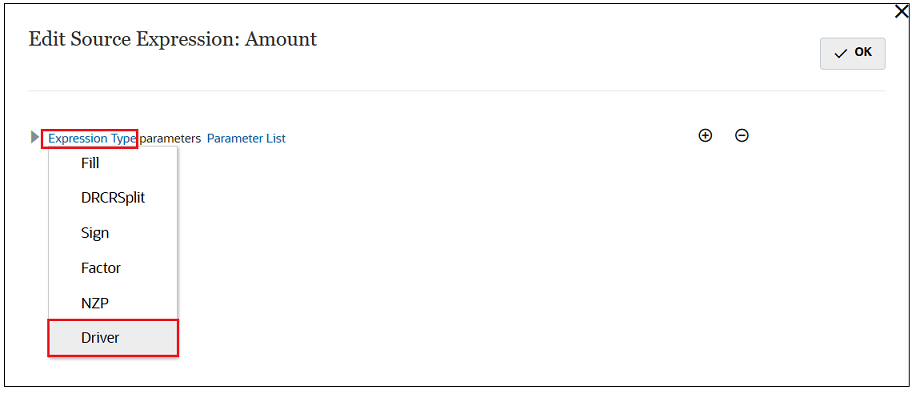
In the Edit Source Expression dialog box, select Expression Type, and then select Driver.
-
Set the Dimension to Account, the Header Row to 1, and the Column to 1,3, and then click OK.
-
-
Click Save and Continue to continue to the next step.
