JavaScript must be enabled to correctly display this content
Introduction
This tutorial describes Dimensions and Members and shows you how to manage them in Cloud Enterprise Performance Management (EPM) business processes. The sections build on each other and should be completed sequentially.
Background
Most Cloud EPM business processes contain dimensions that represent the categories of data in your organization. For example, you identify time periods, such as YearTotal, Q1, or Jan, in the Period dimension. You identify budgeted items, such as Selling, General and Administrative (SG&A) expenses, in the Account dimension, and you identify departments for your organization in the Entity dimension.
After creating the business process, you can start reviewing the cubes and dimensions that were added during the creation process. You can further add dimensions and members based on your organizational requirements.
Prerequisites
Cloud EPM Hands-on Tutorials may require you to import a snapshot into your Cloud EPM Enterprise Service instance. Before you can import a tutorial snapshot, you must request another Cloud EPM Enterprise Service instance or remove your current application and business process. The tutorial snapshot will not import over your existing application or business process, nor will it automatically replace or restore the application or business process you are currently working with.
Before starting this tutorial, you must:
Have Service Administrator access to a Cloud EPM Enterprise Service instance.
Import this FreeForm snapshot into your instance or have a Cloud EPM application that supports managing dimensions created in your instance. The examples provided in this tutorial use the snapshot. If you use your own application, you will need to modify the specific examples that are applicable to your application.
Use these Measures.csv and Entity.csv import files for the FreeForm snapshot or have a valid import file for your Cloud EPM application.
Note:
If you run into migration errors importing the snapshot, re-run the migration excluding the HSS-Shared Services component, as well as the Security and User Preferences artifacts in the Core component. For more information on uploading and importing snapshots, refer to the Administering Migration for Oracle Enterprise Performance Management Cloud documentation.
About Dimensions and Members
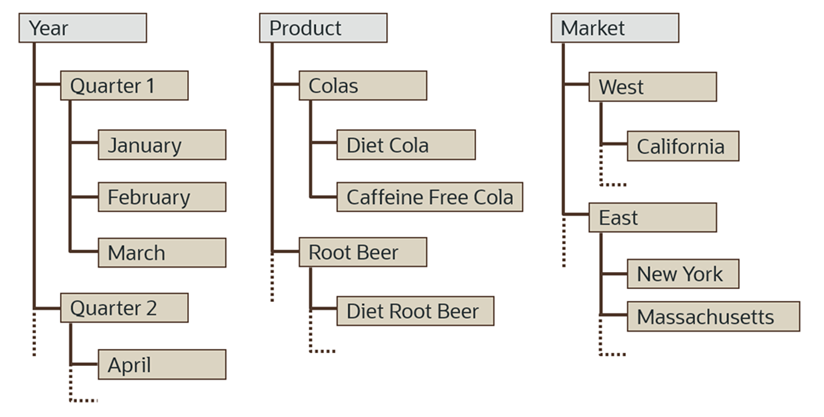
Dimensions categorize data values. Members are components of dimensions. A dimension represents the highest consolidation level in the database outline. The database outline presents dimensions and members in a tree structure to indicate a consolidation relationship.
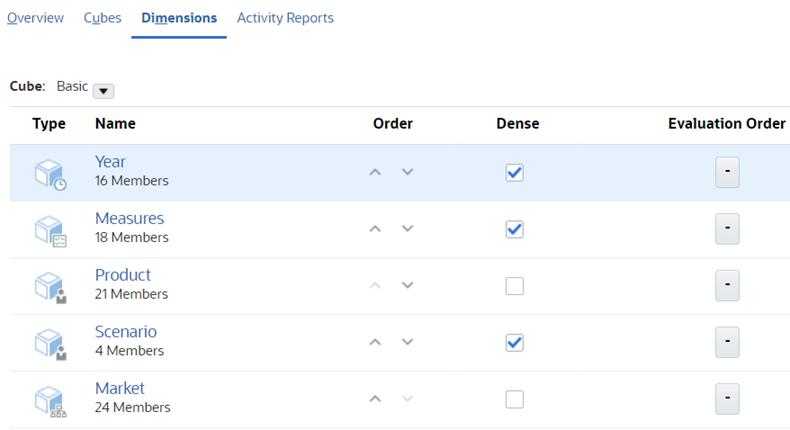
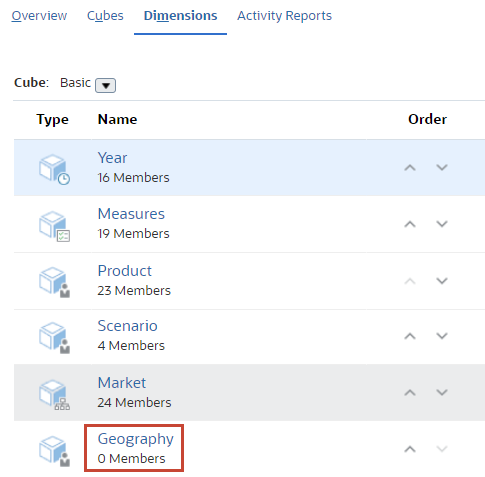
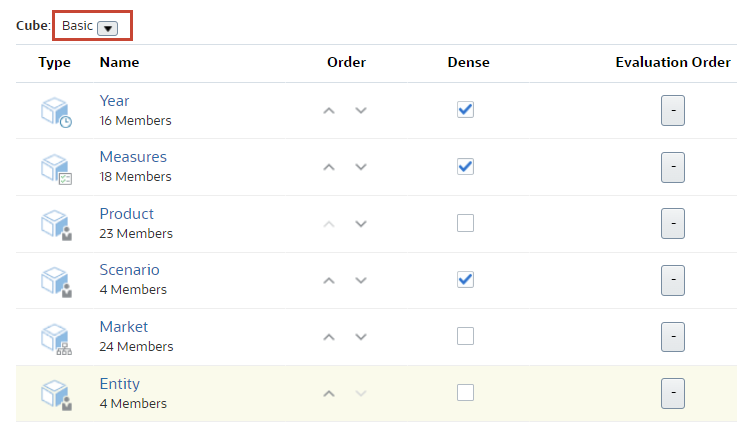
In this example, the dimensions in the Basic cube of the sample FreeForm application are displayed. See the Prerequisites section of this tutorial for a copy of the snapshot of the sample FreeForm application.
Members are the individual components of a dimension. For example, Product A, Product B, and Product C might be members of the Product dimension. Each member has a unique name. Data associated with a member can be stored, or the data can be dynamically calculated when a user retrieves it.
Dimension Types
There are two types of dimensions:
Standard dimensions represent the core components of a business plan and often relate to departmental functions. Time, Accounts, Product, Market and Division are typical standard dimensions.
Attribute dimensions are associated with standard dimensions. With attribute dimensions, you group and analyze members of standard dimensions based on the member attributes (characteristics). For example, you can compare the profitability of non-caffeinated products that are packaged in glass to the profitability of non-caffeinated products packaged in cans.
Custom Elements
Attribute dimensions: When you assign an attribute dimension to a base dimension, the members of the attribute dimension become potential attributes of the associated base dimension.
Consider the following guidelines:
Attribute dimensions can have a data type of text, date, Boolean, or numeric. The data type applies only to level 0 members of the attribute dimension.
Names for attribute dimensions must be unique.
You can assign attribute dimensions only to sparse dimensions, such as the Entity dimension and user defined dimensions that are classified as sparse.
You can add attribute dimensions to the Account dimension if it is designated as a sparse dimension in all plan types.
If you change sparse dimensions to dense dimensions, all attribute dimensions and their associated values for the base dimension are automatically deleted.
You cannot assign attribute dimensions to label-only members.
You must assign attribute dimensions at the same level in the base dimension.
User-defined attributes (UDAs): UDAs are words or phrases about members, and are used for grouping members for calculation, security, or reporting purposes. You can select members for forms based on a common attribute, which you have defined as a user-defined attribute (UDA). Before you can associate the UDA with a form, you must create the UDA.
Follow these rules when creating UDAs:
You can define multiple UDAs per member.
You can set the same UDA for multiple members.
A UDA name can duplicate a member, alias, level, or generation name.
You cannot create a UDA on shared members or members of attribute dimensions.
A UDA applies only to the specified member. Descendants and ancestors of the member do not inherit the UDA.
You can define UDAs manually in the Member Properties dialog box.
Smart Lists: You can enter data using custom drop-down selection lists called Smart Lists, which are accessed from data cells in forms and ad hoc grids. Service Administrators use Smart Lists to create custom drop-down lists that users access from form cells. When clicking in cells whose members are associated with a Smart List (as a member property), users select items from drop-down lists instead of entering data. Users can't type in cells that contain Smart Lists. Smart Lists display in cells as down arrows that expand when users click into the cells.
Keep the following smart list guidelines in mind:
You associate smart lists with dimension members.
After associating smart lists with dimension members, you reserve those members to store only smart list values. Do not use those members to store other data values.
You should consider creating new members and setting up a separate rollup within the dimension.
You can create reports to capture the smart list information. You must use Planning details as your data source.
You can associate smart lists with more than one member, but those members must be level 0 members.
Sparse and Dense Dimensions
Dimensions are categorized as either Sparse or Dense. Sparse dimensions lack data values for the majority of member combinations. Dense dimensions have data values for the majority of member combinations. By default, Planning designates the Account and Period dimensions as dense, and the remaining dimensions as sparse. To optimize performance for sparse dimensions, Planning searches for and calculates only occupied data values in each dimension combination, reducing calculation time and disk usage. You can modify these settings.
Label-Only Members
Label-only members are typically used for navigation and have no associated data.
Keep the following label-only member guidelines in mind:
You cannot assign level 0 members as label-only.
Label-only members can display values.
Making dimension members label-only minimizes database space by decreasing block size.
You cannot assign attributes to label-only members.
In a multicurrency application, you cannot apply label-only storage to members of these dimensions: Entity, Version, Currency, and user-defined custom dimensions. To store exchange rates, use Never Share.
Data Storage for children of label-only parents is set to Never Share by default.
Dimension Hierarchies
Dimension hierarchies:
Define the structural relationships between members in the database.
Organize data in the database.
Define the consolidations and mathematical relationships between items.
In an application hierarchy, the levels below the cube name are dimensions, and the levels below each dimension are members. Members of the same level that belong to the same parent are called siblings. Members immediately below a parent are called children.
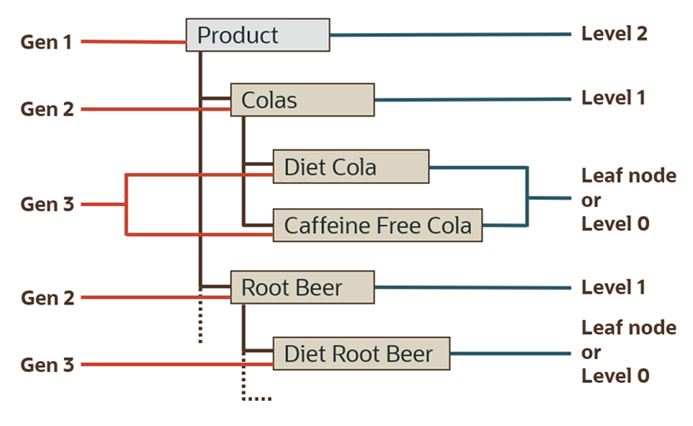
Hierarchical (generations and level; and roots and leaves) and family history (parents, children, and siblings; and descendants and ancestors) terms are used to describe the roles and relationships of the members in a database outline.
Note:
You can add members to dimensions and define dimension hierarchies. When you add a child member, you add a member one level below the selected member. Adding a sibling member adds a member at the same level. Adding a sibling to a dimension adds another dimension.
Account Hierarchies:
A typical challenge when creating your Account dimension is converting a report in spreadsheet format into a meaningful outline structure. In this situation, keep the following points in mind:
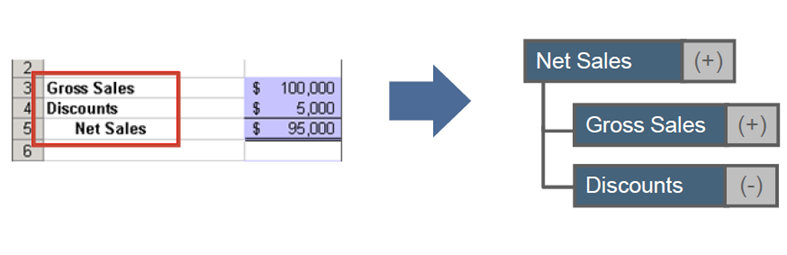
A total or subtotal in the spreadsheet becomes a parent member in your outline; the children are the elements that produce the total or subtotal.
A parent member is displayed above its children in the outline editor, but below its children in the spreadsheet.
The top member of a hierarchy branch in the outline is often what is called the bottom line in a spreadsheet report.
Property Value Inheritance:
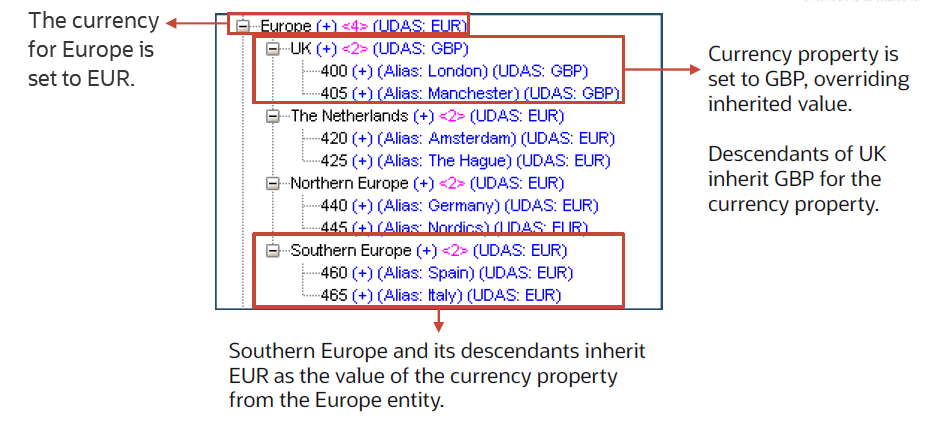
Properties for members of dimensions can also be inherited. Inheritance allows high-level members to share their property values with lower-level members in the hierarchy. It allows new members to automatically obtain their property values from the appropriate ancestors to ensure symmetry within the branches.
The example shows the Entity dimension. The currency for Europe is set to EUR. Europe’s descendants, The Netherlands, Northern Europe, and Southern Europe, inherit the EUR currency property. However, the UK currency was explicitly set to GBP, therefore overriding the inherited EUR value. Descendants of the UK member inherit GBP for the currency property.
Alternate Hierarchies:
You can create multiple rollup paths for your data by placing a child member under more than one parent.
The example illustrates the following:
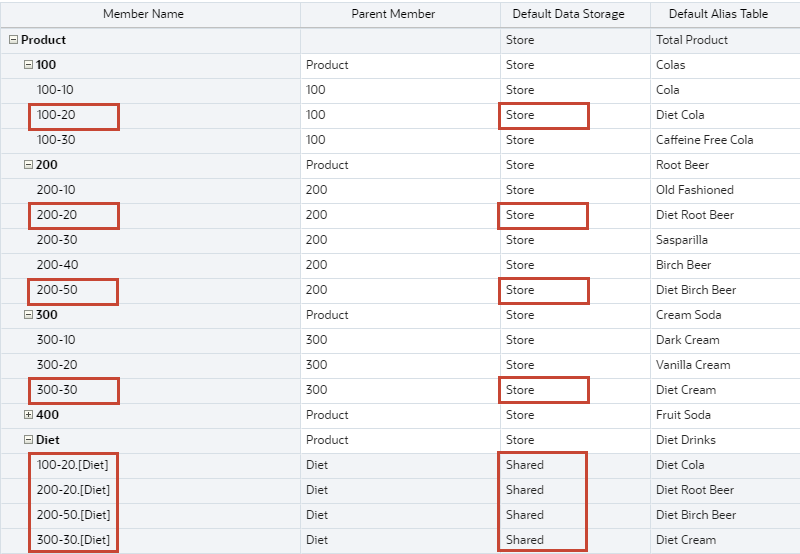
Product 100-20 is a child member of 100, products 200-20 and 200-50 are both child members of 200, product 300-30 is a child member of 300.
These same products, are used in the Diet member alternate hierarchy.
By default a member takes the same property settings as their parents. If you modify base member properties, the properties of the related shared members are also updated.
In this example, the default data storage for 100-20, 200-20, 200-50 and 300-30 is set to Store. When they are added to the alternate hierarchy the default data storage is set to Shared.
Aggregation and Consolidation Options
You can define calculations within dimension hierarchies using aggregation options. Aggregation options determine how child member values aggregate to parent members:
+ Addition
- Subtraction
* Multiplication
/ Division
% Percent
~ Ignore
^ Never (don't aggregate, regardless of hierarchy)
Dimension Storage Options
The following storage options are available to dimensions:
Dynamic Calc and Store: calculates data values of members, and stores values.
Store: stores data values of members.
Dynamic Calc: calculates data values of members, and disregards the values.
Never Share: prohibits members in the same dimension from sharing data values.
Shared: allows members in the same dimension to share data values.
Label Only: has no data associated with the member.
Required and Default Dimensions
The required and default dimensions can vary in each business process.
The typical required and default dimensions are:
Period and Year: You specify base time periods (such as months) and distribution of weeks in the Period dimension. You use the Year dimension to add years to the calendar.
Scenario and Version: The Scenario and Version dimensions represent the broadest categories of data in your plans and budgets. Scenario describes the type of data in a plan, such as budget, actual, or forecast, as well as the plan’s time span. Version allows for flexibility and iterative planning cycles. Use Scenario and Version combinations to create multiple iterations of a plan. This allows you to model possible outcomes based on different assumptions.
Entity: The Entity dimension represents the flow of information through your organization. For example, you can establish a geographic entity for each responsibility center that submits a budget plan.
Account: The Account dimension specifies the data to be collected from budget planners. You can establish accounts for all budgeted items. Examples of accounts are Rent Expense and Cash on Hand.
Currency: The Currency dimension identifies the currency in which values are displayed. You can plan in one or more currencies.
Custom Dimensions: You can use custom dimensions to store additional details associated with accounts, such as products, markets, channels, balance sheet movement, or types of elimination. For example, custom dimensions could include Product Line, Region, Channel, or Customers.
Consider the following required and default dimensions for Planning and FreeForm:
Planning applications must include the Account, Entity, Period, Scenario, Version, and Year dimensions. These Planning required dimensions are included with Sample, Custom, or Module-based applications. Multicurrency business processes include the Currency dimension.
With FreeForm, you can create an application with the cubes and dimensions of your choice without being constrained by the cube and dimension limitations imposed by standard applications. Predictive Planning, Auto-Predict, and IPM Insights are not available in FreeForm because these features require the provided Scenario, Version, Period, and Year dimensions to be present. In FreeForm, you can define the Scenario, Version and Currency dimensions as optional custom dimensions.
Refer to the Administration documentation for dimension details on each business process:
Sharing members allow alternate rollup structures within an application. A base member must exist before you can create a shared member. You can create multiple shared members for the base member. A base member must display before its shared members in position from top to bottom.
Shared members share some property definitions with base members, such as member name, alias name, and cubes for which members are valid. Shared members must have unique parent members and different rollup aggregation settings. Custom attributes, custom attribute values, and member formulas are not allowed for shared members. Renaming base members renames all shared members.
Keep the following shared members guidelines in mind:
The base member can't be the parent of the shared member.
You can't add a shared member as a sibling to the base member.
You must give the shared member the same name as its base member. It can have a different description.
You must select Shared as the Data Storage for the shared member.
Guidelines for Dimension and Member Names
When naming dimensions, members, and aliases, follow these rules:
Use no more than 80 characters for dimension, member, or alias names.
Names are not case-sensitive for dimensions, non-shared members, and aliases. Do not use matching names with only case differences; for example, do not name two members "zzz" and "ZZZ," or a base member "zzz" and a shared member "ZZZ."
Do not use dimension names that are the same name as a member property or a column header in the metadata load file; for example, Data Type.
HTML tags cannot be used in member names, dimension names, aliases, and descriptions.
The TAB key is restricted and cannot be used in dimension, member, and alias names.
Spaces cannot be placed at the beginning or end of names.
For time periods in custom calendars, don't use spaces in prefixes.
The following cannot be used as dimension, member, or alias names:
Calculation script commands, operators, and keywords.
Function names and function arguments.
Names of other dimensions and members (unless the member is shared).
If Dynamic Time Series is enabled, don't use History, Year, Season, Period, Quarter, Month, Week, or Day.
In unique member outlines that contain an attribute dimension, you cannot use Sum, Count, Min, Max, and Avg as member or dimension names. Using these names causes duplicate name conflicts.
The members that are created in the attribute calculations dimension (Sum, Count, Min, Max, and Avg) are not considered reserved words because you can change these names in the attribute calculations dimension and then use the standard name in an attribute or standard dimension.
If the outline is tagged as a duplicate member outline, and an attribute dimension (and, therefore, the attribute calculations dimension) exists before you use Sum, Count, Min, Max, and Avg as a base member, the duplicate name is allowed. However, if, you use Sum, Count, Min, Max, and Avg as a base member before creating an attribute dimension, the duplicate name isn't allowed.
Note:
For more details see Appendix A - Naming Restrictions, in the Administering Planning documentation.
Creating and Modifying Dimensions
In this section, you create a dimension and then modify it.
Creating Dimensions
On the home page, click Application, then Overview.
In the horizontal tabs, click Dimensions.
In this example, the dimensions in the Basic cube of the sample FreeForm application are displayed. See the Prerequisites section of this tutorial for a copy of the snapshot of the sample FreeForm application.
On the top right, click Create.
In Create Dimension, enter the following values:
Dimension
Description
Geography
Regional Markets
On the right, under cube, for Basic and REP, select enabled.
Verify your entries and selections, then click Done.
The dimension is created and listed on the Dimensions page.
Modifying Dimensions
In Dimensions, click Geography to modify it.
From the left vertical tabs, click (Edit Dimension Properties).
Enter the following values:
Dimension
Description
Entity
Company department
Verify your changes, then click Done.
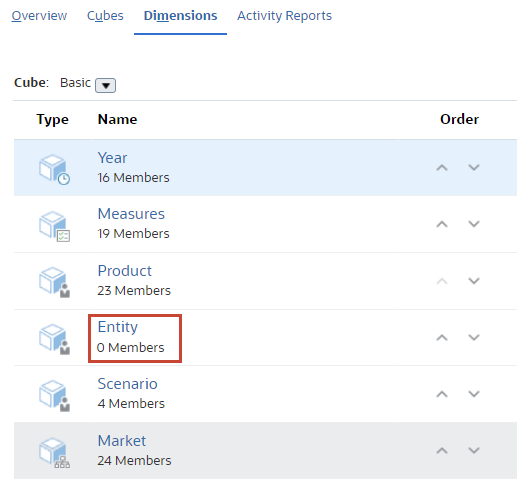
The dimension is modified.
Creating Members
In this section, you create members for a dimension.
In Dimensions, click Entity.
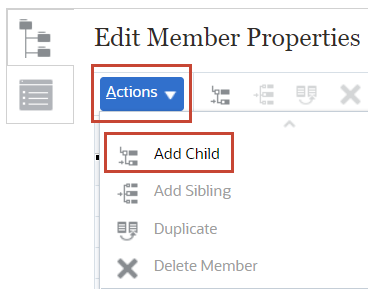
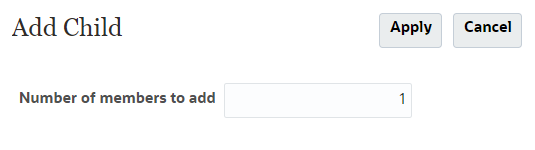
In Edit Member Properties, click Actions, and select Add Child.
In Add Child, click Apply.
The grid displays a new untitled row.
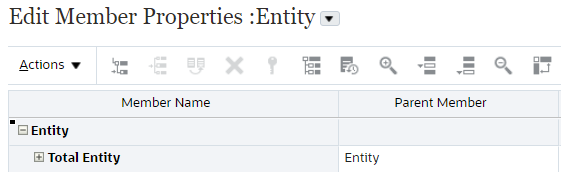
In the grid, for the new untitled member name, enter Total Entity.
Verify the Parent Member is set to Entity, then click Save.
In the grid, click Total Entity to select the row.
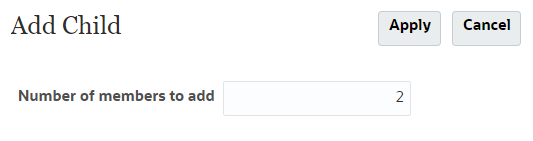
On the top bar, click Actions, then select Add Child.
In Add Child, enter 2 and then Click Apply.
The grid displays 2 new untitled rows.
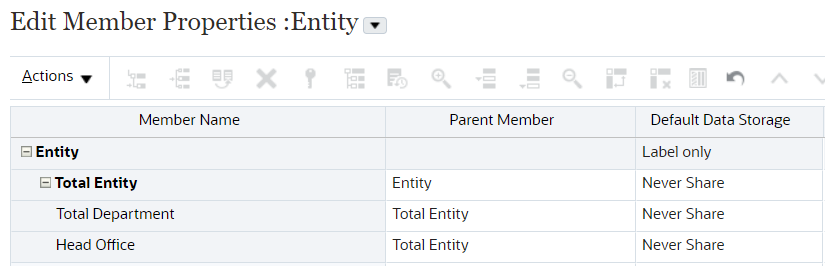
In the grid, for the new untitled member names, enter the following values:
Member Name
Total Department
Head Office
Click Save.
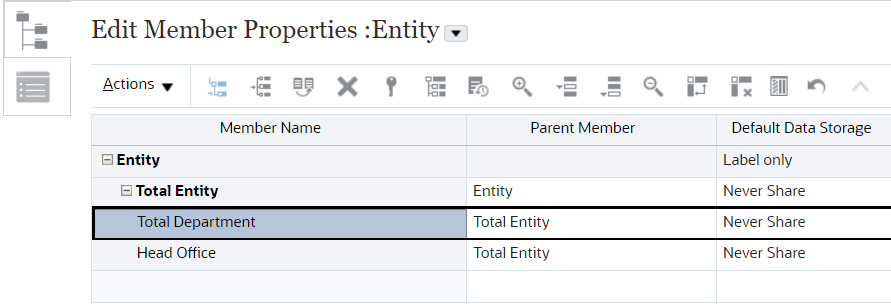
In the grid, click Total Department to select the row.
On the top bar, click (Add Child).
In Add Child, click Apply.
In the grid, for the new untitled row, update and select the following values:
Member Name
Default Data Storage
000
Store
Click Save.
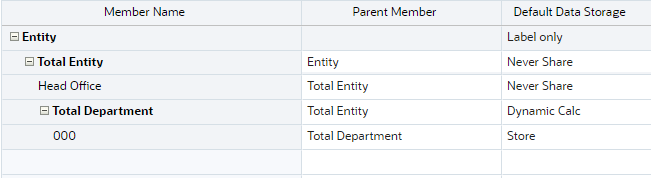
The members are displayed in their hierarchy.
Creating Shared Members
In this section, you create a shared member for a dimension.
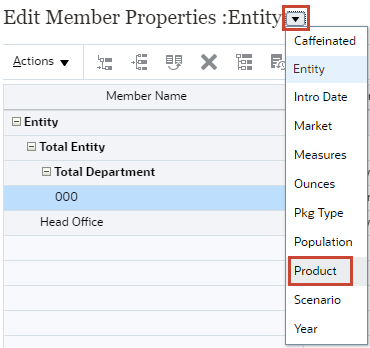
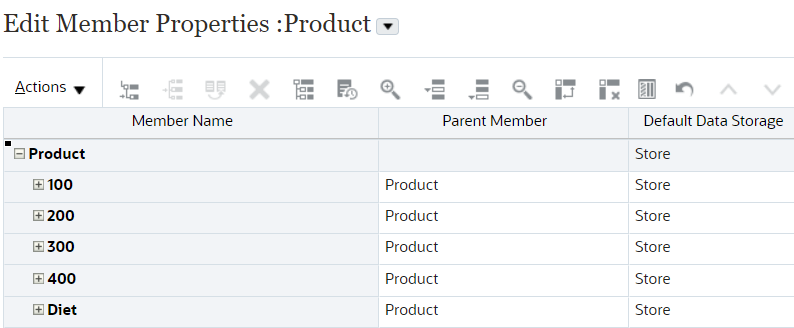
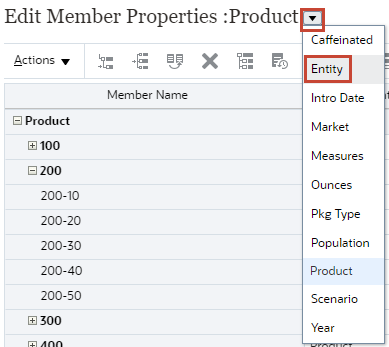
In Edit Member Properties, click the down arrow next to the dimension name, and select Product.
The members of the product dimension are displayed.
In the grid, for 200, click (Expand).
The 200 products are displayed in the grid.
On the top bar, click (Add Child).
In Add Child, click Apply.
The grid displays a new untitled row.
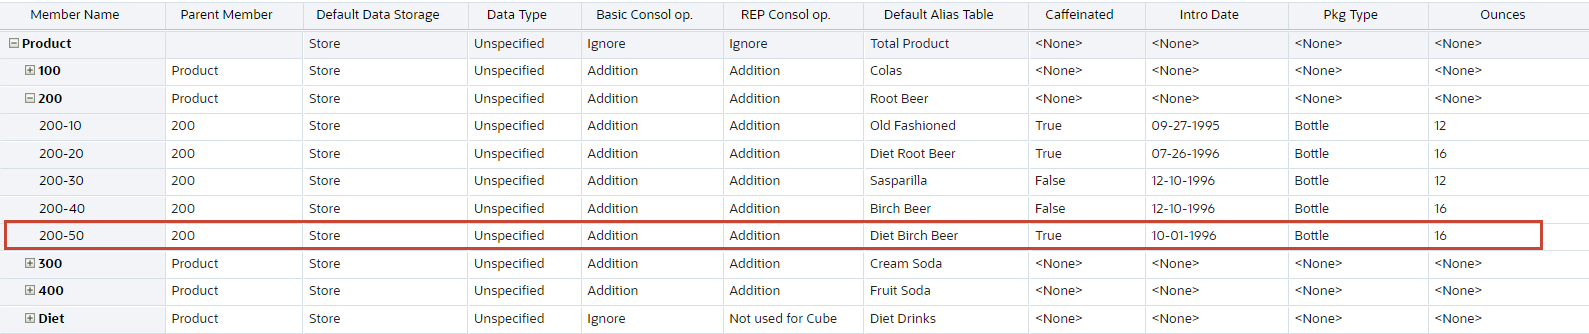
In the grid, for the new untitled row, update and select the following values:
Member Name
Default Alias Table
Caffeinated
Intro Date
Pkg Type
Ounces
200-50
Diet Birch Beer
True
10-01-1996
Bottle
16
Tip:
Ensure the parent member is 200.
Click Save.
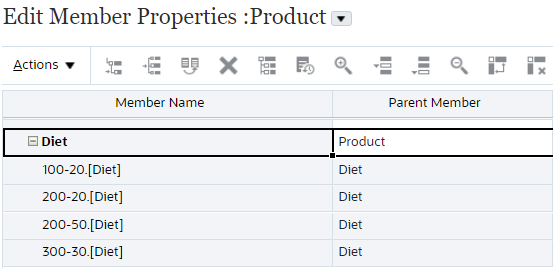
For Diet, click (Expand).
Click (Add Child).
In Add Child, click Apply.
The grid displays a new untitled row.
In the grid, for the new untitled row, update and select the following values:
Member Name
Default Data Storage
200-50
Shared
Tip:
Ensure the parent member is Diet.
Click Save.
200-50 displays as a shared member with square brackets indicating alternate hierarchy.
Note:
The rules for shared members are covered in Shared Members.
Managing Members
In this section, you perform tasks for managing dimension members.
Sorting Members
Caution:
Sorting dimensions with multiple hierarchies or complex consolidation paths can have unpredictable results.
In the grid, click Diet.
The row gets selected.
On the top bar, in Sort, click the drop-down and select Children.
On the top bar, click (Sort Ascending).
When prompted to proceed with sorting the outline, click Yes.
The members for Diet are sorted in ascending order.
Click Save.
Switching Dimensions
In Edit Member Properties, click the down arrow next to the dimension name, and select Entity.
The dimension is switched to Entity.
Modifying Members
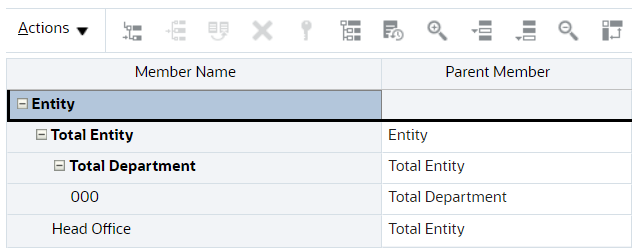
In the grid, click Entity, the dimension root member.
On the top bar, click (Zoom in All Levels).
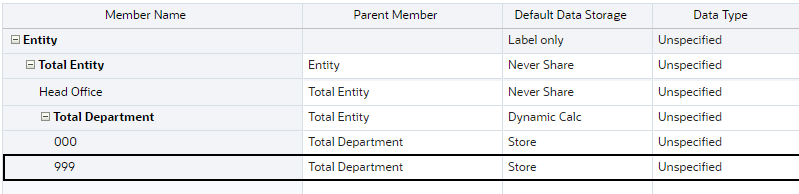
All the members under Entity are displayed.
Each column in the grid represents a member property.
In the grid, for Total Department, under Default Data Storage, click Never Share and replace its value by selecting Dynamic Calc.
Verify your changes, and click Save.
The modified values are displayed in the grid.
Viewing Member Formulas
Member formulas are attached directly to dimension members. They go beyond aggregation logic by letting you reference values in members anywhere in the outline, including other dimensions or databases. You can define member formulas to combine operators, calculation functions, dimension and member names, and numeric constants to perform calculations on members. Member formulas can also include:
Operator type, function, value, member name, UDA, and so on allowed in formulas.
Predefined formula expressions, including Smart List values, that expand into a formula or value upon database refresh.
Note:
There is no member formula support for ASO cubes.
If you have created member formulas you must refresh the database.
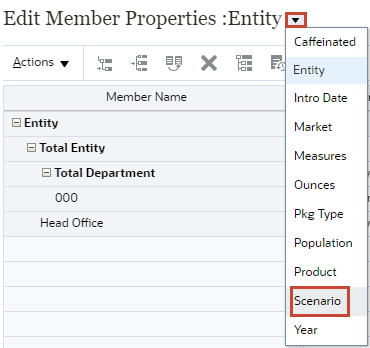
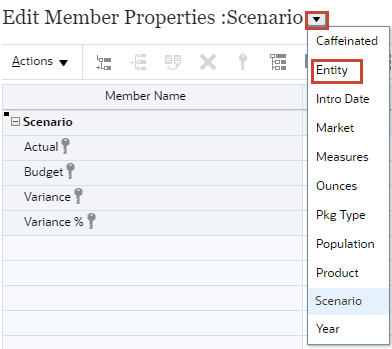
In Edit Member Properties, click the down arrow next to the dimension name, and select Scenario.
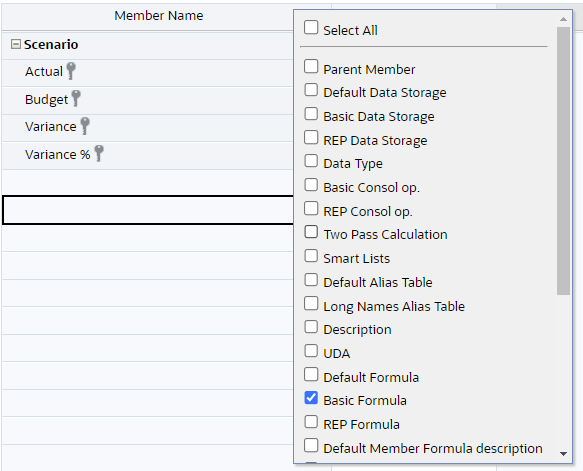
In the grid, right-click a column heading.
The window to select columns displays.
In Select Columns, expand Member Formula and check Basic Formula.
Click OK.
In the grid, click Scenario, the dimension root member.
On the top bar, click (Zoom in All Levels).
All the members under Scenario are displayed.
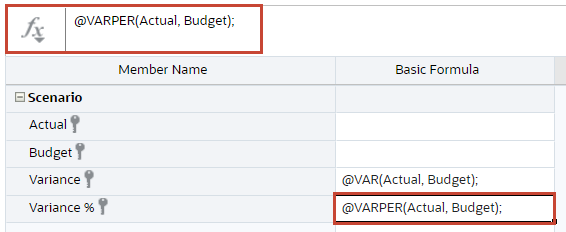
In Variance %, under Basic Formula, click @VARPER(Actual, Budget);.
The Member Formula used for Variance % is displayed above the grid.
In this example, the VARPER function is used to calculate the percentage variance (difference) between two specified members.
Moving Members
In Edit Member Properties, click the down arrow next to the dimension name, and select Entity.
On the top bar, click (Zoom in All Levels).
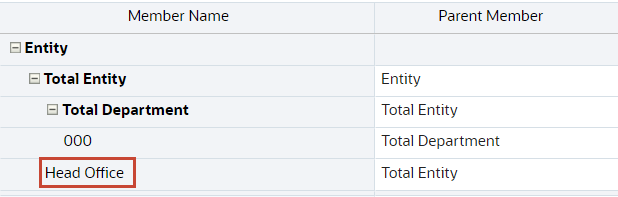
In the grid, click Head Office, the member to be moved.
On the top bar, click (Move Up).
The new hierarchy order is displayed.
Click Save.
Finding Members
In the grid, double-click in the first empty row and add details:
Member Name
Parent Member
Default Data Storage
999
Total Department
Store
Click Save.
The new member is displayed in the grid.
On the top bar, in the search box, enter 999 and click (Search Down).
The 999 member is highlighted.
Deleting Members
Caution:
Deleting members results in data loss when refreshing the database. Deleting entity members deletes all approval units (including data) associated with them.
In the grid, ensure that the row for 999 is selected.
On the top bar, click (Delete Member).
In Confirmation, click Yes.
The member - 999 is deleted.
Click Save, then click Cancel.
Refreshing the Database
In this section, you refresh the database due to changes made in the metadata structure.
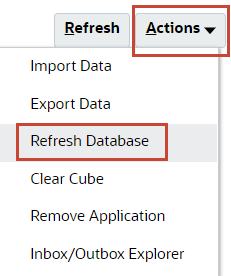
On the home page, click Application, then Overview.
On the top right, click Actions and select Refresh Database.
Click Create.
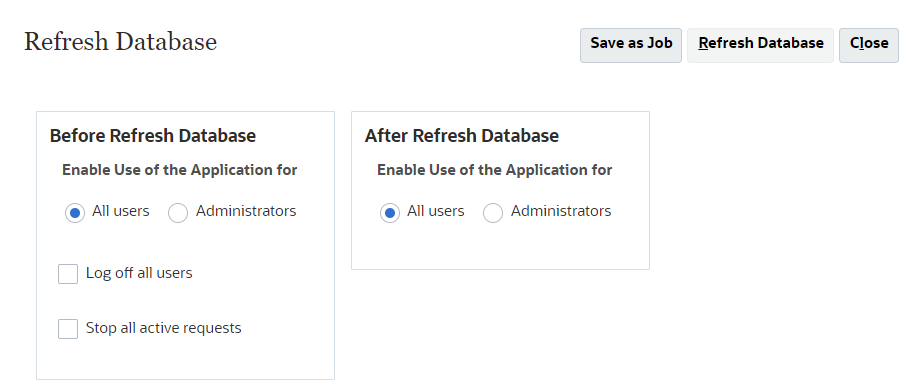
In Refresh Database, click Refresh Database.
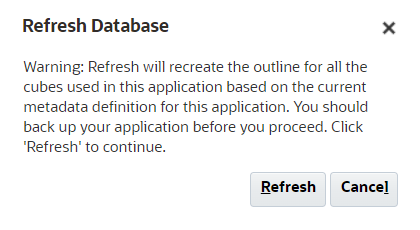
Click Refresh.
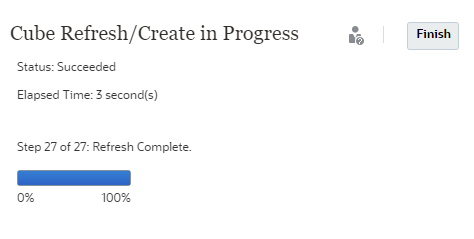
The Cube Refresh takes a moment to complete.
When finished, click Finish.
Click Close twice.
Managing Attribute Dimensions
In this section, you create an Attribute Dimension to assign a Regional VP to each of the regions for the Market base dimension.
Creating Attributes
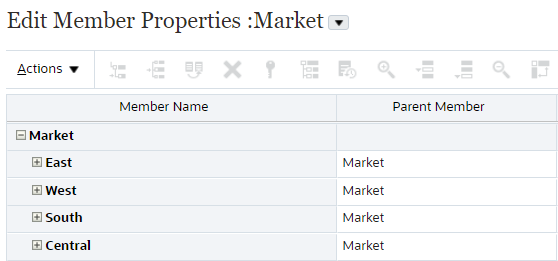
In Dimensions, click Market.
Edit Member Properties for Market is displayed.
Click (Edit Dimension Properties).
Under Custom Attributes, click Create.
In Create Attribute, in Name, enter Regional VP.
Click Save.
In Market, click Done.
In the Cube drop-down list, select All.
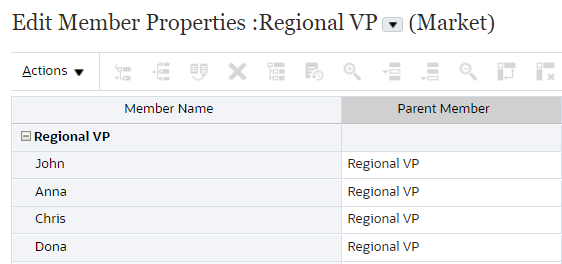
Click Regional VP.
The member properties for Regional VP attribute dimension are displayed with the base member name (Market).
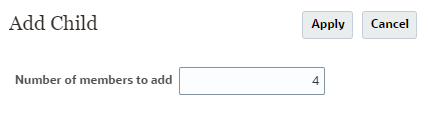
Click (Add Child).
In Add Child, enter 4.
Click Apply.
In the grid, for the new untitled members, update the following values:
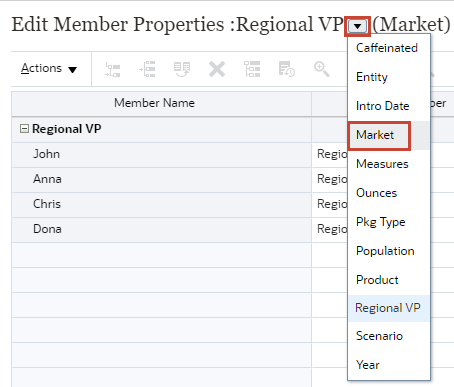
In Edit Member Properties, click the down arrow next to the dimension name, and select Market.
The base dimension is displayed.
On the top bar, click (Zoom in All Levels).
All the members under Market are displayed.
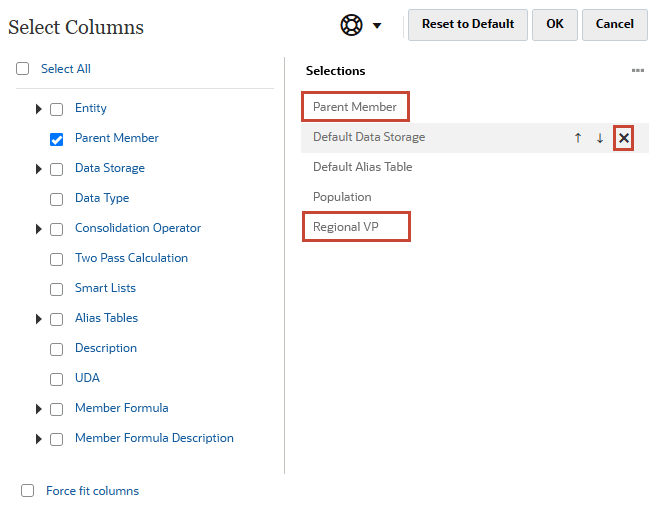
In the grid, right-click a column heading.
The window to select columns displays.
In Select Columns, verify that only Parent Member and Regional VP is selected and remove any other selections.
Click OK.
In the Regional VP column of the grid, for each child member, modify its values as follows:
John for all child members of East
Anna for all child members of West
Chris for all child members of South
Dona for all child members of Central
Regional VPs are assigned to each region.
Click Save.
Attribute dimension values are assigned to the Market base dimension.
Adding User-Defined Attributes
In this section, you create a User-Defined Attribute (UDA) and assign it to members.
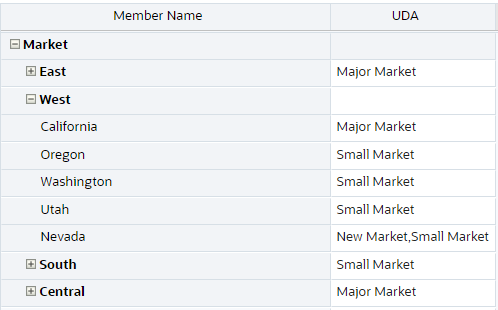
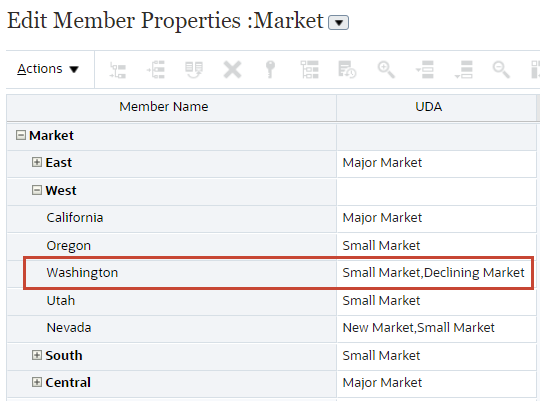
You can use UDAs to describe the characteristics of dimension members. For example, UDAs like New Market, Small Market, Major Market can be assigned to all members in the Market dimension. Then calculations can be done only for products designated as New Market.
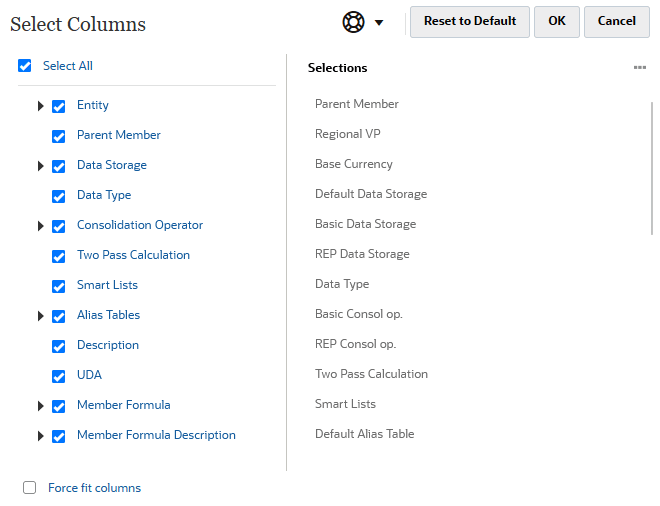
In the grid, right-click a column heading.
The window to select columns displays.
In Select Columns, click Select All.
Tip:
You can also enable just the UDA column as well.
Click OK.
The UDA column is displayed.
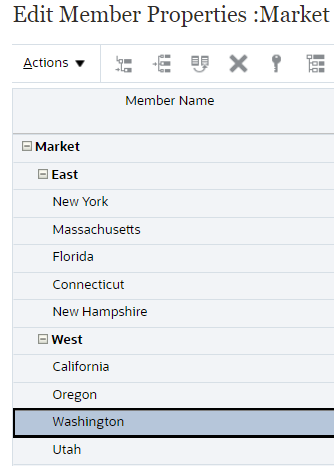
Click Washington.
The member row is selected.
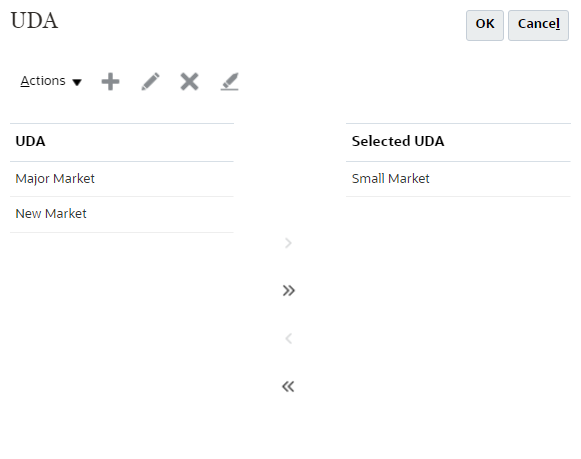
In the grid, scroll to the right, then under the UDA column, click the UDA cell for Washington.
UDA dialog is displayed.
In the UDA dialog, click (Create), enter Declining Market, and click Save.
In the UDA dialog, select Declining Market, click (Add) and then click OK.
The Declining Market is assigned to Washington as an additional UDA.
Click Save.
The UDA is available at the dimension level and can be assigned to more members.
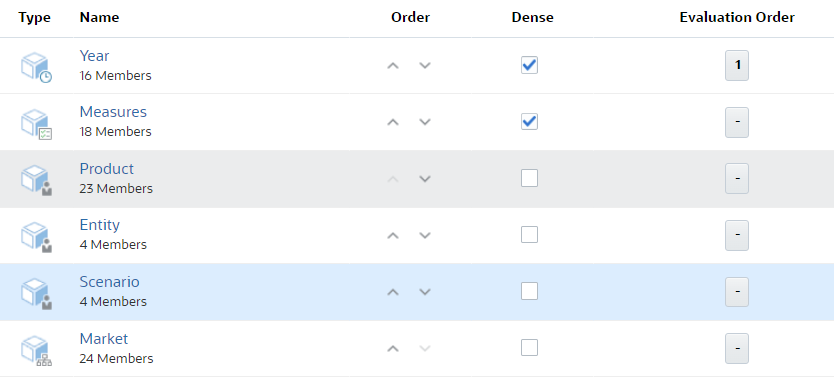
Setting Performance Evaluation Options
You can accelerate data retrieval and minimize memory and disk space requirements by setting the order of dimensions, setting dimensions as dense or sparse, and setting the evaluation order for dimensions.
Changing Dimension Order
Dimensions on the Dimensions page are listed in order of precedence. You can speed calculation time by changing the order for calculating dimensions. The order of dimensions is critical in the structure and performance. Dense dimensions calculate faster than sparse dimensions. When you order dimensions, place the dense dimensions first, followed by the sparse dimensions. Within the Dense section, dimensions should be ordered from most to least dense. Within the Sparse section, dimensions should be ordered from least to most sparse.
On the home page, click Application, then Overview.
In the horizontal tabs, click Dimensions.
In the Cube drop-down list, ensure Basic is selected.
In this example, the dimensions in the Basic cube of the sample FreeForm application are displayed. See the Prerequisites section of this tutorial for a copy of the snapshot of the sample FreeForm application.
For Entity, click (Move Up) until Entity is displayed below the Product dimension.
Setting Data Evaluation Order
Evaluation Order enables you to specify which data type prevails when a data intersection has conflicting data types.
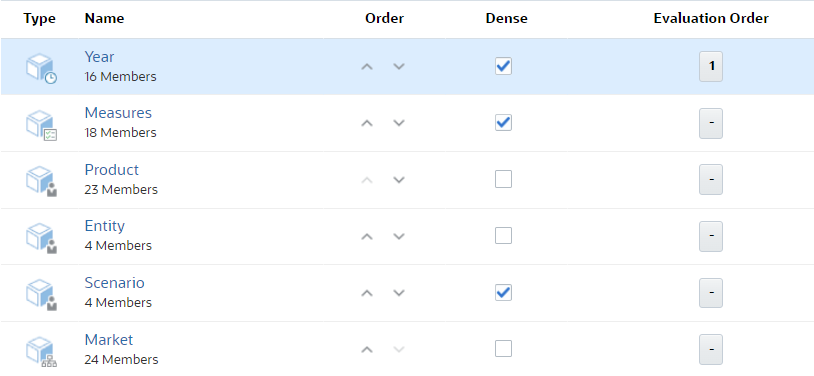
For Year, under the Evaluation Order column, click .
The evaluation order for Year is set as 1, indicating that the Year dimension is evaluated first.
Changing Density
If a dimension lacks data values for the majority of member combinations, define it as sparse. If a dimension has data values for the majority of member combinations, define it as dense.
For Scenario, clear the Dense column to set it as a sparse dimension.
Dimensions are sorted from dense to sparse as you go from top to bottom.
In this example, the import file loads an Entity dimension with the required header record and three data records. This is an example of a data file using a comma delimiter. The header record specifies the member to be imported (Entity), the parent member (Parent) into which to import the member, and the Data Storage property to assign to the member.
Entity, Parent, Data Storage
    Total Entity, Entity,
    000, ,
    Total Entity, 000, Shared
With this import file, metadata will be imported as follows:
Entity
    Total Entity
    000
        Total Entity(Shared)
The first data record (Total Entity, Entity) imports Total Entity as a child member of Entity. Unspecified property values will assume the default. For example, if data storage isn't specified, it assumes the default value, Never Share. The next data record (000, ,) imports Entity member 000 under the dimension root member because no parent is specified, and sets data storage to Never Share. The last data record (Total Entity, 000, Shared) imports a shared member of Total Entity under member 000, and sets data storage to Shared.
Importing from a Local File
On the home page, click Application, then Overview.
In the horizontal tabs, click Dimensions.
In this example, the dimensions in the Basic cube of the sample FreeForm application are displayed. See the Prerequisites section of this tutorial for a copy of the snapshot of the sample FreeForm application.
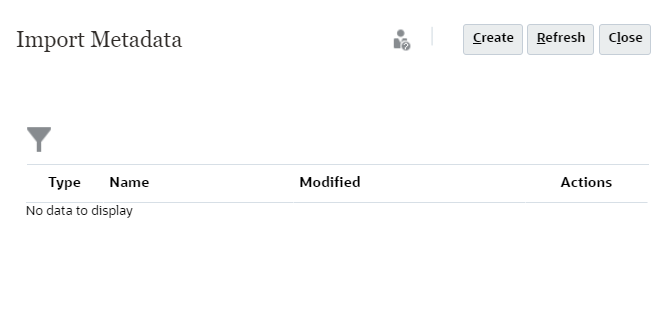
In Dimensions, on the top right, click Import.
The Import Metadata page is displayed.
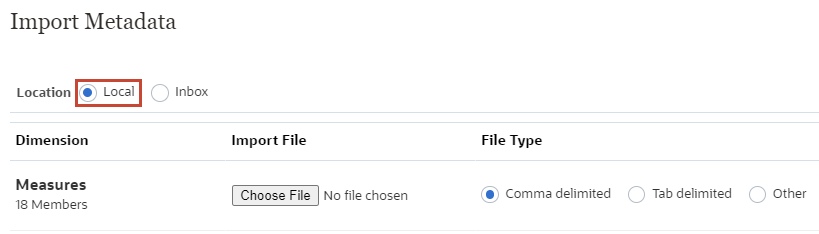
In Import Metadata, click Create.
For Location, select Local.
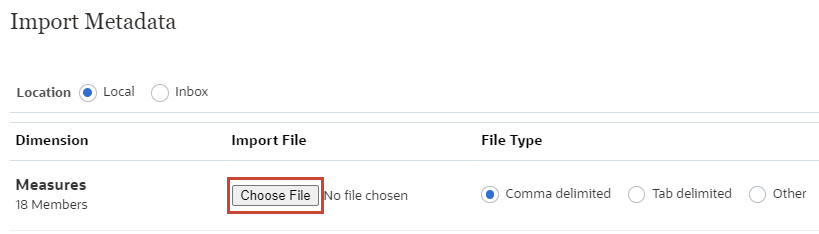
For Measures, select Comma delimited and click Browse.
The import file is provided in the Prerequisites. It is specific to the snapshot mentioned in Prerequisites.
Note:
Depending on your browser, the button label may display Choose File or Browse.
On your local computer, navigate to where you saved Measures.csv, then select and open it.
In Import Metadata, select Clear Members and then click Import.
Note:
Any member not specified is deleted from the application outline after importing the dimension unless it's an ancestor of a member that was specified, or it's a base member of a shared member that was specified.
If Clear Members isn't selected, the import will only add or update existing members. Oracle recommends loading the metadata file without selecting Clear Members to make sure the file loads successfully. Then, select Clear Members and execute the import again.
Clear Members is unavailable in certain dimensions where members must exist and are critical to the application.
Members that can't be deleted in the dimension editor for any reason (for example, because they're used in a form or in a validation rule) won't be deleted.
In the Options dialog, enable Refresh Database if Import Metadata is successful and click OK.
In the Information dialog, click OK.
Click Close twice.
In Dimensions, on the top right, click Refresh.
The import file loads the records for the dimension.
Importing from the Inbox
In Dimensions, click Actions, and then select Inbox/Outbox Explorer.
In Inbox/Outbox Explorer, click Upload.
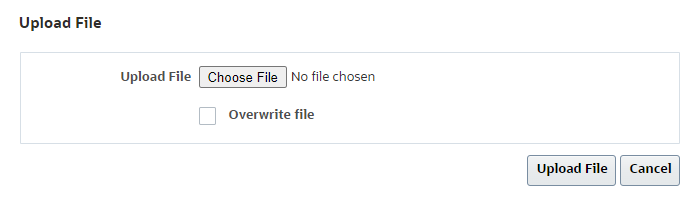
In Upload File, click Choose File.
Note:
Depending on your browser, the button label may display Choose File or Browse.
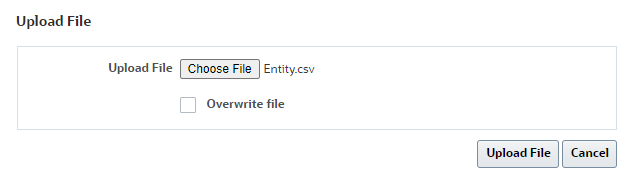
On your local computer, navigate to where you saved Entity.csv, then select and open it.
The import file is provided in the Prerequisites. It is specific to the snapshot mentioned in Prerequisites.
In Upload File, click Upload File.
Note:
Make a note of the filename for the upcoming import task.
In the Information dialog, click OK.
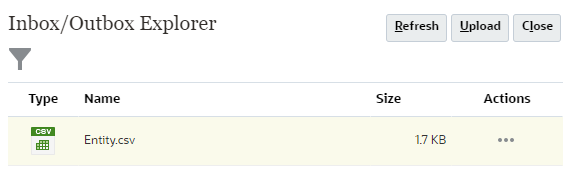
In Inbox/Outbox Explorer, click Close.
In Dimensions, on the top right, click Import.
The Import Metadata page is displayed.
In Import Metadata, click Create.
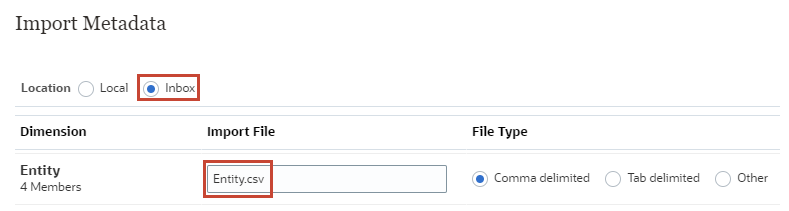
For Location, select Inbox.
Under Import File, for Entity, type Entity.csv.
Under File Type, for Entity, ensure Comma delimited is selected, then select Clear Members and then click Save as Job.
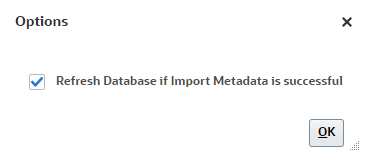
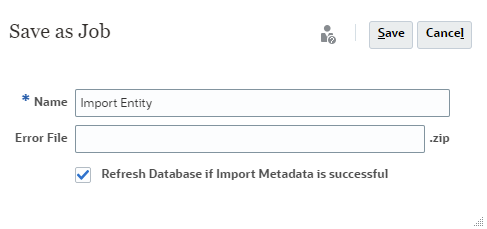
In Save as Job, type Import Entity, then enable Refresh Database if Import Metadata is successful and click Save.
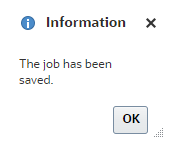
In the Information dialog, click OK.
In Import Metadata, click Close.
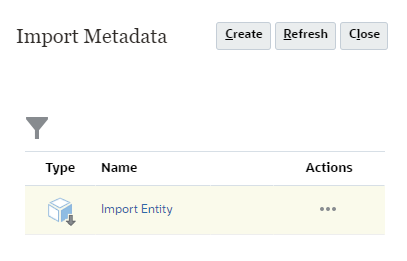
In Import Metadata, click Refresh.
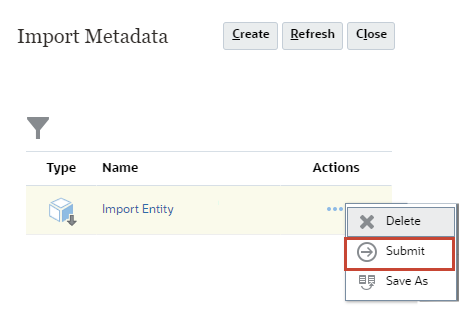
The Import Entity job is displayed.
For Import Entity, click (Actions) and select Submit.
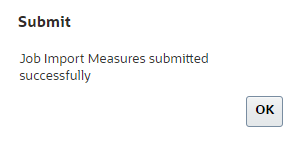
In the Submit dialog, click OK.
In Import Metadata, click Close.
From the cards on the top of the page, click Jobs.
The status of the job submitted is displayed.
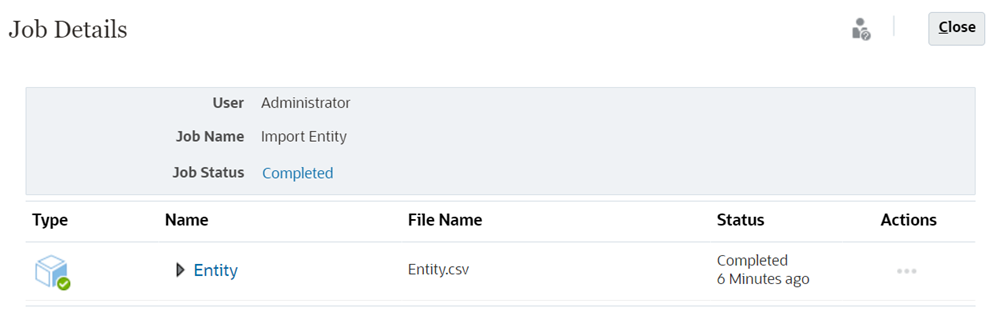
Under Recent Activity, click Import Entity.
Job Details is displayed.
In Job Details, under Name, click Entity.
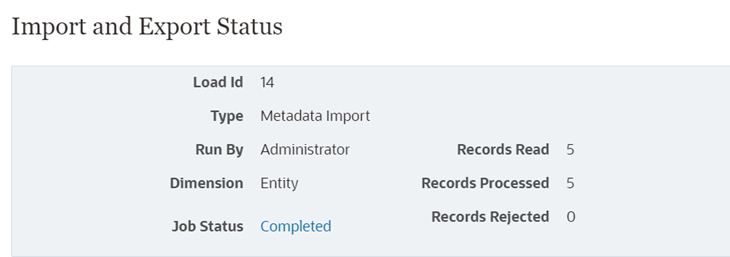
Import and Export Status displays the number of records processed.
Exporting Dimension Members
You can export metadata to create a backup or metadata load file template.
The application creates an export file for each artifact (.txt or .csv, depending on the file type), and all export files are consolidated into one zip file. You must extract the .csv or .txt files from the zip file if you want to use the files as import files (for example, when importing into another application).
Exporting to a Local File
On the home page, click Application, then Overview.
In the horizontal tabs, click Dimensions.
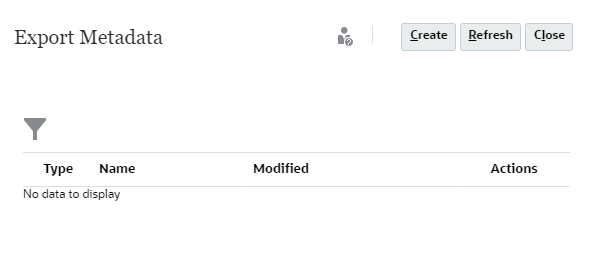
In Dimensions, on the top right, click Export.
In Export Metadata, click Create.
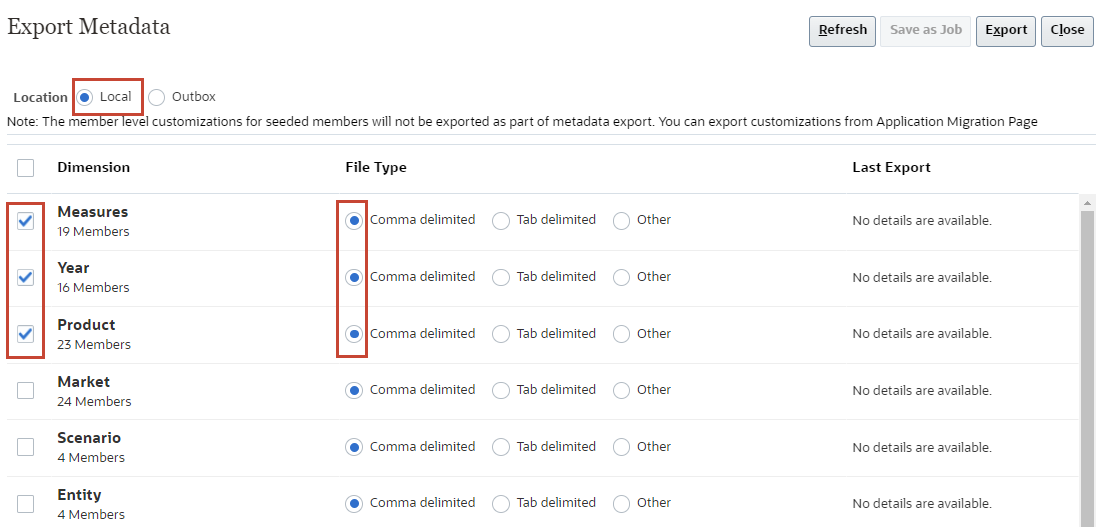
For Location, select Local.
Local: Saves the export file to a location on your local computer.
Under Dimension, select Measures, Year and Product, the artifacts to export.
Under File Type, ensure that Comma delimited is selected.
File Type options include:
Comma delimited: Creates a comma-delimited .csv file for each artifact.
Tab delimited: Creates a tab-delimited .txt file for each artifact.
Other: Creates a .txt file for each artifact. Enter the delimiter character that you want to use in the export file.
Verify your selections, the click Export.
Save the metadata zip file to a local folder.
Note:
Depending on how your browser is configured, the zip file may be saved automatically to the downloads folder for your browser.
Click Close twice.
Exporting to the Outbox
In Dimensions, on the top right, click Export.
In Export Metadata, click Create.
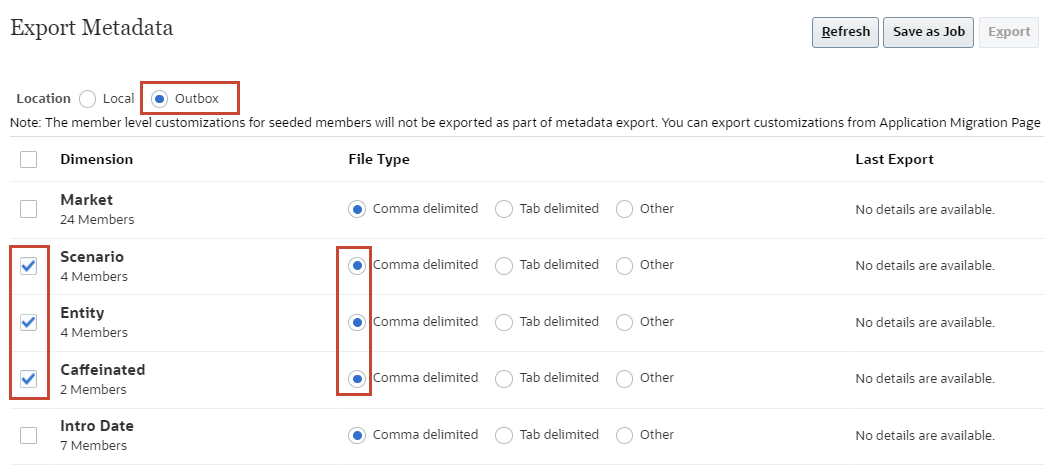
For Location, select Outbox.
Under Dimension, select Scenario, Entity and Caffeinated, the artifacts to export.
Under File Type, ensure that Comma delimited is selected.
File Type options include:
Comma delimited: Creates a comma-delimited .csv file for each artifact.
Tab delimited: Creates a tab-delimited .txt file for each artifact.
Other: Creates a .txt file for each artifact. Enter the delimiter character that you want to use in the export file.
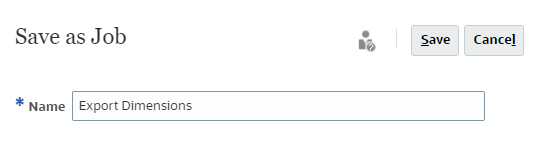
Verify your selections, then click Save as Job.
In Save as Job, type Export Dimensions and click Save.
In the Information dialog, click OK.
In Export Metadata, click Close.
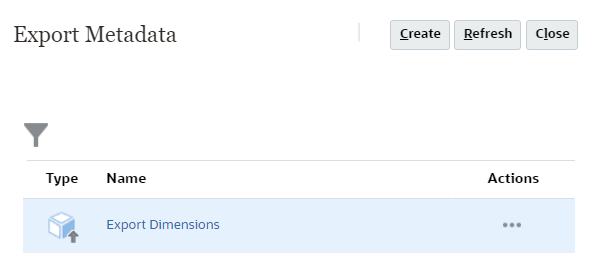
In Export Metadata, click Refresh.
The Export Dimensions job is displayed.
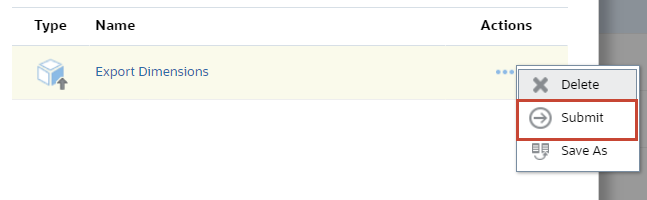
For Export Dimensions, click (Actions) and click Submit.
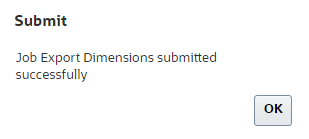
In Submit, click OK.
In Export Metadata, click Close.
From the cards on the top of the page, click Jobs.
The status of the job submitted is displayed.
Under Recent Activity, click Export Dimensions.
Job Details is displayed.
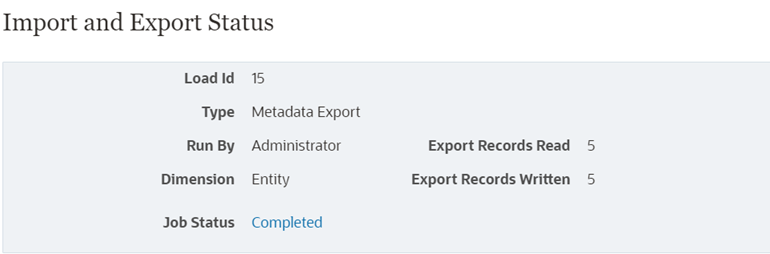
In Job Details, under Name, click Entity.
Import and Export Status displays the number of records processed.
Click Close.
From the cards on the top of the page, click Overview.
Click Actions, and then select Inbox/Outbox Explorer.
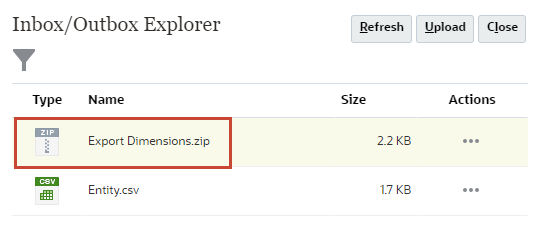
The Inbox/Outbox Explorer displays the exported consolidated zip file.
Note:
You can save the zip file by clicking the Actions icon for the respective file.


 (Edit Dimension Properties).
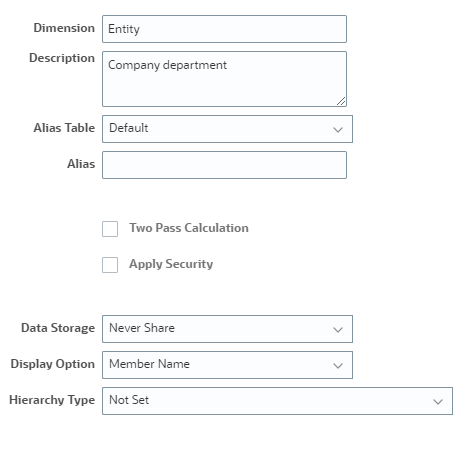

 (Add Child).
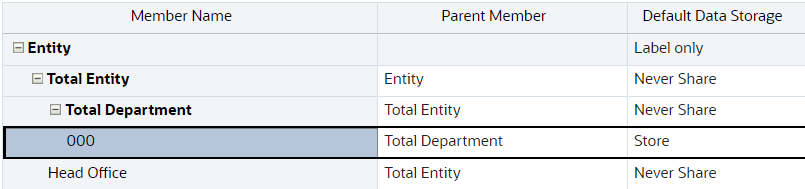
 (Expand).


 (Sort Ascending).
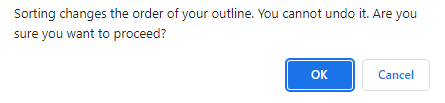
 (Zoom in All Levels).

 (Move Up).

 (Search Down).
 (Delete Member).
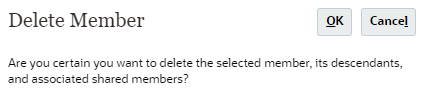


 (Create), enter Declining Market, and click Save.
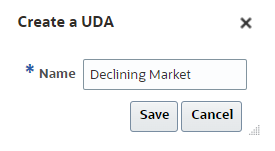
 (Add) and then click OK.
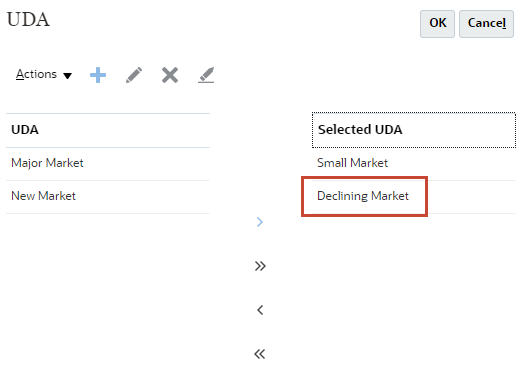

 (Move Up) until Entity is displayed below the Product dimension.
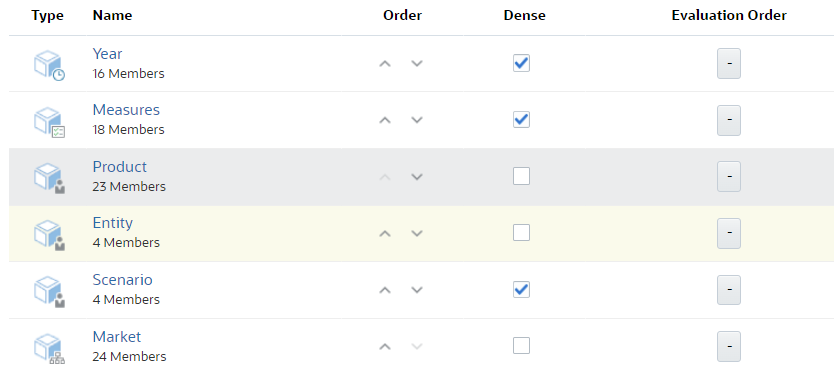


 (Actions) and select Submit.