Adding an Import Expression for a Data Driver

To add an import expression for non-numeric data:
  1. On the Setup tab, under Integration Setup, select Import Format.
  2. In Import Format, from the Import Format Mapping grid, select the data source column.
  3. In Expression, specify the import expression.
  4. Optional: You can also specify the expression type and value in the Add Expression field.
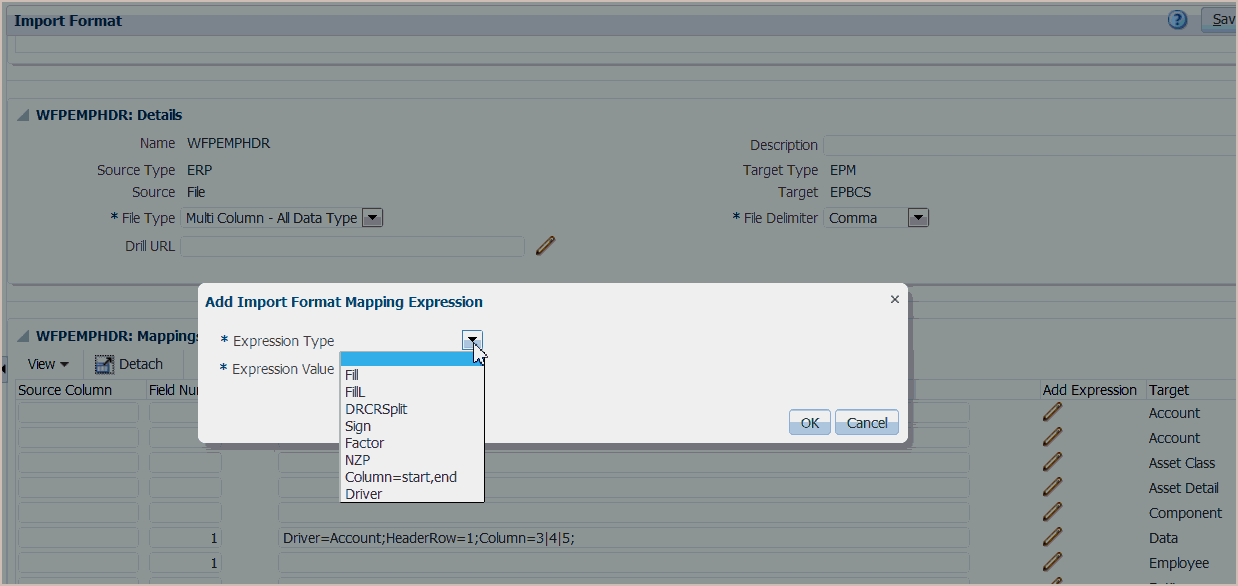
    1. Click Image shows Edit button.
    2. From the Expression Type drop-down, select Driver.

      Image shows Expression Type drop-down

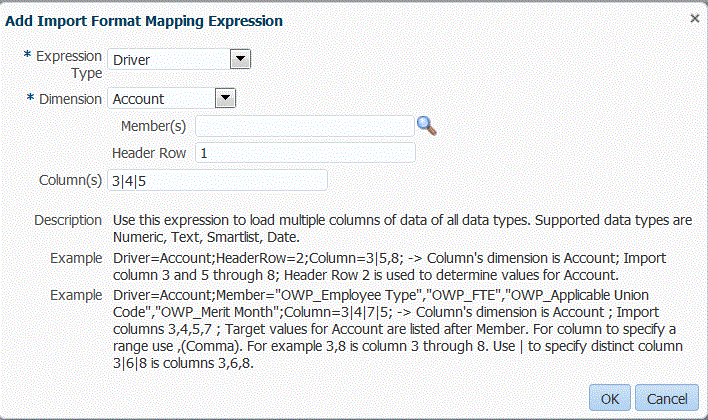
    3. In Add Import Format Mapping Expression when entering a driver, enter the values for the expression and click OK.

      Image shows Add Import Format Mapping Expression screen

      In Dimension, select the dimension to which the expression applies.
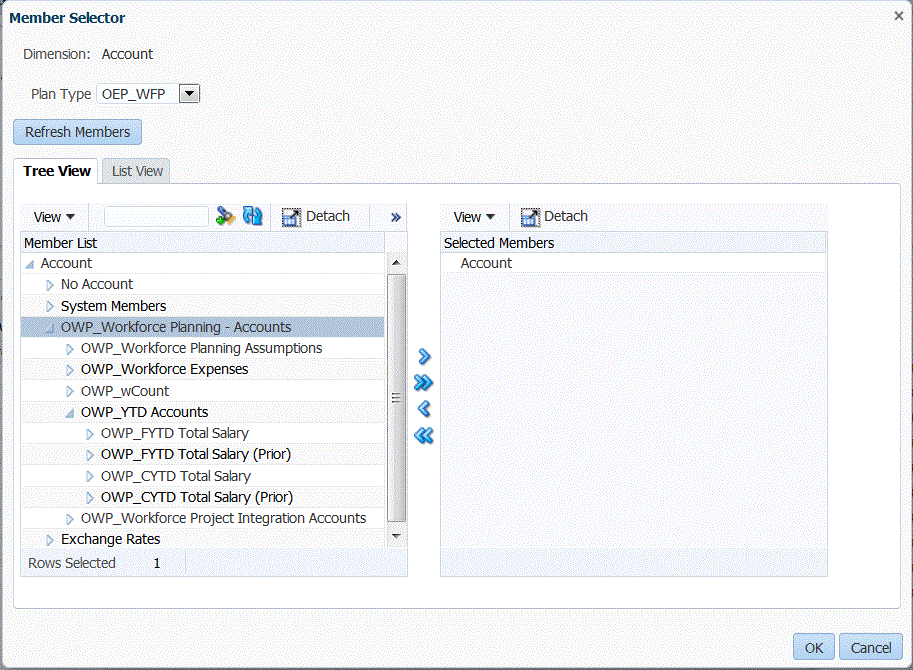
      In Member(s), select the dimension members. You can also browse and select members on the Member Selector screen. Member Selector screen
      In Header row, select the header row of the file for the expression.
      In Column(s), specify the data columns in the expression. To use a range of DATA columns, specify columns using a comma (,). To use non-contiguous DATA columns, specify columns using the pipe (|) delimiter.
    4. Click OK.
      In the following example, the "Project Element" is the driver member of the first header row, and includes contiguous rows "2,3", and non-contiguous rows "5,7".

      Import Mappings section