Creating Range Names Within Journal Templates
A range of columns comes predefined in the template, and you can simply fill out the top section in rows 5-13 and add any necessary columns. Data Management evaluates the named range to determine the POV, load method, and data to load.
To create your own journal template, you create a range name that includes all metadata and data cells, and that begin with the prefix ups. For example, for a standard template, create the range name [upsStandardJV (B16 to J33].
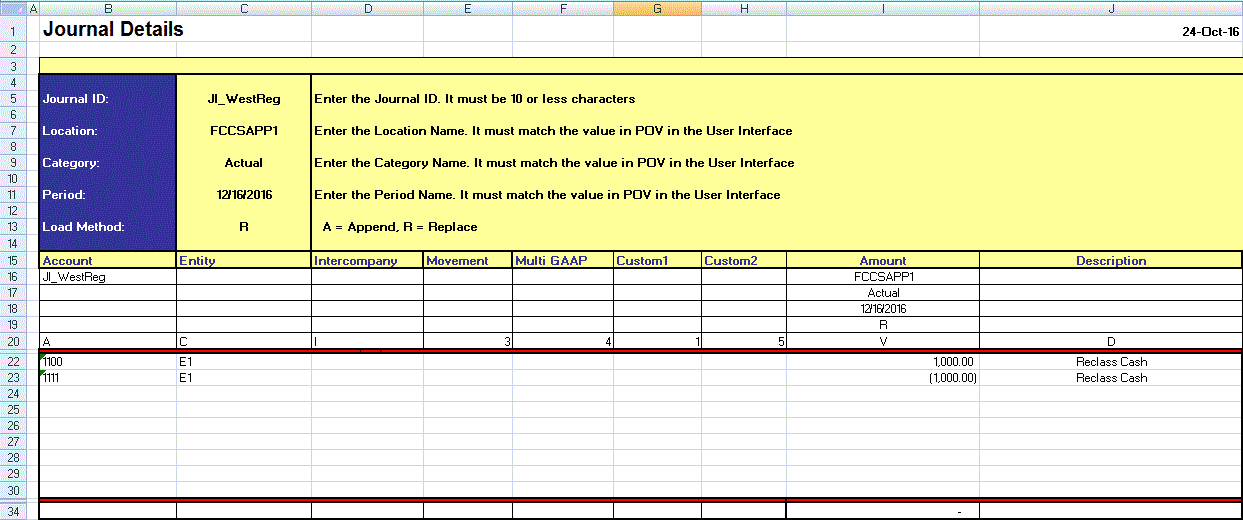
The following illustration depicts a journal template. Note that in this template, the metadata are not in rows 1–5, but in rows 16–20. The template has an upsJournal starting from row 16. Therefore, rows 16–20 are the first five rows in the upsJournal. Rows 4–14 is a simple interface to assist users with creating the metadata header. Metadata information is entered here and referenced by the metadata header.
(Enter journal data against the respective columns and by adding more rows within the range. The easiest thing to do is to add rows to the existing range and just use a single range, and use the default upsJournal. You add columns to the spreadsheet based on the dimensionality of the target application.)

The journal template must contain the following dimensions:
-
Account—It is the journal account (required).
-
Entity—It is the journal entity (required).
-
Intercompany— (Optional unless being used by Financial Consolidation and Close.)
-
Movement—Data changes from period to period (required)
-
Multi GAAP—Data changes from period to period (optional)
-
Custom1, Custom2 Dimensions—Optional unless used by the target application
-
Amount—(required)
-
Description—(optional)