Testing Check Rule Expressions
You can test a rule in the Test Expression tab of the Rule Logic tab and validate conditions for a combination of dimensions. When a test check rule is submitted, you can display errors that were found in the rule being tested.
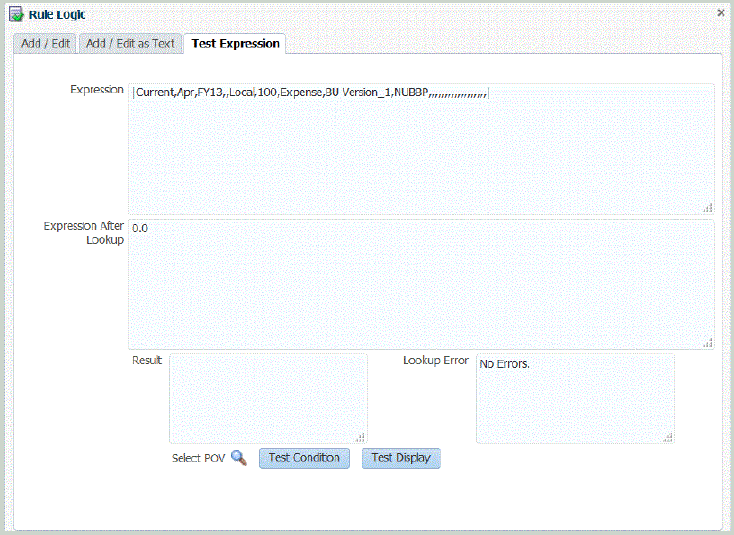
The Text Expression screen contains the following elements:
-
Expression—Area that displays the rule being tested
-
Expression After Lookup (Scratch Pad)—Area that displays the results of the expression being tested. (You can use the area for temporary storage of text and expressions by selecting text and right-clicking.)
Any expression in this field is removed when you click Test Condition or Test Display.
-
Result—Area that displays the results of the test condition (True or False)
-
Lookup Errors—Area that displays errors that were found in the expression being tested
-
Select POV—Enables you to select the Check Rule POV.
On the Select Point of View screen, you can select another POV, or select a specific entity on the Member Selector screen.
Note:
The POV can only be set after data was exported to the application for a specific POV. Then you can enter the POV and run the rule being tested. The POV entered remains set for the current session. You can navigate to the workbench and return without having to reset the POV. -
Test Condition and Test Display—Buttons that are used to run, respectively, the expression in the Condition or Display area on the Rule tab

To test a rule logic statement: