Changing Connections in EPM Cloud Multiple-Grid Worksheets

Data source types: Planning, Planning Modules, Financial Consolidation and Close, Tax Reporting

From the Document Contents pane, you can change connections for individual grids within a multiple-grid worksheet. This is useful when sharing a workbook between departments that point to different servers or when moving from a test to a production environment.

You can change the connection properties for all entities in a workbook that share the same connection information (for example, all worksheets or grids that point to the same application and cube on a particular service). Or you can change the connection information sheet by sheet. To do this, see Modifying Connections within an Office Document.

Use this topic to change connections properties on multiple-grid worksheets grid by grid.

To modify connections of a grid in a multiple-grid worksheet:
  1. If not already displayed, open the Document Contents pane.

    To open the Document Contents pane:

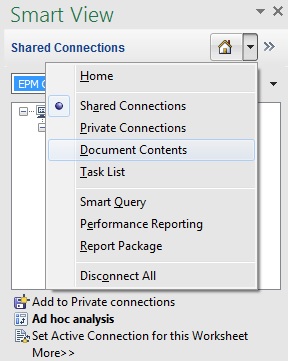
    1. In the Smart View Panel, click the arrow next to Home button, and select Document Contents.

      The Home button drop-down menu with the Document Contents option selected.

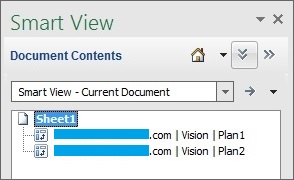
      The Document Contents pane is displayed in the area of the Smart View Panel


      The Document Contents pane, showing the connections used in the current document; in this case, there are connections to the Vision Plan1 and Plan2 cubes.
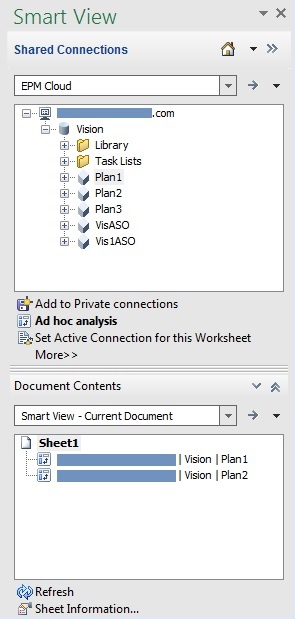
    2. To display both the library pane and the Document Contents pane in the Smart View Panel, click Restore button, looks like two downward pointing arrows., located at the top of the panel next to Home button.

      The Smart View panel with the both the library pane and the Document Contents pane displayed.
  2. In the Document Contents pane, highlight the grid to you want to work with in the tree, and then click Select.

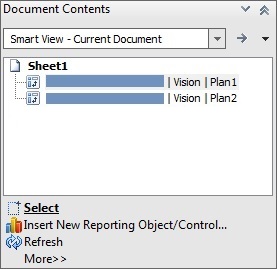
    In the following example, Vision | Plan 1 is highlighted in the tree.

    There are two items in the tree in the Document Contents pane, the Vision Plan1 cube and the Vision Plan2 cube. The first item in the tree, the Vision Plan1 cube, is highlighted.

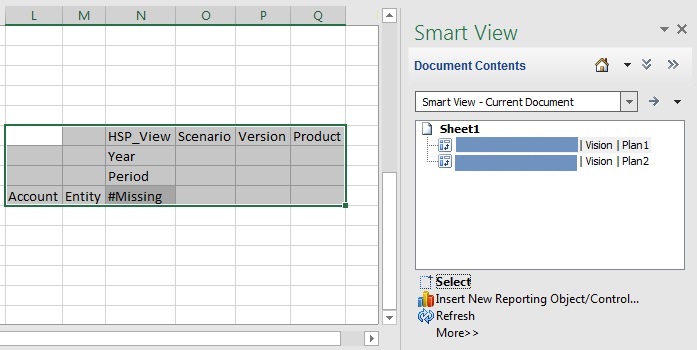
    Use the Select command to verify that you are working with the correct grid on the sheet. For example, after highlighting Vision | Plan1 and clicking Select, the Vision Plan1 grid on the worksheet is highlighted.

    Shows the Document Contents pane on the right, with Vision Plan1 highlighted, and the Vision Plan1 grid highlighted in the worksheet at the left.
  3. In the Action Panel, click More, and then select the Modify Connection.

    Alternatively, right-click a connection name or sheet name and select Modify Connection.

    The Edit Connection - URL page of the wizard is displayed.

  4. In the URL drop-down list, select an existing connection or enter a new connection URL, using private connection syntax.
  5. Click Next and in Edit Connection - Application/Cube, expand Servers, and navigate to the application and database to which you want to connect, depending upon the provider requirements.

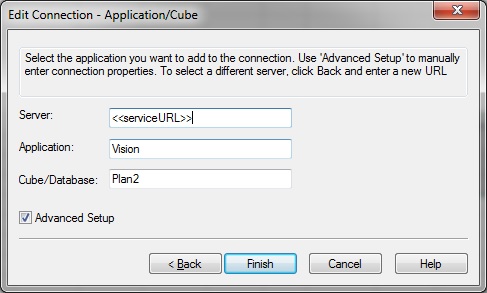
    Alternatively, select the Advanced Setup check box and manually enter the information for Server (your service URL), Application, and Cube/Database, as the provider requires.

    For example, Figure 14-3 shows the entries for connecting to an Oracle Essbase application and cube.

    Figure 14-3 Edit Connection - Application/Cube Advanced Setup


    Edit Connection - Application/Cube Advanced Setup wizard page showing Server, Application, and Cube/Database fields.
  6. Click Finish.
  7. In the Action Panel, click Refresh.
  8. Repeat this procedure to modify the connection information for any other grids in the workbook.
  9. To save the modified connection information, save the workbook.

    The modified connection information is saved when you save the workbook.