Creating Functions in the Function Builder
In the Function Builder, you select a function and specify the connection and members that you want the function to use.
The Function Builder then creates the function using the proper syntax and enters it into the selected cell. You can edit these functions.
The selections available to you in a given Function Builder field are limited by your selections in other fields of the Function Builder. For example, only the connections supported by the selected function are displayed, and only the dimensions supported by the function you select are displayed.
A cell reference can be selected for each function argument. Type-in functionality is available for each argument.
To create functions using the Function Builder:
- Connect to a data source.
-
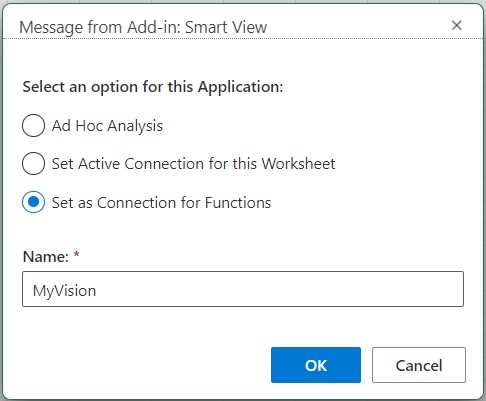
Select a cube and, in the connection dialog that displays, select
Set as connection for functions, then type a name for
the connection, and then click OK.
In the below example, the connection name is MyVision.
Note:
You must create a connection name for each new workbook.
The connection name is saved with the workbook. When you reopen the saved workbook, you will not be prompted to enter a connection name.
Figure 16-1 Connection Option and Name
- In the sheet, select the cell in to which you want to enter the function.
-
In the Smart View ribbon, click Functions and then click Build
Function,
 , to launch the Function Builder panel.
-
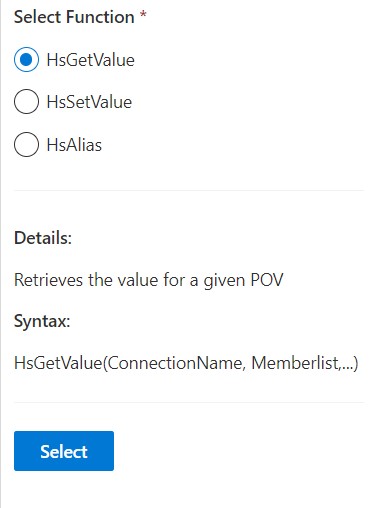
In the Function Builder panel, choose a function from
the list and then click Select.
Note:
Currently, Smart View supports these functions:
- HsGetValue
- HsSetValue
- HsAlias
- HsGetSheetInfo
For detailed explanation of these functions, see Function Descriptions.
In the below example, the HsGetValue function is selected.
Figure 16-2 Function Builder Panel, Supported Functions List
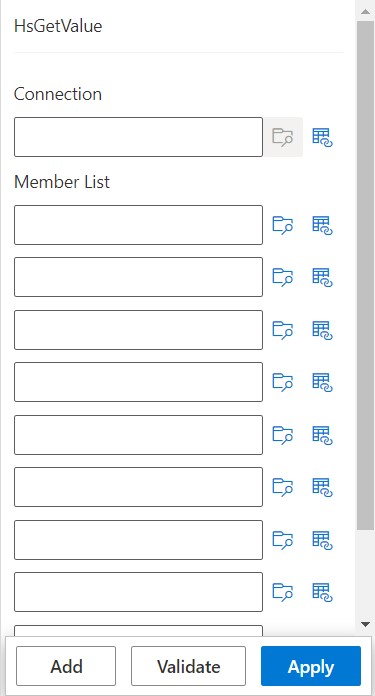
After clicking Select, the selected function's panel is displayed in the Function Builder. The following example displays the fields for HsGetValue in the Function Builder. These fields vary based on the selected function.
Figure 16-3 Function Builder Panel, Member List
-
For HsGetValue:
- In Connection, enter the connection name you specified in step 2.
-
In Member List, add an argument for each
dimension in the cube using any of the following methods:
- Click the Select Member button,
 , next to the argument text box, and in the
Member Selector, select a dimension
and member. Repeat for each dimension in the cube.
- Enter the argument manually by typing the dimension and member
pair in the text boxes using the format: dimension#member. For
example,
Year#Qtr1orYear#Jan. Repeat for each dimension in the cube. - To use cell references, follow the procedure in Using Cell References.
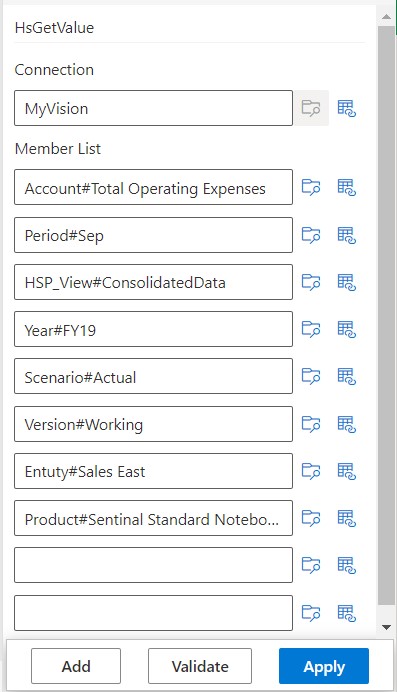
The following example displays a completed Member List for the HsGetValue function.
Figure 16-4 Function Builder panel for HsGetValue based on the Planning Vision Sample Database
- Click the Select Member button,
- Optional: To add more rows in the Member List, click Add.
-
For HsSetValue:
- In Value, enter the value that you want to set.
- In Connection, enter the connection name you specified in step 2.
- In Member List, add an argument for each dimension in the cube.
- Optional: To add more rows in the Member List, click Add.
-
For HsAlias:
- In Connection, enter the connection name you specified in step 2.
- Enter the values in the Member Name, Destination Alias, Source Alias, and Distinct Name fields.
- For HsGetSheetInfo: Select a property from the Sheet Property list.
-
Click Validate and correct any errors.
Errors are noted in the Function Builder panel, next to the problem areas.
Some of the errors that you may see are:
- Connection offline or invalid
- Invalid selection
- Member name is invalid or not matching selected alias
- Dimension name is invalid or not matching selected alias
- Incomplete Dimension#Member combination
- Generic "Error" in cases of missing quotation marks or other minor syntax errors
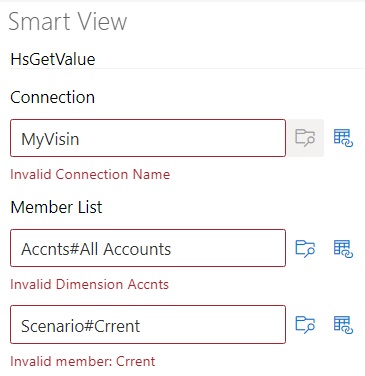
For example, Function Builder Validation Errors shows simple spelling errors that resulted in an invalid Connection name, an invalid dimension name in one argument, and an invalid member name in another argument.
Figure 16-5 Function Builder Validation Errors
Note:
Validate only works with dimension#member combinations that are hand-typed into the text boxes and does not apply to those dimension#members that are added using the Member Selector dialog. If all dimension#member combinations are entered using the Member Selector, then no validation messages regarding those combinations are displayed. You may still see an error regarding the connection name if it is misspelled.
- If the connection name is correct and all the other dimension#member combinations were added using the Member Selector dialog, then a "Validation successful" message will not display.
- If the connection name is correct and one or more dimension#member combinations were hand-typed correctly, then a "Validation successful" message will display.
-
Resolve the errors and click Validate again.
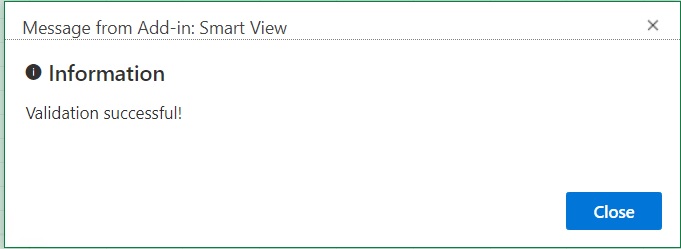
When the function validates correctly, a message appears stating that validation is successful.
- Click Apply.
- To execute the function, follow the procedure in Running Functions.