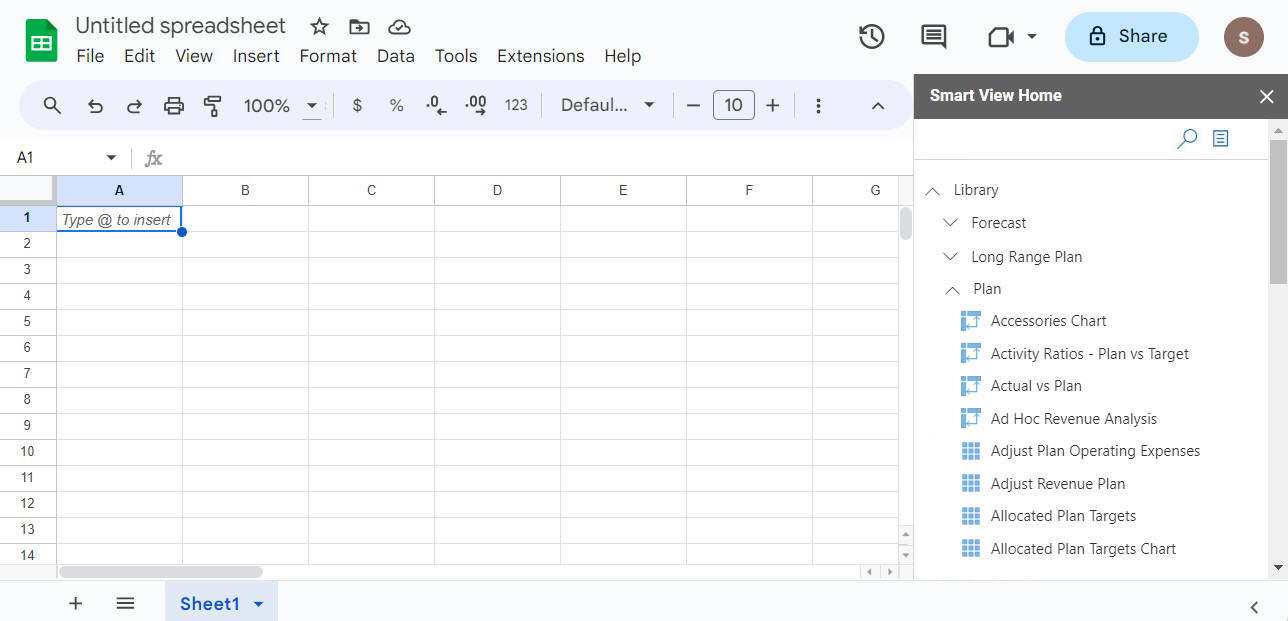
Connecting Using Company Sign In Credentials
You can sign in to your business process environments from Oracle Smart View for Google Workspace using your organisation's sign in credentials.
Before you start:
- Ensure that you have installed the Oracle Smart View for Google Workspace extension from Google Workspace Marketplace and provided the access permissions required by Google Workspace. For more information, see Installing Smart View in Getting Started with Oracle Smart View for Google Workspace.
- Ensure that you have the connection credentials provided by your Service Administrator for Client ID, IDCS URL, and Scope. For more information, see Creating an Oracle Identity Cloud Service (IDCS) Application in Getting Started with Oracle Smart View for Google Workspace.
- Ensure that your Service Administrator has enabled the Smart View Extension for Google Sheets for your business process. For more information, see Enabling the Smart View Extension for Google Sheets in Getting Started with Oracle Smart View for Google Workspace.
- To troubleshoot connection issues while connecting to your business process from Google Sheets using Smart View, see Troubleshooting Connection Issues.
To connect to your business process environment using company sign in credentials:
- Sign in to Google Sheets using your Google Workspace credentials and open a new spreadsheet.
- In the Extensions menu, select Smart View for Google Workspace, and then select Connect under Start.
- In the Connect dialog box, select the Company Sign
In check box.
By default, this check box appears selected or cleared based on your previous selection.
-
Enter the server URL and connection credentials of Client ID, IDCS URL, and Scope shared by your Service Administrator.
You can click the Server URL list to view the previously connected URLs or search the list by typing a part of the desired URL and selecting it from the filtered matching results. Alternatively, if your Service Administrator has shared a connections JSON file, click Load Connections to browse, select, and load the connections from the file.
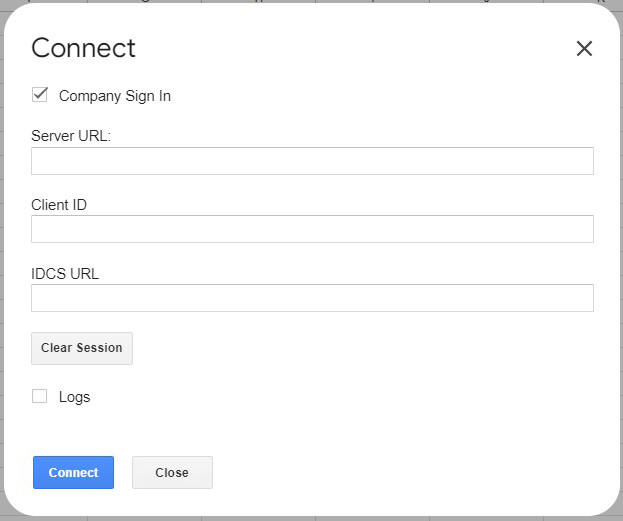
The server URL and other details are populated automatically based on the connection scenarios described in Connection Scenarios. To change the display order of the previously connected server URLs or to delete them from the list, see Managing Connections.
The connection details are as follows:
-
Server URL: This refers to the web application environment link of your Oracle Fusion Cloud Enterprise Performance Management business process.
Modify the web application link to remove "/epmcloud" and add "/HyperionPlanning" towards the end of the link.
-
Client ID: This is generated as part of the IDCS application creation process.
To find the Client ID in the Oracle Cloud Console, go to Identity domains and click Integrated applications. Click your IDCS application link, and in the OAuth configuration tab under General Information, see the value in the Client ID field.
-
IDCS URL: This is the URL that you get on the Sign In page when you open your Cloud EPM web application.
Modify the link to retain it till "identity.oraclecloud.com" and remove the characters after this part. For example,
https://idcs-<instanceID>.identity.oraclecloud.com. -
Scope: This determines the resources available for each application. The scope is added as part of the IDCS application creation process.
To find the Scope in the Oracle Cloud Console, go to Identity domains and click Integrated applications. Click your IDCS application link, and in the OAuth configuration tab, under Resources, see the value in the Scope column for each resource.
For example,
urn:opc:serviceInstanceID=<SERVICE_INSTANCE_ID>urn:opc:resource:consumer::all offline_access.To avoid signing in to your business process frequently from Google Sheets due to session expiry, ensure that scope is appended with
offline_accessas shown in the above example. It enables you to obtain new access tokens after your usual tokens expire, thus reducing reauthentication and frequent sign-ins. See troubleshooting topic Issue: Frequent prompts to sign in and reauthenticate.
-
- Click Connect.
-
If
offline_accessis not appended in the Scope field, then a message appears "Access will not be refreshed after session expiry as offline_access is not added to Scope. Continue session without generating refresh tokens?".- Click Yes, to continue connecting without generating refresh tokens. In this case, you will be prompted to authenticate again after session expiry.
- Click No, to go back and append
offline_accessin the Scope field as shown in the above step.
-
If
offline_accessis appended in the Scope field but the service administrator has not enabled refreshing of tokens required to prevent session expiry, an error message appears "Service Administrator has not enabled refreshing of access tokens for this instance".In this case, you can still continue connecting to your business process without automatic token refresh. Click OK in the message, go back to the Scope field, and remove the appended
offline_access. Click Yes in the message prompting you to continue connecting without generating refresh tokens.
See troubleshooting topic Issue: Frequent prompts to sign in and reauthenticate.
-
- Complete the authentication in the following ways based on how it was set up in the
IDCS application creation process by your service administrator.
-
Device Code Method: If a Device Code is configured, then the Device Log In dialog box appears.
- In the Device Log In dialog box, copy the
displayed code to clipboard. You will need to enter this code in the
next step.
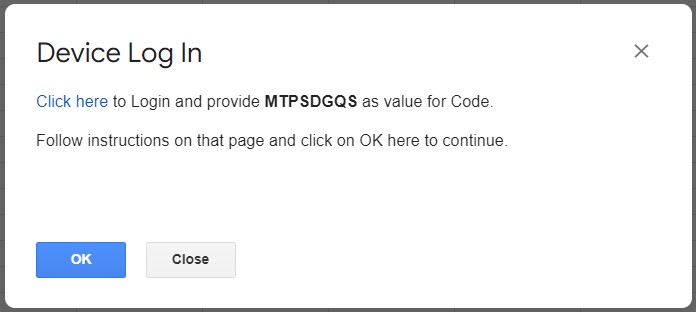
- Click the Click Here link, and after you
authenticate using your cloud credentials, enter the copied code in
the Code field on the Device Log
In page.
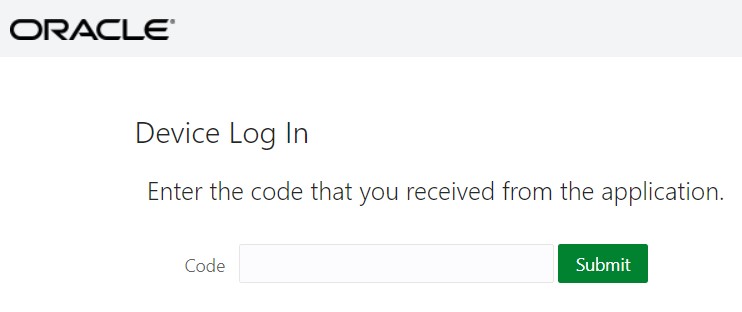
- Click Submit.
Once you get a confirmation message stating you have access to your application, you can close the tab and return to the tab where Google Sheets is open.
- In Google Sheets, click OK in the Device Log In dialog box. A toast message appears stating that you have got the access token. You are now connected to your business process from Google Sheets.
- In the Device Log In dialog box, copy the
displayed code to clipboard. You will need to enter this code in the
next step.
-
Authorization Code Method: If a Device Code is not configured, then a new browser tab opens where you need to sign in to your business process.
- In the Oracle Cloud Account Sign In page, enter your user name and password.
- Click Sign In.
On successful sign in, a message appears stating that authentication is completed. You can close this tab.
- Return to the Google Sheets tab and click Confirm in the
Connect dialog box.
You are now connected to your business process from Google Sheets.
-
- In the Connect dialog box, click Launch
Home to open the Smart View Home panel.
In the Smart View Home panel, you can view the library and work on forms and ad hoc grids present in the business application.