Assign a Schedule to a Resource
The supervisor can update a resource’s calendar and the changes are visible with immediate effect.
-
Calendar icon present on the Home page (if configured on the layout)
-
Calendar icon present in the hamburger menu (if added on the Main menu context layout)
-
From the Resource Info page, using the Resource Calendar option (if added on the Resource/User Info layout)
Assigning a Schedule
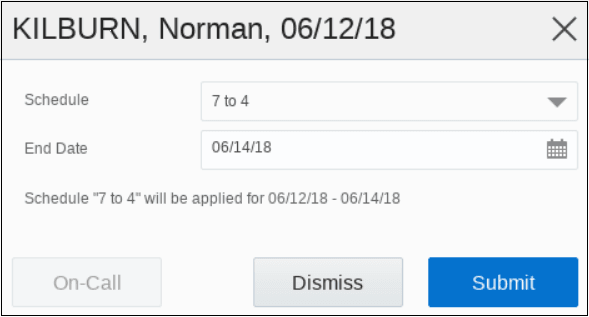
You can assign a schedule that exists in the application to a resource.
-
Click Submit. The new schedule is applied to the resource.
What to do next
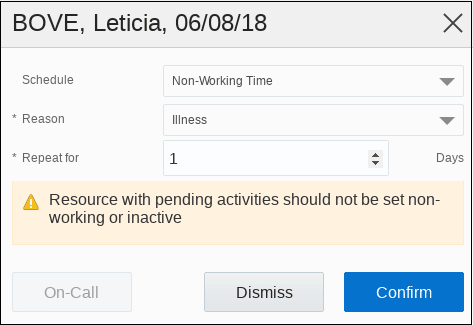
Non-Working Time Option
You can schedule an activity under the Non-Working Time category, if a mobile worker needs a day off, because of reasons such as vacation or illness. However, you cannot apply non-working time if the mobile worker has activities other than repeating, shift, or mass type activities assigned for the day. A warning message appears on the dialog box, and if you click Confirm, then the non-working time is applied regardless of the resource’s schedule.