Draw Polygon to Select Activities
When you enable the Scheduling Layer, you’ll see a Lasso icon on the Route Map page. Dispatchers and mobile workers can draw a ploygon using the lasso to select activities.
The lasso icon helps you switch to ‘draw’ mode, where you can select activities on the Scheduling Layer. You can select all the activities within a drawn closed shape and all the selected activities are displayed in the activity panel. You can add the selected activities to your route.
How to select activities as a mobile worker?
Follow the steps below to select activities:
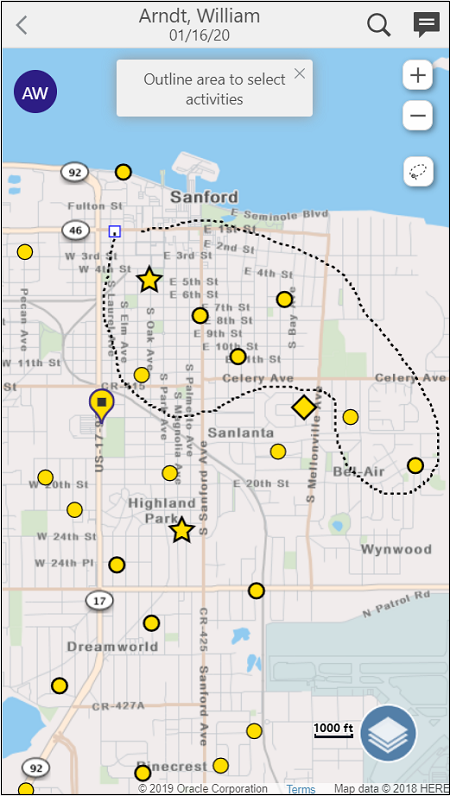
- Click the Lasso icon to switch to drawing mode.
A message Outline area to select activities is displayed on top of the map.
- Draw an closed shape in the Scheduling layer. Select the listed activities and assign them to your route. Click Assign.
- Review the route impact, position of the activity in the route and select the resource to whom you want to move the activity. Scroll forward beyond midnight if activities extend into the next day. You can scroll up to 24 hours into the following day.
- Click Move to assign the activities to yourself.
- To cancel the drawing mode, close the message hint or zoom the map in or out.
Show Selected Activities on the Dispatch Map as a Dispatcher
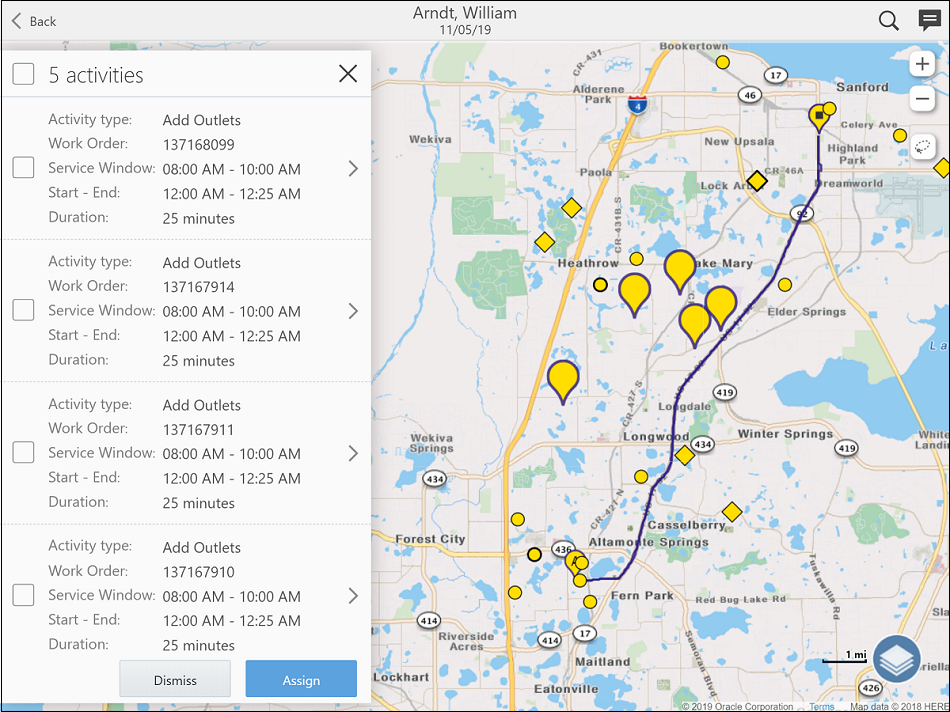
As a dispatcher, you can select multiple activities on the Dispatch map by drawing polygon or selecting clustered activities. The selected activities appear on the right panel on the map. When you mark one or several activities in the panel, the top panel displays the number and total duration of the marked activities.
-
Drag the marked activities to a resource from the tree.
- Review the route impact, position of the activity in the route and select the resource to whom you want to move the activity. Scroll forward beyond midnight if activities extend into the next day. You can scroll up to 24 hours into the following day.
-
Click Move to assign the activities to the selected resource.
In the panel, the activities are listed according their priority (Urgent, Under risk, Other). The activities appear on the map with different markers, such as bubbles.
Show identifiers on the route map
When you select multiple activities on the Route map (by drawing polygon or selecting clustered activity), the panel displays activity markers and activity identifiers for the activities.