Configure Core Application for the New Activity Type

You can configure how new activity types can be used.

  1. Navigate to the Configuration page and click Action Management.
  2. In the Action Management page, create an action link with the following details:
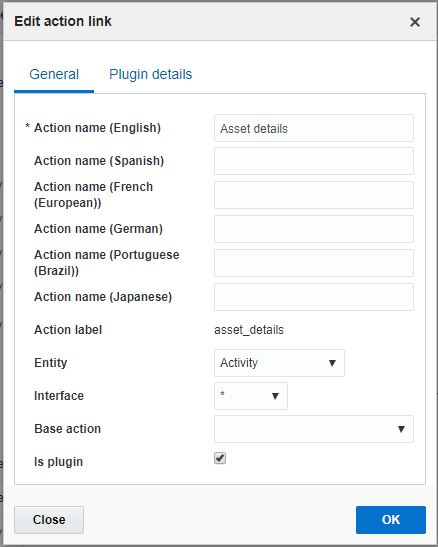
    Set your options in the General tab.

    This screenshot shows the Edit Action Link dialog box with General tab options.


    This screenshot shows the Edit Action Link dialog box with General tab options.

    Set your options in the Plugin details tab.

    This screenshot shows the Edit Action Link dialog box with Plugin details tab options.


    This screenshot shows the Edit Action Link dialog box with Plugin details tab options.

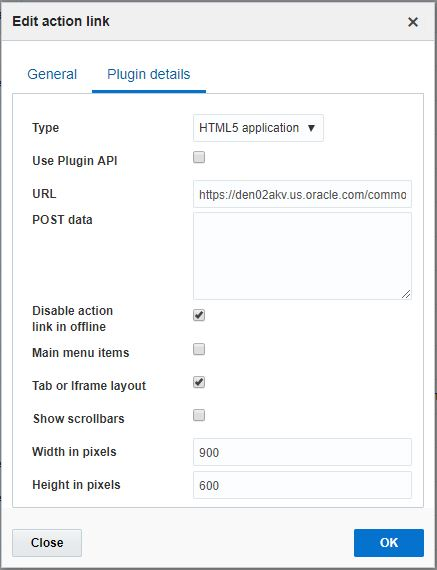
    Make sure the URL show the details of your IOT host, for example https://your_iot_host/commonui/indexWidget.html?app=AM&root=assetDetail&assetDetail={asset_name}.

  3. In the Configuration page, click User Types.
  4. In the User Types page, select the Screen Configuration tab:
  5. Add the above created action link Asset details to the context Edit/View Activity.
  6. Drag and drop the actions named Asset details to the palette and give visibility condition as Activity type[aworktype] equals to Asset Maintenance.
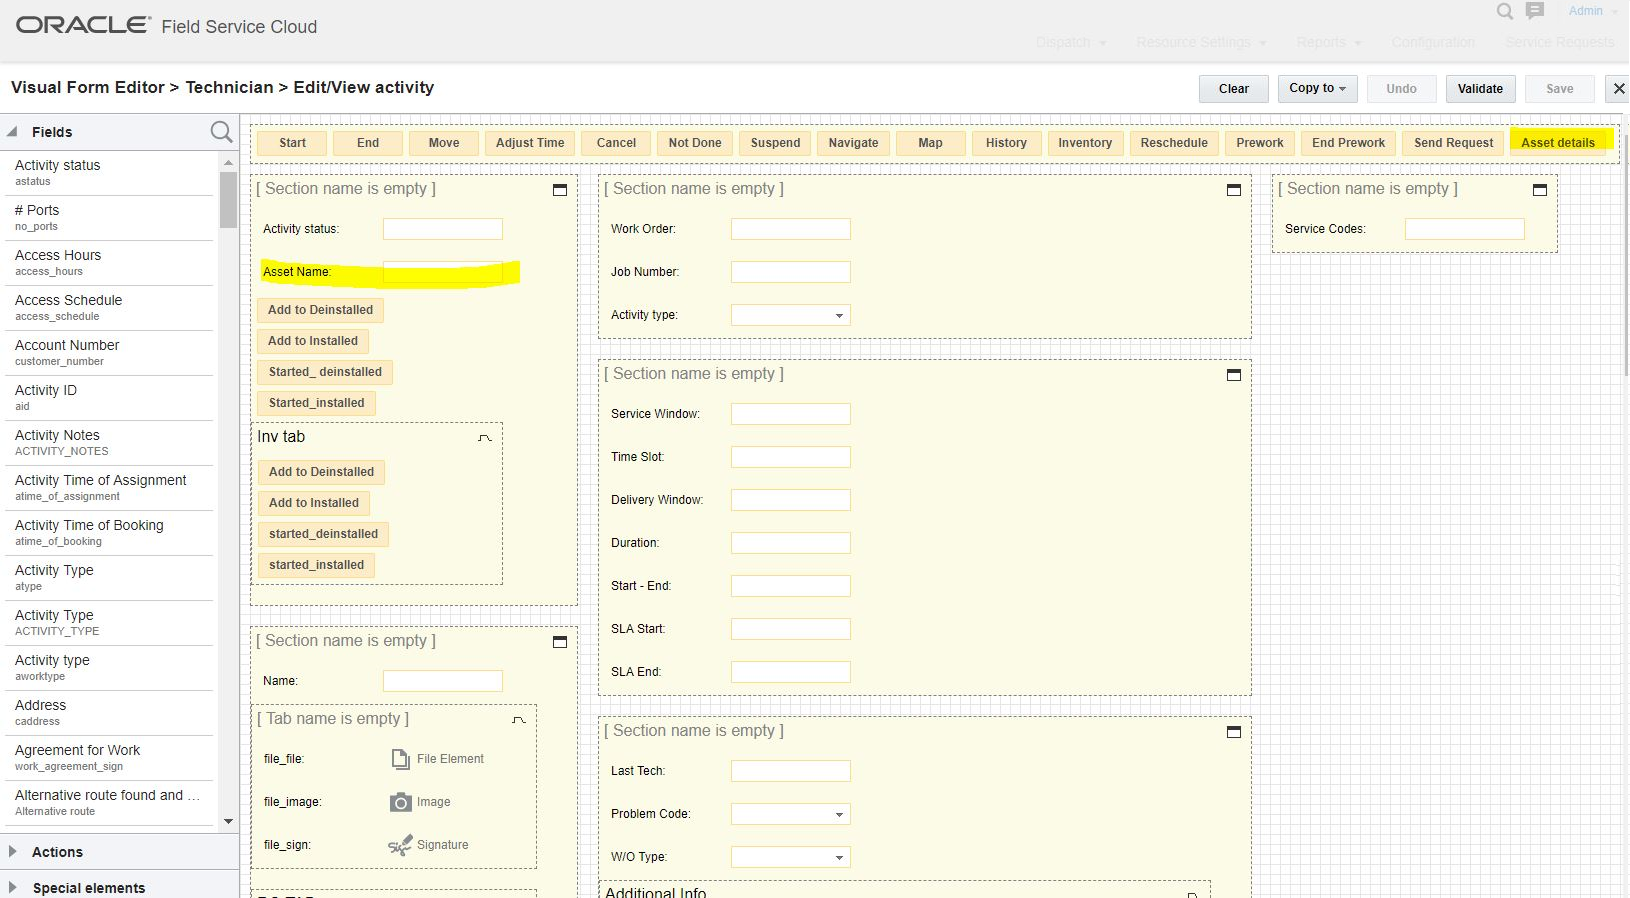
  7. Drag and drop the field Asset Name to the palette. This is a mandatory field. The plug-in will work only if this field has a value.
    Other fields like Asset ID, Asset Description, Summary, Severity are also can be added to this context with visibility flag as Activity type[aworktype] equals to Asset Maintenance.
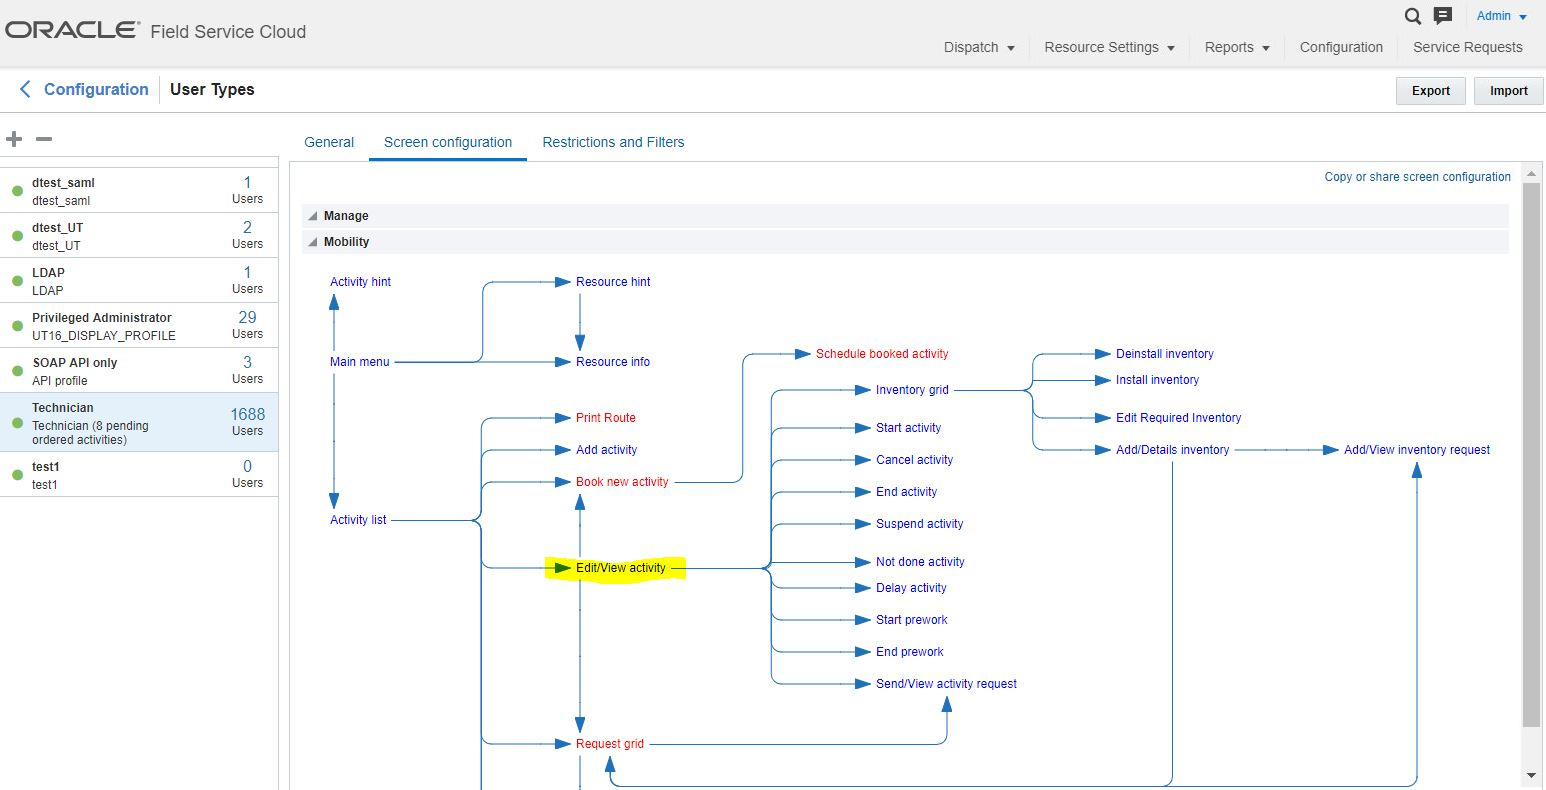
    This screenshot shows the Screen Configuration tab with the Edit/View Activity action link:


    This screenshot shows the Screen Configuration tab with Edit/View Activity action link.

    Click the Edit/View Activity Action Link to define the urgent activity condition.

    This screenshot shows the Edit/View Activity action link details screen:


    This screenshot shows the Edit/View Activity action link Details screen.
  8. Define the urgent activity condition as required.
  9. In the Configuration page, click Business Rules.
  10. In the Business Rules page, locate the Activity priority field.
  11. In the Activity priority field, enter the following field values:
    • Property to define priority: Severity[severity]

    • Urgent activities have the following values for the property: Critical

    • Normal activities have the following values for the property:
      • Low

      • Normal

      • Significant

  12. Create a routing plan with Run schedule Immediately for Urgent activities. This is used to assign the activities meeting the defined criteria as they appear in the bucket.
    Once you select Immediately, two options of activity selection appear: Apply for Urgent Activities and Apply for Activities that correspond to
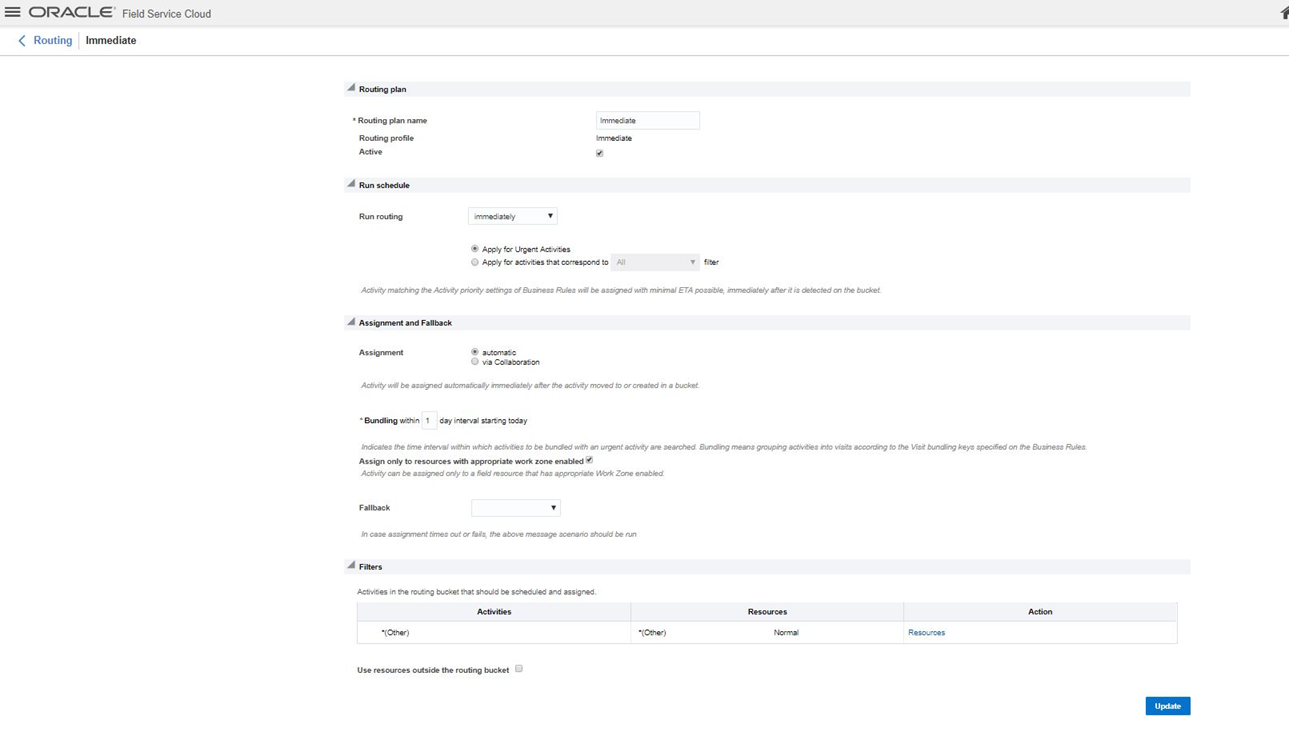
  13. Select the Apply for Urgent Activities option. (Routing will assign the activities matching the 'property+value' combination defined in the Activity Priority field).

    This screenshot shows the Add Routing Plan screen with Apply for Urgent Activities field selected:


    This screenshot shows the Add Routing Plan screen with Apply for Urgent Activities field selected.
  14. Activate the Routing plan.