Analyze Routing Run Results

In Routing Run Reports, we have improved the ability to analyze routing results.

Routing Run Summary Changes

  • Routing Run ID have been added to Routing Run Summary table as an additional column

  • Routing Run Summary table is redesigned to include pagination, sorting and filtering

Routing Report Changes

  • Routing report window is shown by default in full screen mode to maximum the view

  • Routing report table was redesigned to include pagination, sorting and filtering

  • Routing report may be downloaded in XML, CSV or Excel format for additional analysis

  • Standard resources and activities hints were added to routing report

Routing Run Report Changes

To access results of a particular routing run, open Routing Run Summary. In the table displayed under Routing Run Summary, you may find a list of all the routing plan runs for a particular date.

To select the routing run needed, sort the table. To sort the table, click the column header of any column (for example Time or Run Id) . To select the sorting order (ASC or DESC), click the triangle next to the column header. The following columns are sortable:

  • Run Id

  • Time

  • Bucket name

  • Plan name

  • User name

  • Activities

  • Resources

  • Status

If the number of routing runs is too large to fit on a single page (for example, more than 20), you can switch to another page by using paging at the bottom of the list.

You can also use filtering to narrow the list. Just start typing the content (three or more symbols) by which you would like to filter the list, and when you type, only the records having the filtering symbols in the content of one (or more) of the columns are visible. The whole record is shown if at least one of the following fields contains a string to filter by:

  • Run Id

  • Bucket name

  • Plan name

  • User name

Follow these steps to access the results of the routing run.

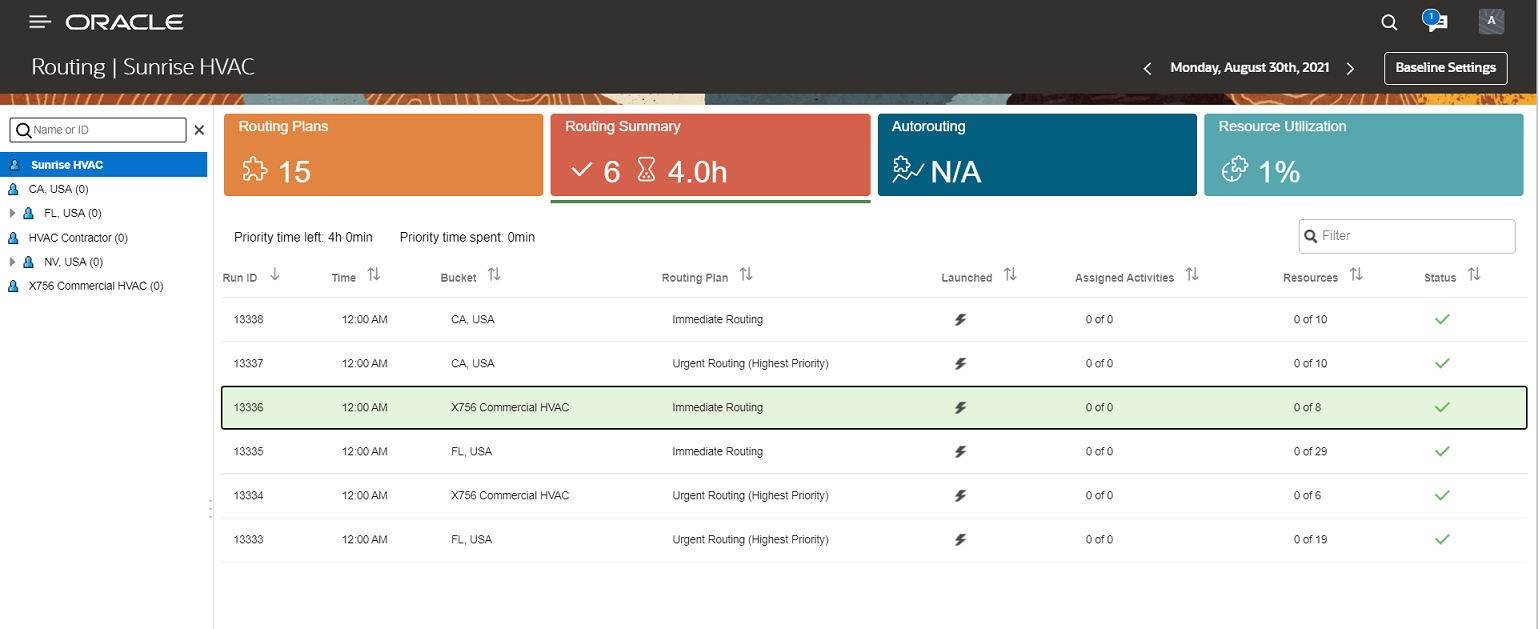
  1. Click Routing Summary.

    The table displays the list of all the routing plan runs for particular date.

    This image shows routing plan runs in Routing Run Summary table.

    Image shows Routing Run Summary tab

  2. Click a column header and select the sorting order (ASC or DESC) by clicking the triangle next to the column header. You can sort these columns:
  3. Select the routing run.
    1. Switch to another page if you can't find the routing run listed on the existing page. Search results may run across multiple pages if the number of routing runs is more.
    2. Use filtering to narrow the list. As you start typing the content to filter the list, only those records that match the filtering symbols in one or more columns appear.
    3. You can see the entire record if at least one of these fields contains a string to filter by:
      • Run Id

      • Bucket name

      • Plan name

      • User name

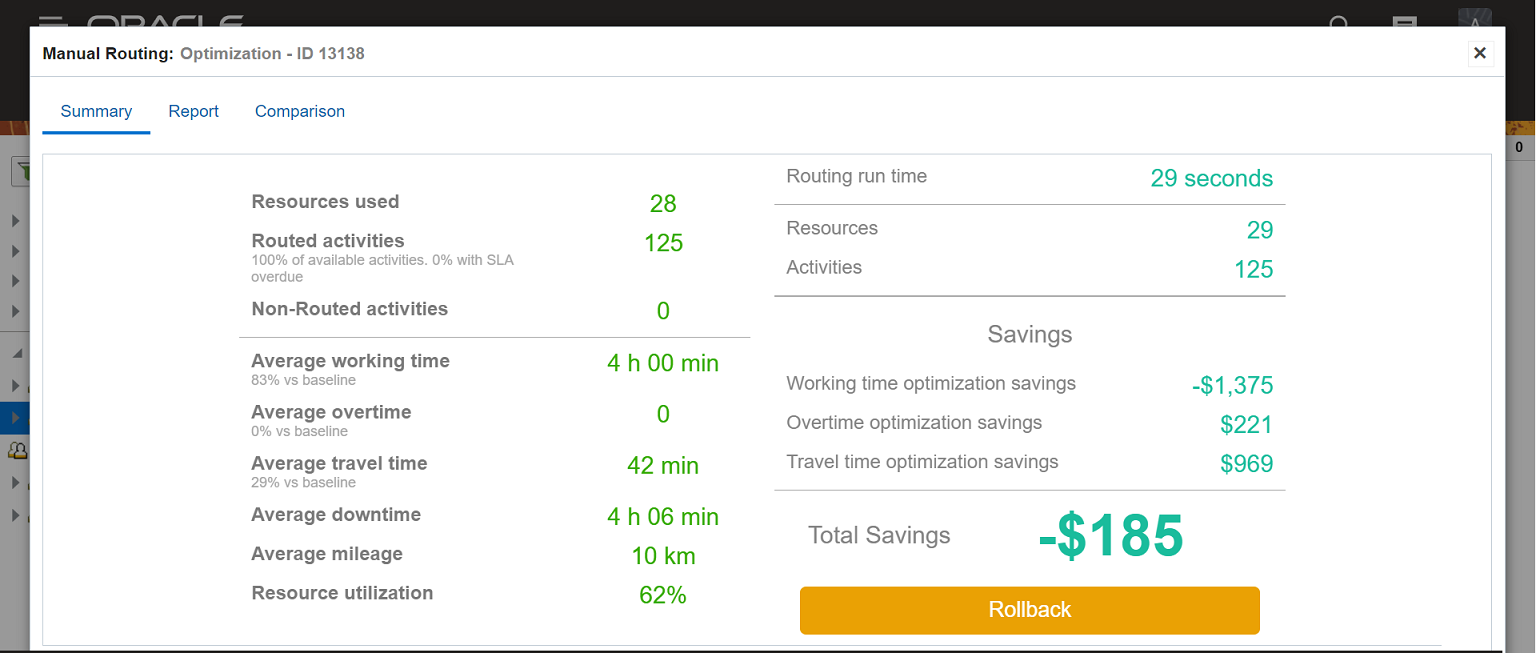
  4. Click the row of the routing run to open the Summary window and to access the results of that routing run.

    This image shows the Routing report window with Filter Results

    Image shows Routing report window with Filter Results

  5. To review particular routing run results:
    1. To find the needed record, you may order the table by the particular column and/or filter the data by typing the content (3 or more symbols) in the Filter field.
      You can see the entire record if at least one of these fields contains a string to filter by:
      • Initial resource
      • Destination resource
      • Activity ID (Depends on the value of Activity time view label)
    2. To view more information regarding activity or resource, hover the mouse over resource or activity ID to show the hint popup.
    3. To use standard actions like accessing resource or activity details, reassigning activity or getting directions right from the routing run report, click on resource or activity ID and use the actions link on the bottom of the hint popup.
    4. To further analyze routing run results, click Download report and select a format to initiate download. You may import the file into spreadsheet or analytical software.
    5. Steps to configure:
      • To choose the format of downloading the report, for Legacy Manage go to My Display and select the required value under the Default export format drop-down list. In case of Core App, open the Edit Resource/User for given resource and select the required value from the Default export format drop-down list.
      • To configure activity label on routing report, click Configuration, User types, Select user type, Screen configuration. In the Screen Configuration tab, select Collaboration and Identifiers, Identifiers, Activity identifier and set up the fields needed. If it is empty, the value set for Activity time view label (click Configuration, User Types, Select user type, Screen Configuration, Application screens, Main menu, Dispatch console, Activity time view) is used. If both are empty, standard format "Activity type - activity id" is used.