Oracle Field Service Follow-Up Activities
If you're using Service Logistics, you can create service work orders automatically based on the creation of a Follow-Up Activity in Oracle Field Service.
This feature works with the order parts functionality in Oracle Field Service. You can use this feature when technicians perform work and determine that additional parts and follow-up are required.4
Configuring Follow-Up Work Orders
Follow-up activities are created as booked activities. The Book New Activity option is configured in the Mobility section of the Screen Configuration window in Oracle Field Service.
Create Properties
The first step in setup for follow-up work orders, is to create properties.
-
Navigate to Oracle Field Service Configuration.
-
To create the properties, click Properties in the Resources, Activities, Inventories section.
The following tables shows the properties you need:
Note:The property label and type must be exact or the integration flows have errors.
Property Name
Property Label
Property Type
Entity
GUI
Parent Work Order Number
wo_parent_number
string
Activity
text
Follow-up Activity
wo_followup
integer
Activity
check box
Create Button
To create the new button in Oracle Field service, do the following:
-
In Oracle Field Service navigate to: Configuration > User Types > Screen Configuration
-
In the Application screens window, click
Edit/View activity. -
Drag the Button element to the form where you want the button to appear.
-
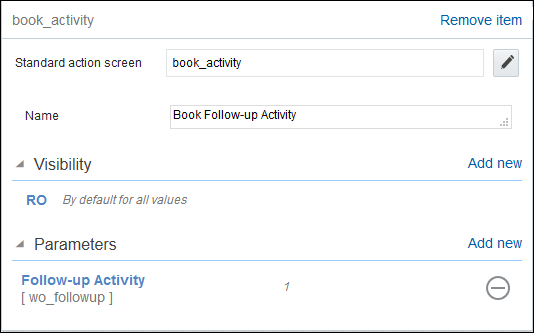
Enter the following values:
-
Standard action screen: book_activity
-
Name: Book Follow Up Activity
-
Visibility: RO (default)
-
-
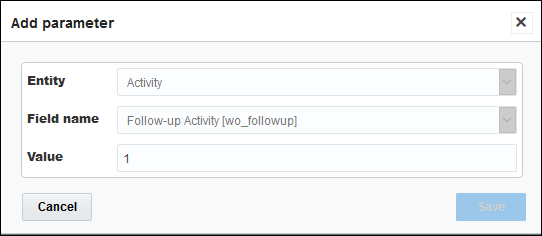
In the Parameters section, click Add new.
-
Enter the following values in the Add parameter window:
-
Entity: Activity
-
Field Name: wo_followup
-
Value: 1
-
-
Optionally, add the properties you created (Parent Work Order Number and Follow-up Activity) by dragging them from Data fields onto the form. Make sure they have read-only visibility.
After you have completed the steps for creating a new button, the button is available on the UI for the technician.
Configure Screen
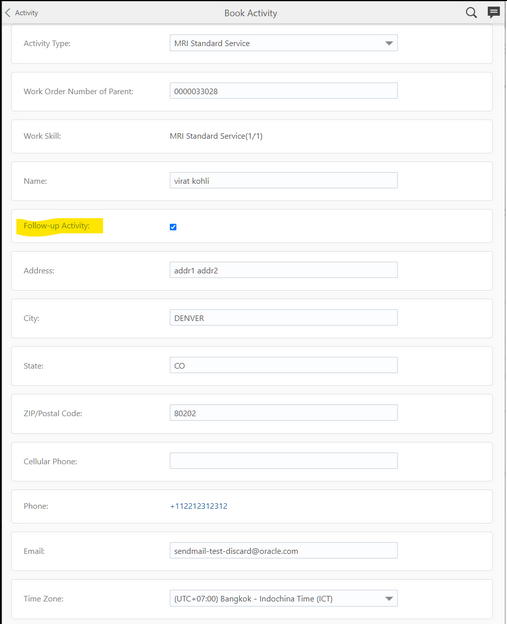
When the technician decides to book a new activity, they click the Book Follow-Up Activity button that you just added. Now, you configure the next screens the technician uses to create the follow-up activity. Determine which fields you want to copy from the original activity and follow these next steps.
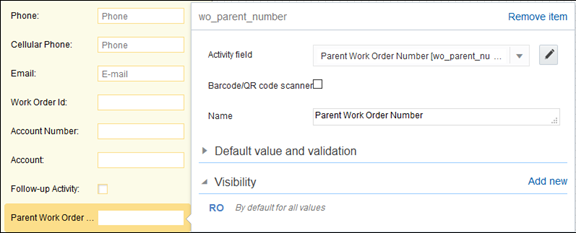
Configure Screen for Book New Activity
-
In Oracle Field Service navigate to: Configuration > User Types > Screen Configuration
-
In the Application screens window, click Book new activity.
-
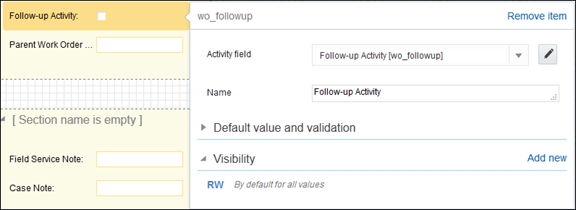
From Data fields, select which fields you want to copy from the original activity and drag them to the form.
-
Make all fields read-write "RW" except Follow-up Activity. If you make it read-only "RO," then it just displays "on."
Here's what the technician will see:
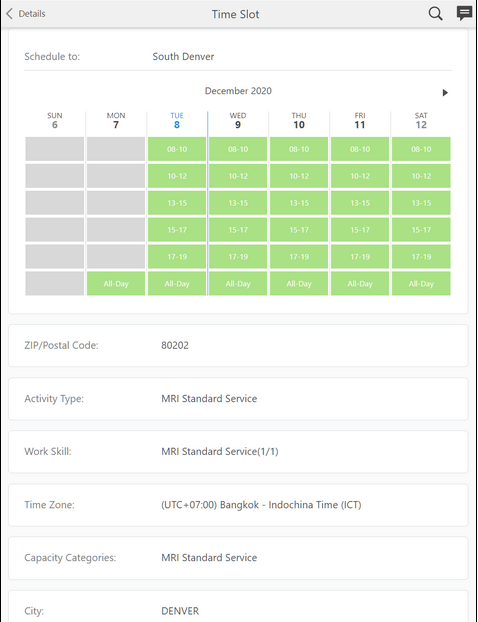
Configure Screen for Schedule Booked Activity
-
In Oracle Field Service navigate to: Configuration > User Types > Screen Configuration
-
In the Application screens window, click Schedule booked activity.
-
From Data fields, select which fields you want to copy from the original activity. These are read-only.
Here's what the technician will see: