How do I add a read only custom field using VB Studio?
Now, we'll create and add a custom field in VB Studio then add it to a layout. For this example, we'll be creating a custom field based on the SR severity.
-
In the Applications Extensions explorer, navigate to App UIs > Oracle Fusion Service UI Extension App > Service > ec > case > create .
-
Click the Fields tab.
-
Click the + Custom Field button.
-
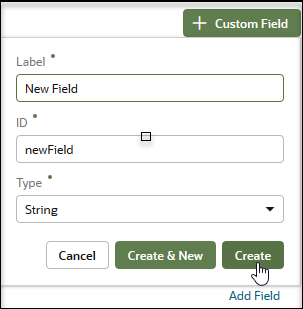
In the Custom Field dialog box, enter the field name that you'd like reflected in the UI.
-
Click Create.
-
From the list of fields, select the newly created custom field.
-
In the Properties pane, add referenced fields by doing the following:
-
Click the Add link for the Referenced Fields property.
-
In the Referenced Field text field, start entering the word and then choose the PriorityCd field from the results that appear and then click Add Field.
-
-
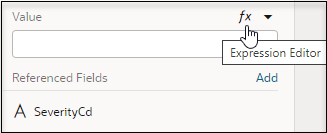
Now, click the Expression editor:
-
Now in the Expression Editor, set the conditions that govern when the field is displayed by doing the following:
-
From the Context explorer, expand the fields list.
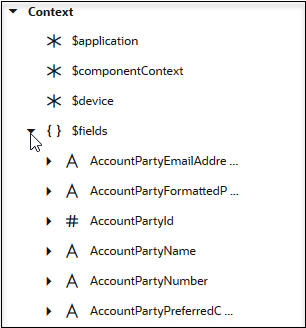
-
Find the PriorityCd field in the list, expand it, and drag value into the editor.
-
Add the following to the expression:
$fields.PriorityCd.value(), then in the Value field, enter: ORA_SVC_HIGH -
Click Save.
Now the custom field will only display if and value has a priority code of 1.
-
-
Click Rule Sets to return to the layout.
-
In the Fields explorer, enter the name for the custom field.
-
Click the checkbox to include the field in the layout.
-
Drag the field to where you want it to appear in the UI.
-
Use the Field properties window to choose one of the default templates from the Template drop-down list.
-
Click the Create link to create your own template.
-
Click the Preview button to view your changes.
Details on creating a template are in the Create Your Own Field Template topic in this chapter.