Create a Custom Job Role and Assign Two Data Security Policies
In this topic you create a copy of the Customer Self-Service Proxy User role and assign a user group data security policy to the custom role.
-
In Fusion Service, click Navigator, expand the Tools section and select Security Console.
-
Click the Roles tab.
-
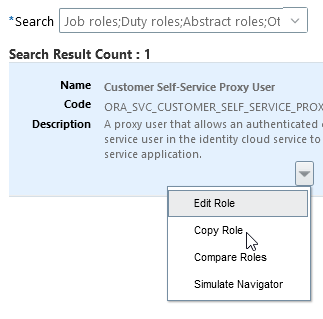
Search for and select the Customer Self-Service Proxy User role. The role code is: ORA_SVC_CUSTOMER_SELF_SERVICE_PROXY_USER_ABSTRACT.
-
In the Search Result field, click the drop-down list and select Copy Role.
-
In the Copy Options dialog box, select Copy top role, then click Copy Role.
-
On the Basic Information page, enter a role name, such as Knowledge User Group Proxy User, a role code (SVC_KNOWLEDGE_USER_GROUP_PROXY_USER), and optionally a description.
Note:Make a note of the Role Code as you'll need it in last tasks when you create an Identity Cloud Service group.
-
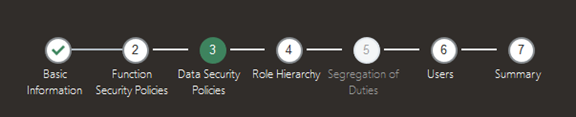
Click Step 3, Data Security Policies.
-
Create a data security policy by doing the following:
-
Click + Create Data Security Policy and change the start date to any date earlier than today's date.
-
Enter your policy name, such as Knowledge User Group Proxy User.
-
Click the Database Resource search icon and search for Knowledge User groups, select that database resource, and click OK to associate it with the newly created policy.
-
Click the Data Set drop-down list, and choose Select by key.
-
Enter the user group reference key you created in the Create a Knowledge User Group task in the Select a primary key value field.
-
Click the Actions drop-down list, and select Access Content with User Group.
-
Click OK.
-
-
Now, create a data security policy to grant access to the Service Department by doing the following:
-
Click + Create Data Security Policy and change the start date to any date earlier than today's date.
-
Enter a policy name, such as Knowledge Service Department Policy.
-
Search for: Knowledge Departments, select the Database Resource, then click OK. .
-
Click the Data Set drop-down list, and choose Select by instance set.
-
Click the Condition Name drop-down list, and select Access to the service department.
-
Click the Actions drop-down list, and select Access Content with Department.
-
Click OK.
-
-
Click Step 7, Summary and review your work.
You should see something like the following:- Function Security Policies: Added (0), Removed (0)
- Data Security Policies: Added (2), Removed (0)
- Role Hierarchy: Added (0), Removed (0)
- Users: Added (0), Removed (0)
-
Click Submit and Close.
-
Back in Security Console, verify the role copy was successful by doing the following:
-
Click the Administration tab.
-
Click Role Copy Status and find the Role Code you entered in the previous step.
-
Verify the status for your process shows Complete.
-