Configure components in Embedded Service
You can implement Embedded service as a modular component. This example shows how to implement the Chat component.
By default, Embedded Service is configured to have chat and knowledge displayed in a single embedded widget. While this is generally the preferred configuration when hosting Embedded Service on many websites, you may choose to offer a Chat only configuration when hosting Embedded Service on a DCS application that already offers knowledge in the portal itself.
Depending on your use case, you can use various components in your support journey such as Chat, Knowledge Search, Popular Articles, and Top Actions and Create Service Request. This task outlines how you configure the Embedded Service Chat component to support conversational interactions with a Human Agent or DA as an Agent (when used with Oracle Digital Assistant). You can choose to use Embedded Service in Chat Only mode on your web pages by configuring the widget in Engagement Engine.
You configure settings to tell Embedded Service to remain on the chat screen rather than redirecting to the home screen after disconnecting a chat. The back button is removed from the chat screen so there's no way the user can navigate anywhere else in Embedded Service.
Here's a screenshot of the settings screen:
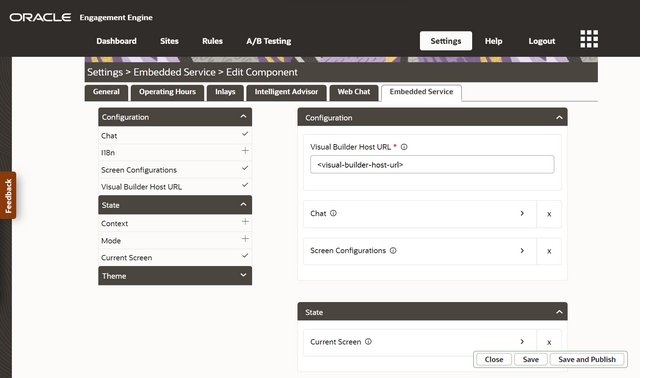
Configure Embedded Service in the Engagement Engine for Chat Only
To configure Embedded Service to only offer chat, set the following properties in the Embedded Service component in Engagement Engine:
- Open Engagement Engine https://admin.ee.channels.ocs.oraclecloud.com/editor/.
- Login with your credentials, then go to Settings > Embedded Service.
- Open the Category State.
- Select the Current Screen property by clicking the
(+) plus sign.
To view individual properties, click the (i) help icon.
The Current screen of the Embedded Service widget is shown. When Embedded Service is first loaded, this is the initial screen displayed.
- In the right column, click Current screen property.
- Select the Chat Screen as the initial screen that
will appear when the widget is loaded.
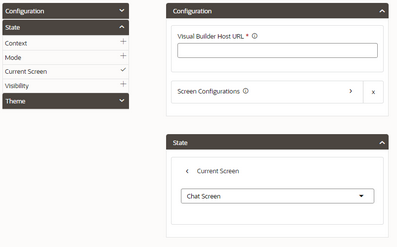
- Open the Configuration category.
- Select Screen Configurations property by clicking the
(+) plus sign.
To view individual properties, click the (i) help icon.
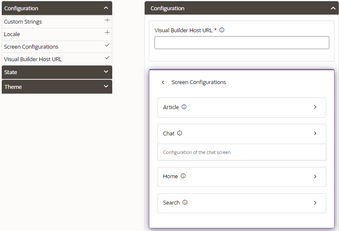
Configure the screens in Embedded Service.
- In the right column, click the Screen Configurations property.
- In the right column, select Chat from the drop-down
list.
To view individual properties, click the (i) help icon.
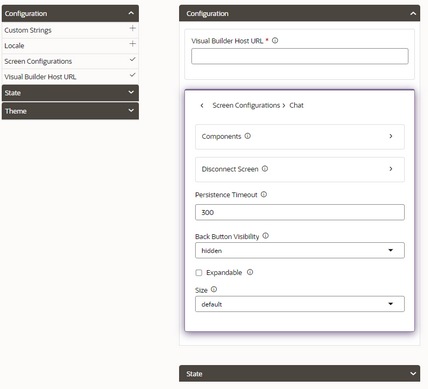
Here's a screen shot of the chat configuration screen:
- Click the drop-down list of the Back Button
Visibility property.
To view individual properties, click the (i) help icon.
This screen is where you configure visibility of the back button. You'll set this property to hidden to prevent a user from navigating away from the screen. This can be used to offer only chat or only knowledge search or even just one article in Embedded Service without allowing users to navigate to other screens.
- Select hidden.
By default this property is set to visible.
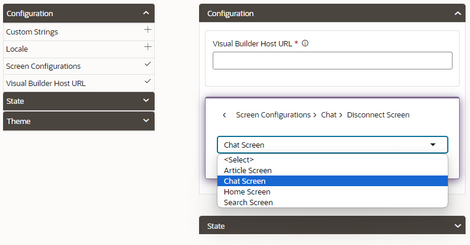
- Click the the Disconnect Screen property.
To view individual properties, click the (i) help icon.
- Choose the screen to navigate to after a chat is disconnected.
- Select Chat Screen from the drop-down list.
By default this property is set to Home Screen.
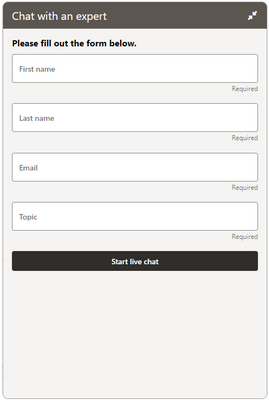
And here's an example of the completed Chat widget:
