Configure the Time Type Attribute Field for Combined Absence, Payroll, and Project Costing Entries

So that the delivered layouts for combined absence, payroll, and project costing time can work correctly, finish configuring the delivered Time Type time card field.

Add as many rows as appropriate for the combined time that people should be able to report. For this example, complete these steps eight times to add and configure all the table rows. Use the Time Entry Layout Component task in the Setup and Maintenance work area. It's part of the Workforce Deployment Offering, Time and Labor functional area.
  1. Add and configure each field value in the attribute definition table.
    1. On the Edit Time Card Field: Field Definition page, click the Add icon.
    2. Configure the fields for each row, as shown here. Note that the absence rows have values for only absence management attributes. This way payroll and project time data routes to the appropriate approvers and transfers to the appropriate time consumers. If you extract time data to use with external applications, you can combine absence data with payroll or project data, or both.

      Example display, time attribute, and identifier values to enter for each row of the attributes definition table.

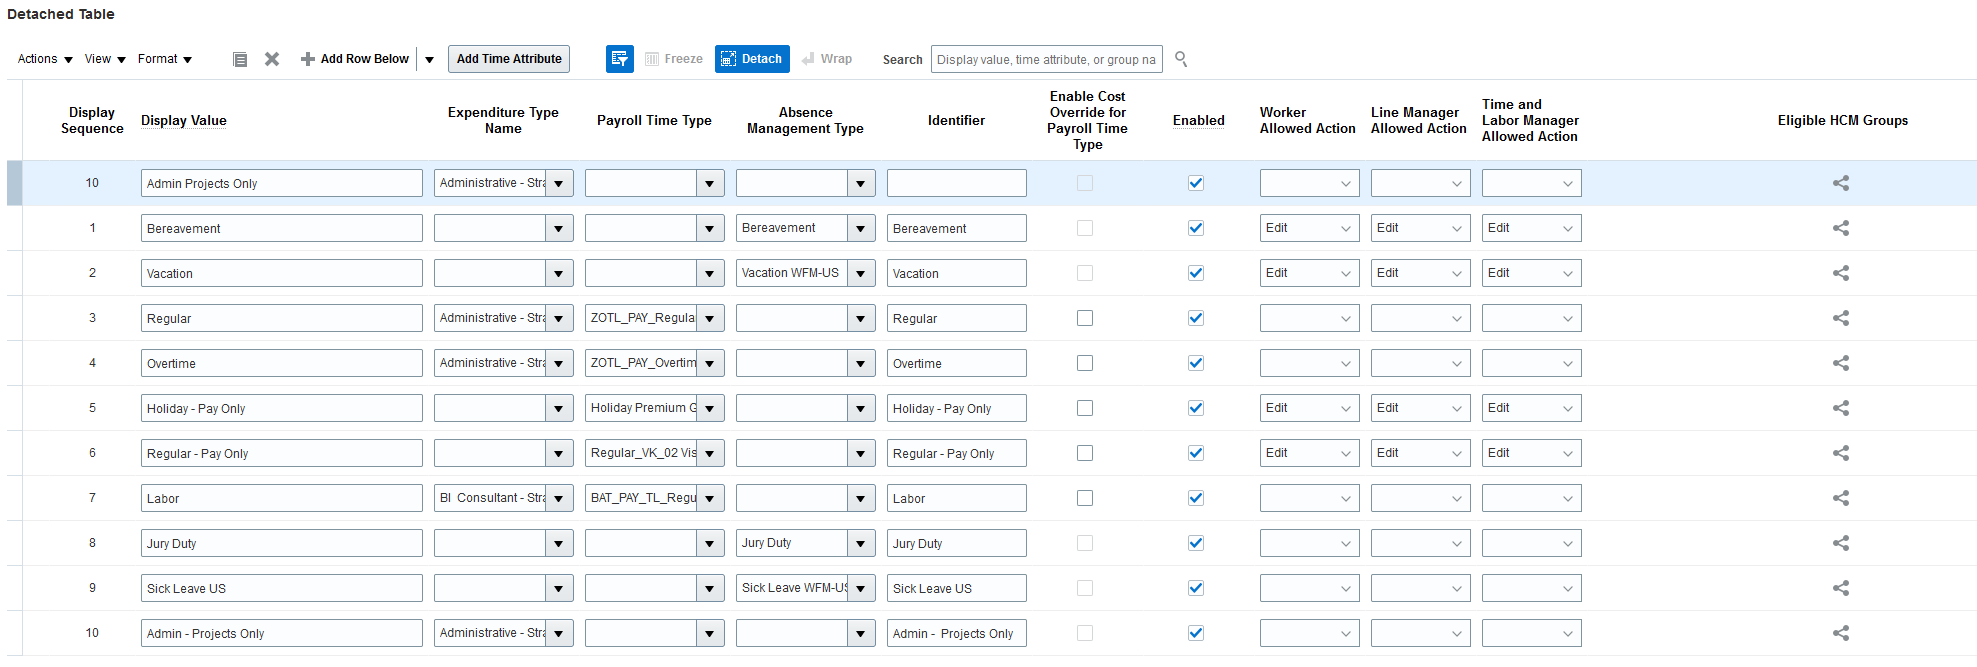
      After time processing, Absence Management retrieves the attribute values from the rows with display sequences 1, 2, 8, and 9. Global Payroll transfers the attribute value from the rows with display sequences 5 and 6. And, Project Costing and Global Payroll transfer their respective attribute values from the rows with display sequences 3, 4, and 7.

  2. Click Next.
  3. On the Create Time Card Field: Dependent Field Definition page, you can also define dependent fields for the independent Absence Management Type and Payroll Time Type time attributes. Other examples provide details on how you can create dependent rate, cost segment, and location fields for the independent Payroll Time Type attribute.
  4. Click Next.
  5. On the Create Time Card Field: Review page, review the definition details for the independent and any dependent fields. If you need to, go back and make any necessary changes.
  6. When the configuration is correct, click Save and Close.
  7. On the Confirmation dialog box, click OK.