Overview of the Benefits Summary Page
The Benefits Summary page of a benefits participant has these key areas that let you complete benefits related tasks or answer any questions that a participant might have.
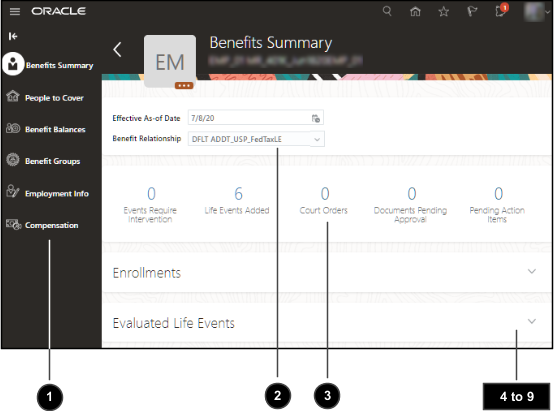
Here are the details of the areas on the Benefits Summary page:
|
Number |
Area |
Details |
|---|---|---|
|
1 |
Side Panel |
This panel contains supporting tasks related to the participant. For example, you use the People to Cover task to see and manage the person's dependents and beneficiaries that you can later use during enrollment. You use the Benefit Groups task to see what groups the participant is enrolled in and manage new and existing memberships. |
|
2 |
Effective Dates and Benefits Relationship |
The information in the Benefits Summary page appears on the basis of the effective date and the benefits relationship that you select. |
|
3 |
Scorecard |
You can see the counts of various benefits aspects or activities. For example, you can see a count of the life events that require your intervention, new life events, pending actions, court orders, and documents that you need to review. Click the count to open a page or navigate to a section within the summary page that has more details. |
|
4 |
Enrollments section |
The current enrollments for the participant as of the effective date appear here. Use the filter to see only those benefits with pending actions or benefits that are suspended. The Actions menu lets you change benefit elections, view flex credits, and enrollment results. Depending on plan setup, you can click the Actions (ellipses) link to override the enrollment. |
|
5 |
Evaluated Life Events section |
When the application processes a life event and starts an enrollment window, the details appear in this section. If the effective date you have set is within the enrollment window, the Enroll button appears. You can then make elections. Depending on your configuration, you can use the Actions menu to add an open enrollment event. For each evaluated life event, depending on setup, you can click Actions (ellipses) to back out the event, close the event, override participant eligibility for that event, or view enrollment opportunities that the life event offers. You can also print the enrollment document so that you can share the report with the participants to record their elections. |
|
6 |
Potential Life Events section |
If life events were detected for the participant, they appear here. To add a life event, click Add. The Actions menu contains tasks to process the life events. If you have configured collapsing logic, click Determine Winning Events. To process the life events and start an enrollment window, you click Evaluate Life Events. |
|
7 |
Court Orders section |
This section lists existing court orders that were defined for the participant. You can add or edit court orders. |
|
8 |
Certification section |
If there are documents that you need to review and approve, they will appear here. Use the filter to see documents that are pending for approval especially when there's a large list. |
|
9 |
Notes section |
You use the Notes section to record any comments or additional text that you want to store for your reference. |