Create a Simple Offer
Here's a guided flow to create a simple offer:
-
On the Launch Application dashboard, click Offering Management.
-
On the Offers page, select Create Simple Offer.
You are now taken to a guided UI flow to create the simple offer.
General Information
-
In the Basic Information section, enter the name and description of the product offer.
-
Specify the details as applicable and click Continue to Collateral Information.
Collateral Information
In this section, you can optionally associate digital content to your offer. Before you associate digital content to your offers, you must add the digital content to Oracle Content Management as an administrator.
Here's how you can add digital content in the Launch application:
-
Go to Administration> Digital Content.
-
Click Manage.
Note:Clicking Manage takes you to Oracle Content Cloud Assets Repository.
-
Search for the asset you want and add it.
For more information on creating and adding assets, see Oracle Content Management.
After adding assets, you are all set to associate the digital content to your offer. Here's how you do it:
-
On the Collateral Information page, click Add Images or Add Collaterals, as required.
-
Select the items and click Select.
Your digital content is now added to your offer and appears in your Images or Collaterals section. If you want to upload marketing information for your offer, click Continue to Marketing Information.
Marketing Information
Optionally, specify the marketing information, such as, storefront banner, offer marketing feature, and promotion tags.
Here's how you can add a storefront banner:
-
On the Marketing information page, click Add Storefront Banner.
-
Specify the details and click Add.
To add a marketing feature:
-
On the Marketing information page, click Add Offer Marketing Feature.
-
Provide the details and click Add.
You can also add promotion tags to your offer. For more information on adding promotion tags, see Create a Promotion Tag.
To move to the next page, click Continue to Attributes.
Attributes
On the Attributes page, you can see all the attributes that are defined for the product type you had selected. The behavior of the page is driven by the product specification that you may or may not specify. You can also set restrictions here. For example, you can create a phone specification in grey or black color.
For more information on creating attributes, see Create a Product Specification. To move to the next page, click Continue to Pricing.
Pricing
On the Pricing page, select your pricing plan which can be one of the following:
-
One-Time Fee
-
Recurring Fee
-
Usage Fee
-
Existing Price Plans
For more information about configuring pricing, see Product Offer Pricing its related sections.
To move to the next page, click Continue to Terms.
Terms
On the Terms page, you can set up your payment terms:
-
Enter the term name and the payment type.
-
Click Save.
To move to the next page, click Continue to Rules.
Rules
On the Rules page, you can set up the various types of rules namely eligibility, compatibility, recommendation, and migration rules. See Rules Overview and its related sections for more information about rules.
Finally, click Create to save your offer. You have now created your simple offer.
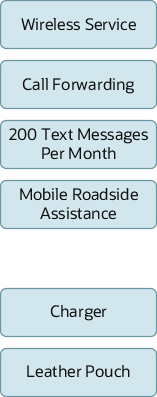
Here's a pictorial representation of a few simple product offers. You can use these simple product offers to create bundle product offers.