Revert Modifications Directly From an Item From Within the Project
Reverting modifications is the recommended method for resolving most collaboration file conflicts in Policy Modeling projects.
In addition, at any time, you can revert modifications to any item you have changed in your Policy Modeling project since you last downloaded changes from the project repository in the Hub. This means that you have a general 'undo' function at your disposal as you work. This function is only available for items you have modified, not items you have simply added.
Reverting your modifications will return the item to the state it was in when you last downloaded changes to the project from the repository.
To revert modifications to an item:
- (Optional) If you are reverting modifications to resolve a conflict, and you do not wish to lose all of your work, save a local copy of your work (outside the project folder structure, with a different file name) so that you will be able to quickly re-do it on the synchronized project.
- Close any rule documents or testing documents you have open and which contain changes connected to the reversion you are about to perform.
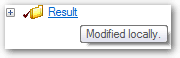
- Locate the item you wish to revert, on the Project, Rules, Data or Interview tab in Policy Modeling. Items which you have modified since you last downloaded changes from the project repository in the Hub will be marked with a Modified locally check icon and tooltip.
Conflicted items will be marked with a Conflicted icon and a tooltip with information about the conflict.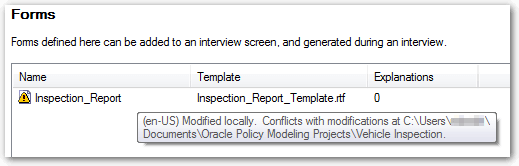
- Right-click on the item you wish to revert.

If the item is conflicted, you will see both Revert Modifications and Steal Ownership on the context menu.
- Select Revert Modifications from the context menu. Note: If other changes to the project depend on the modification you have selected for reversion, Policy Modeling will display a Revert warning dialog box. For example, if you add a new screen to an interview stage, and then attempt to revert the modifications to the stage, the Revert dialog box will appear, warning you that the reversion will also delete the new screen.
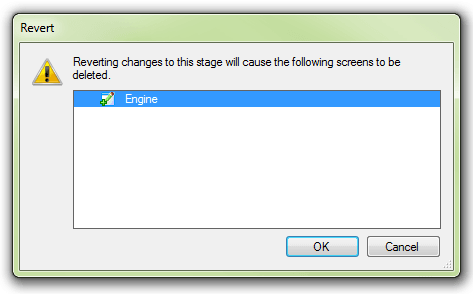
Click OK if you wish to proceed, otherwise click Cancel. - Click Yes in the final warning dialog box which appears.
- (Optional) If you reverted your modifications to resolve a conflict:
- Ask the other user involved to upload their changes to the project repository in the Hub as soon as possible.
- Download changes to your working version of the project. This will synchronize your project with the main version in the repository and ensure you have the most up-to-date copy of the item which caused the conflict.
- (Optional) Re-do your changes to the reverted item if required. If the item you reverted was a Microsoft Word document such as a rule document or form template, you can use the Microsoft Word Compare feature to help you re-do your changes. To do this:
- Open Microsoft Word and click the Review tab.
- Click the Compare button. It is recommended you select the Compare two versions of a document (legal blackline) option from the drop-down menu. This does not change either document, but produces a third document with the differences between the two documents marked with a black line in the margin.
- For Original document, browse to the main version in the working folder for the project (downloaded in Step 6 from the project repository).
- For Revised document, browse to your own local version of the document (created in Step 1).
- Use the resulting Compared Document to help you re-do your changes to the document. You can Accept or Reject a change as desired by right-clicking it.
- When you have finished re-doing your changes, save the Compared Document into the working folder for the project with the filename of the project file which caused the conflict.
- Upload your changes to the project repository in the Hub.
Tip: For more information, including information on using the Combine revisions from multiple authors into a single document option on the Compare menu, press F1 from your Word document to see and search Word Help.