Setting up the master exclude list
As the Oracle Eloqua administrator, you have the option to keep certain contacts from receiving emails. You can do this by adding individual contacts, or by using criteria categories, such as filters and domains. The master exclude list takes priority over a contact's email subscription preferences.
Note: Excluded contacts might not be excluded from a segment, so they might show up in initial segment counts. However, Oracle Eloqua will not process these master exclude contacts in a campaign.
Important: You must have customer administration privileges to set up the master exclude list.
To set up the master exclude list:
- Navigate to Assets
 > Email Setup, then click Master Exclude. The Master Exclude List opens.
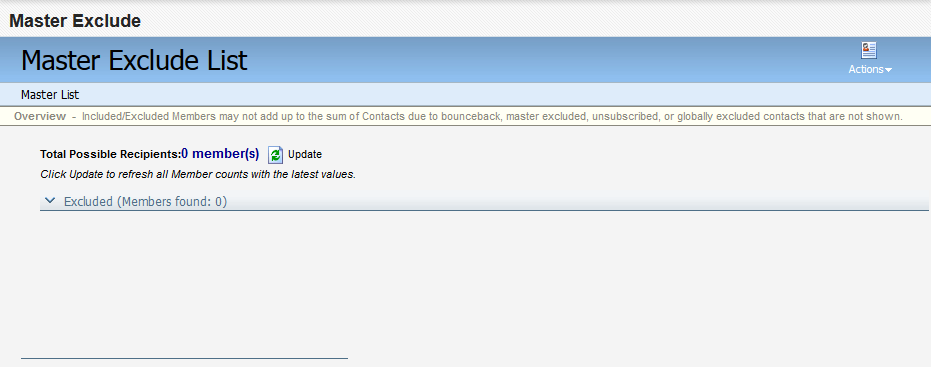
- Click Excluded to expand the table of excluded contacts, if it is not already expanded.
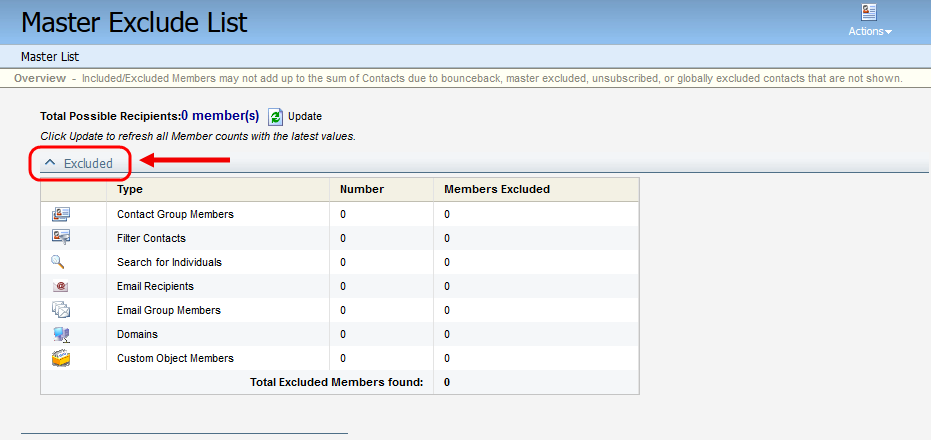
- Set one or more exclusions by selecting categories under the Type column. Click one of the following, then follow the accompanying instructions:
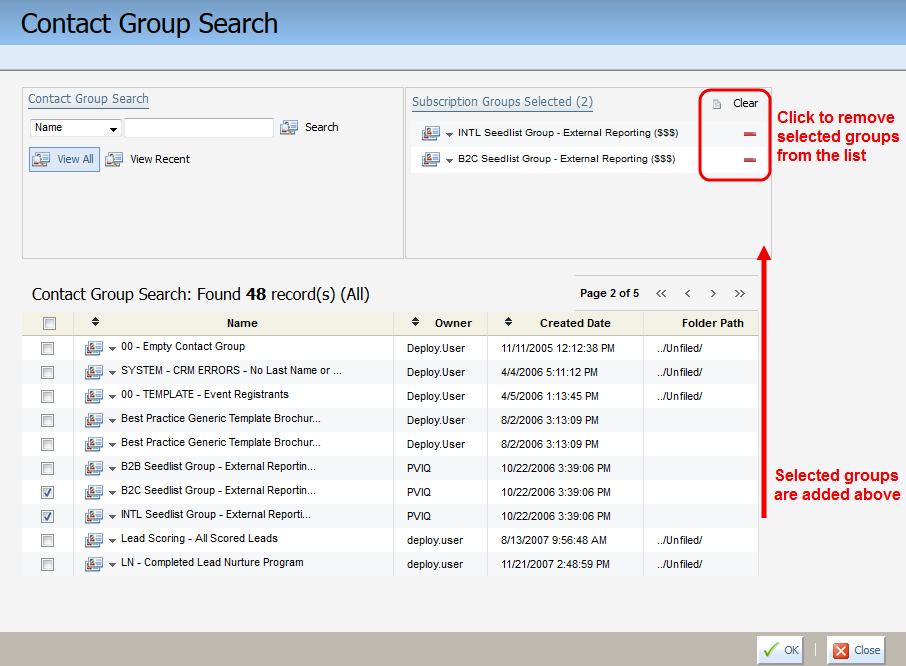
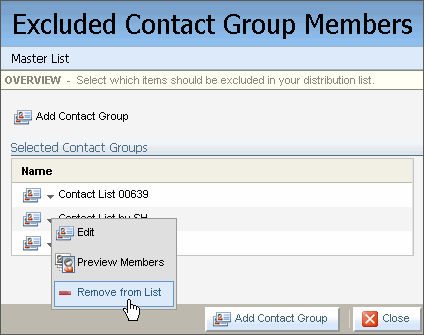
- Contact Group Members: Click Add contact group. Search for and select contact groups to add to the exclude list. Or, click View All, then select the check boxes next to all groups that you want to exclude. Selected groups are added to the list in the upper-right corner. Click OK, thenClose.
- Filter Contacts: Click Add Contact Filter. Search for and select filters to add to the exclude list. Or, click View All, then select the check boxes next to the ones you want to add to exclude. Click OK, thenClose.
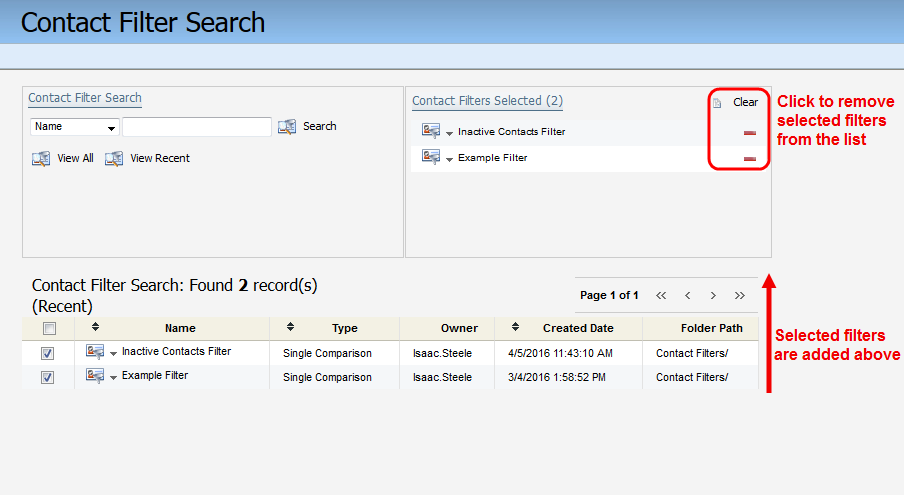
Note: A contact filter in the master exclude list will only exclude that specific contact. The filter will not apply to other entities (whether contact or CDO) that may share the same email address.
- Search for Individuals: Click Add Contact. Search for and select (or create) contacts to add to the exclude list. Or, click View All, then select the check boxes next to the ones you want to exclude. Click OK, thenClose.

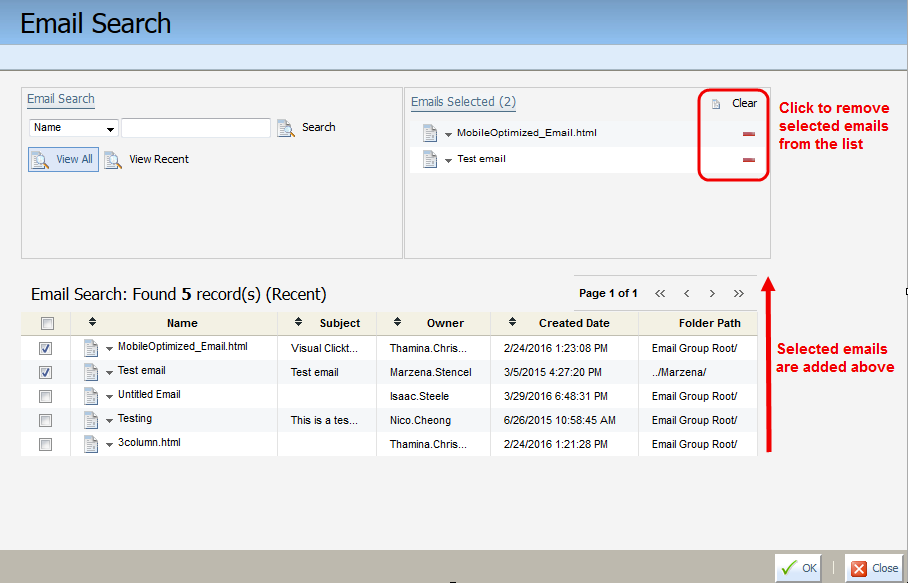
- Email Recipients: Click Add Email. Search for and select emails in order to exclude users who received those emails. Or click View All, then select the check boxes next to the one you want to exclude. Click OK, then Close.
- Email Group Members: Click Add Email Group. Search for and select email groups in order to exclude users who are subscribed to those emails (such as newsletter subscribers). Or, click View All, then select the check boxes next to exclude. Click OK, then Close.

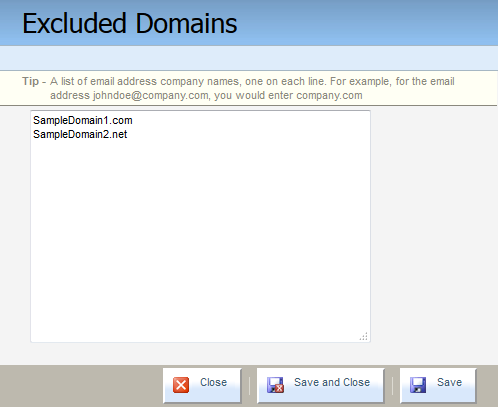
- Domains: Replace the two sample domain names for the domains you want to add to the exclude list. Users who have any of these domains in their email address will be added to the exclude list. Click Save and Close when you are finished.
- Custom Object Members: Click Add Custom Object. Search for (or create) custom objects to add to the exclude list. Or, click View All, then select the check boxes next to the ones you want to add to the exclude list. Click OK, then Close.
- Contact Group Members: Click Add contact group. Search for and select contact groups to add to the exclude list. Or, click View All, then select the check boxes next to all groups that you want to exclude. Selected groups are added to the list in the upper-right corner. Click OK, thenClose.
- To make changes to an exclusion, click on the type in theType list, then click the drop-down list next to the exclusion. Click Remove from List or Edit as needed. Click OK, then click Close.
- Click the Update button to update the total possible recipients number after making changes.
