Creating contact views
Note: We're updating our help center to reflect the new Redwood experience. During the transition, some content reflects the previous version of the UI.
You can create a new contact view and add contact and account fields to it. After you create the view, review the permissions to determine what security groups and users have access to the view.
To create a new contact view:
-
Click Settings
 .
. -
Click Fields & Views in the Database Setup area.
-
Click the Views tab.
Classic UI

Redwood experience

- Create the new view:
- In the classic UI, in the left panel, click Add
 , then select Add Contact View.
 - In the Redwood experience, click Add Contact View.
Classic UI

Redwood experience

- In the classic UI, in the left panel, click Add
- Provide a name for the view and add fields to the view:
In the classic UI, click Add
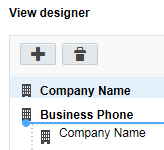
in the View Designer section, and select Add Contact Field or Add Account Field Then add fields to the view..In the Redwood experience, in the View designer, search for and select the fields you want to add. You can expand and collapse the field types to help in your search.
- When you're finished, save your view.
After you finish:
You can set the view as your default. Learn how to change the default for all users.
-
In the classic UI, right-click the view and select Set View as Default. In the Redwood experience, click the actions menu
 and then click Set as Default.
Note: The terms account and company are used interchangeably in some areas of the application.
You can view the dependencies for the view. For example, a dependency is created if a user uses the view as their default.
-
In the classic UI, right-click the view and select Show View Dependencies. In the Redwood experience, click the actions menu
and then click View Dependencies.
You can manage how can see the view.
-
In the classic UI, right-click the view and select Permissions . In the Redwood experience, click the actions menu
and then click View Dependencies.
Important: The Set Security permissions are visible to users with Customer Admin accounts. You must have the Set Security permission to manage view, edit, delete, and set security permissions for users and security groups.
You can rearrange the order of fields in the view.
-
In the classic UI, click-and-drag a field to a new position. In the Redwood experience, click the actions menu
and then click Edit. Then click the drag handle to drag a field to a new position.
Classic UI
Redwood experience

You can delete the view if there are no dependencies.
-
In the classic UI, in the left panel, click the view and then click Delete. In the Redwood experience, in the left panel click the view. Click the actions menu
and then click Delete.