Creating contact records without an email address using contact list uploads
Important: This feature is currently released under our Controlled Availability program. To request access to this feature, please log in to My Oracle Support and create a service request. Note that access to this feature is not guaranteed and will be evaluated based on customer needs.
Note: We're updating our help center to reflect the new Redwood experience. During the transition, some content reflects the previous version of the UI.
Oracle Eloqua allows you to upload a list of contacts from an external file using the Contact Upload Wizard. You can create a list of contacts without email addresses but with other field identifiers that you can then map to fields in Oracle Eloqua.
To create contact records without an email address using contact list uploads:
-
Navigate to Audience
 , then click Contacts.
 -
Click Upload in the upper right-hand corner to open the Contact Upload Wizard.
-
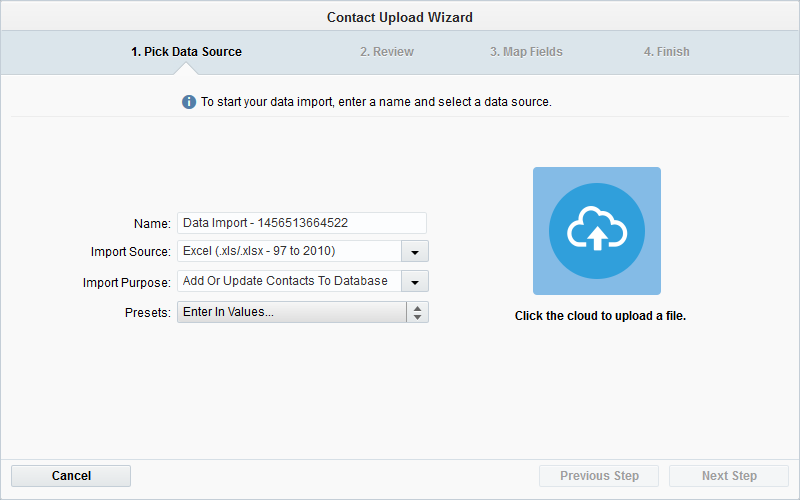
Configure the Pick Data Source tab:
- Name: Enter the upload's name into the Name field. The default name is Data Import - xxxxxxxxxxxxx where xxxxxxxxxxxxx represents a number assigned to this import in Oracle Eloqua. Give your import a more meaningful name for future reference.
-
Import Source: Specify the format of the import data:
- Delimited file (Tab, Pipe, Semicolon)
- Microsoft Excel® 97-2010 (.xls or .xlsx)
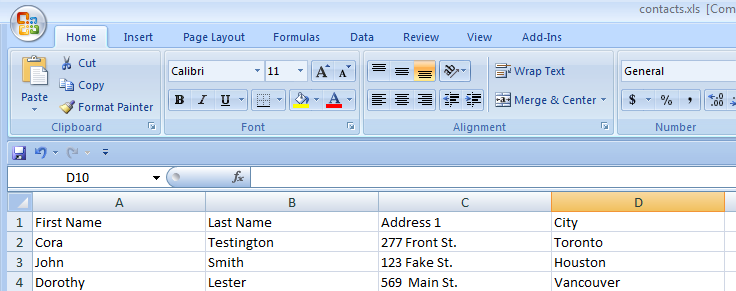
Note: You should map each of the fields in the file to match a corresponding field in Oracle Eloqua. For example, have a column labeled Email Address in order to map to the Email Address field in Oracle Eloqua. This will make your mapping task easier, and will ensure that your contacts are uploaded successfully.
-
Import Purpose: Select Add Contacts to Database from the Import Purpose drop-down list.
Note: You can also use this Contact Upload Wizard to update contacts already contained in your database, to update their email addresses, mark as bouncebacks, unsubscribe, or delete them.
- Presets: Select the preset that you have created, or continue with No Preset (default).
-
Click the cloud icon, then browse to your file.
Note: In your source file there should be a column that can be used as the unique matching identifier for your contacts. For example, "City". The column name should reflect that identifier.
- Select your file, then click Open.
-
Configure the Review tab:
- Verify that the displayed data matches your source file's configuration.
- (Optional) If something is inaccurate, click Previous Step. Modify your source file, or select another file to begin the process again.
- If everything looks correct, click Next Step.
-
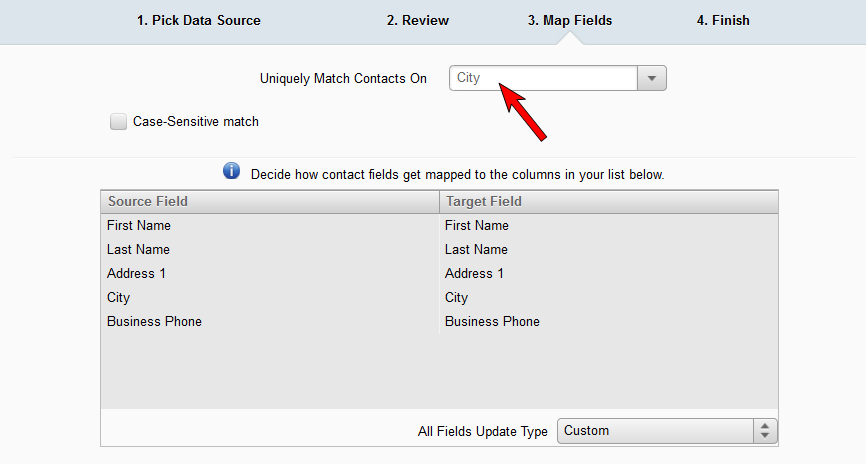
Configure the Map Fields tab.
- Verify that the field names from your source file have been matched with field names in the Oracle Eloqua database. For example, First Name maps to First Name.
- Fix any fields that are not mapped, or that are mapped incorrectly. Double-click on a field, then select a correct matching field from the Target Field drop-down menu.
-
For contacts without an email address, select a field from the Uniquely Match Contacts On drop-down list to use as a unique identifier. The table in the window shows the fields from the source file and the target fields to which they correspond, these are the fields that can be selected from the drop-down list.
Example: In the following image, the City field is used to uniquely match contacts.
Note: Eloqua Contact ID cannot be selected as the unique match field when creating new contacts, however, it can be used to update the records of current contacts.
-
Click Next Step.
-
Configure the Finish tab:
- (Optional) Enter the email address to which you want a confirmation sent after uploading.
-
(Optional) Select Place Contacts into a Shared Contact List to add a list of your contacts to your database for future use. Either create a new list in a specified root folder, or select Use Existing to update an existing list.
Example: If you are uploading a list of names of attendees at a recent trade show, you can reuse this list for later campaigns without having to manually create a shared list. You can place the contacts into a new list or add them to an existing one by selecting the respective option.
- Click Finish to complete the import. the wizard closes and the contacts from the file are added to Oracle Eloqua. A confirmation email is sent to the address specified in step 4 of the wizard.
All contacts without an email address will be successfully uploaded and matched based on the unique identifier that you specified. If an email address was specified in Step 8, then a confirmation email is sent to that address.