Embedding Engage in Microsoft Dynamics 365
You can add Engage to your Microsoft Dynamics 365 instance.
Prerequisites
- A Microsoft Dynamics 365 instance and the permissions needed to customize it
-
Build an allowlist of the domains that will be hosting embedded Engage pages. Learn more in the Configuring Engage topic.
- Determine the Oracle Eloqua login URL you want to use. You can use the simplified login URL or a specific legacy URL based on the desired login method. Learn more.
To install Engage in Microsoft Dynamics 365:
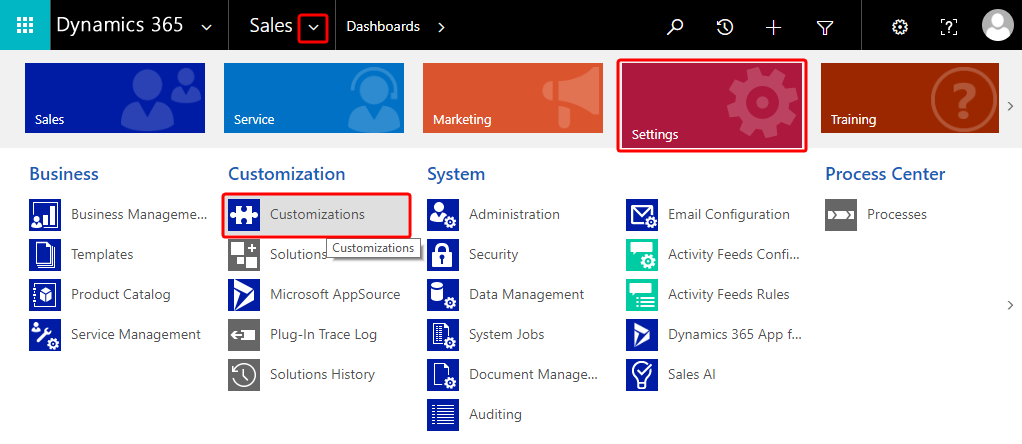
- Log in to Microsoft Dynamics 365 and navigate to Settings.
- In the Customization section, click Customizations.
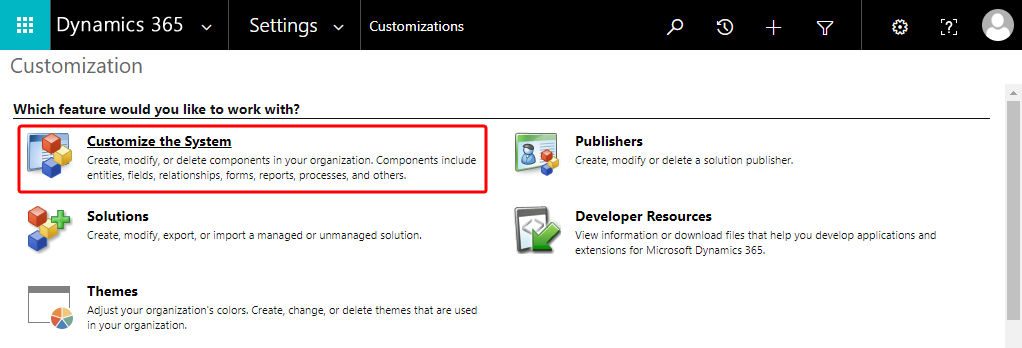
- On the Customization page, click Customize the System.
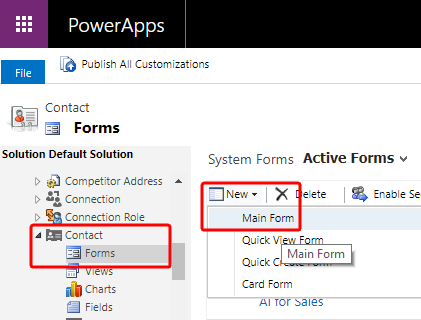
- On the PowerApps page, under Components, select Entities > Contact > Forms.
- Click New, then select the form you want to add Engage to, such as Main Form.
- Click the Insert tab.
- Add a One Column Tab select the new tab and click IFRAME to add an iframe to it.
The Add an IFRAME window is displayed.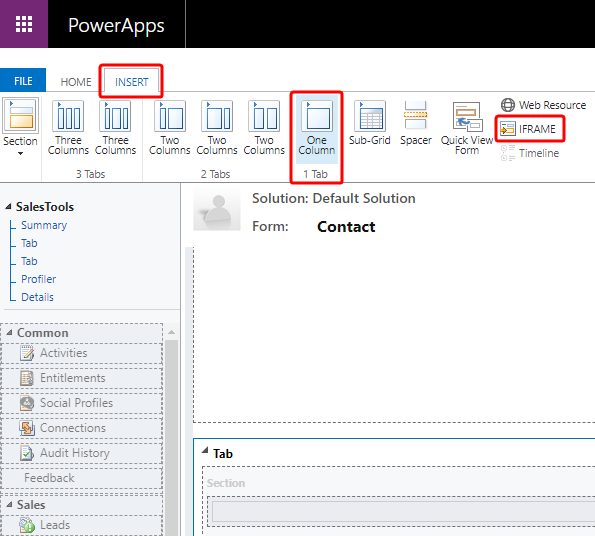
- Enter the following iframe values.
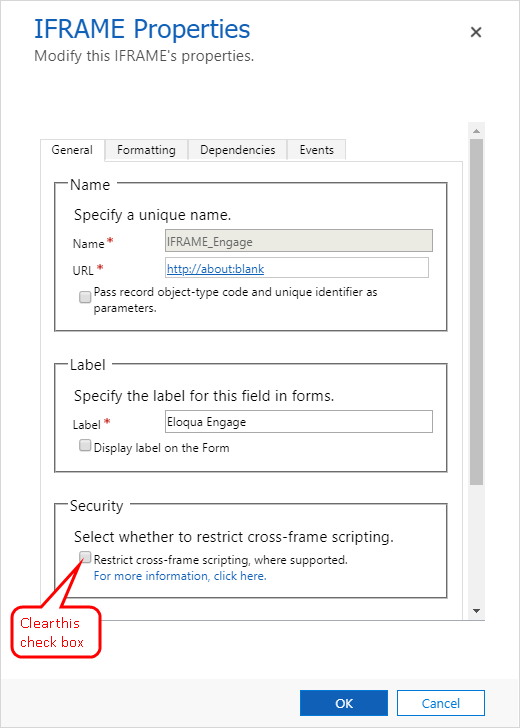
- Name: IFRAME_Engage
- URL: http://about:blank
- Label: Eloqua Engage
- In the Security section, clear the Restrict cross-frame scripting option.
- (Recommended) In the Row Layout section of the Formatting tab, increase the height by setting the number of rows to 20 so that Engage will have enough room to display its information.
- On the Dependencies tab, add email as a dependent field.
- Click OK to close the Add an IFRAME window.
- On the Home tab, click Form Properties.
The Events tab of the Form Properties window is displayed.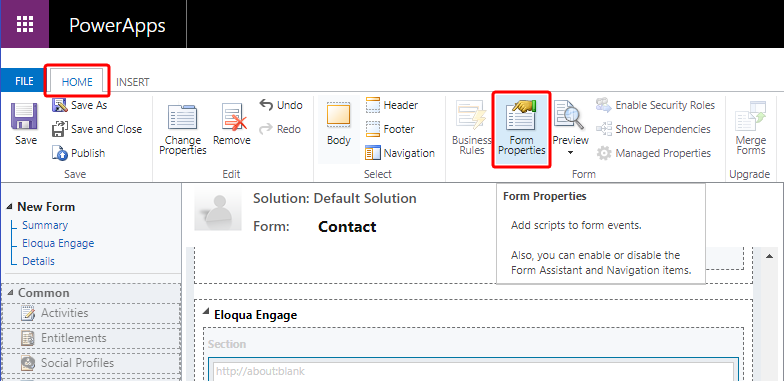
- In the Form Libraries section, click Add. The Lookup Record window is displayed.
- Select new_EPPOnLoad and click Add.
- In the Event Handlers section of the Form Properties window, click Add.
The Handler Properties window is displayed.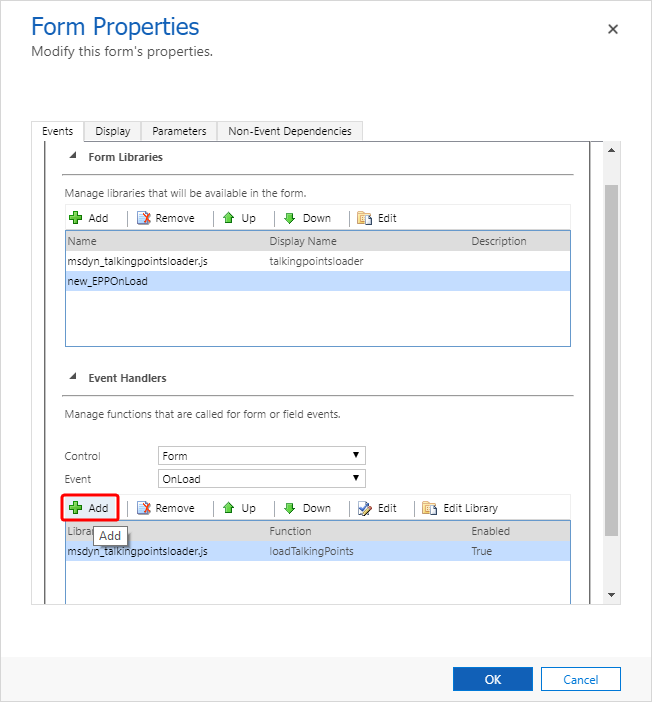
- From the Library list, select new_EPPOnLoad.

- In the Function box, enter loadEngage, click OK, and then click OK to close the Form Properties window.
- Double-click your new iframe. The IFRAME Properties window is displayed.
- Click the Events tab, expand Form Libraries, and double-click new_EPPOnLoad. The Edit Content window is displayed.
- Depending on your login type, copy and paste one of the following code snippets into the code editor:
Simplified login URL
function loadEngage() {
var newUrl = "https://login.eloqua.com/siteLogin?SiteName={CompanyName}&ReturnUrl=/apps/embed/salesTools/engage/compose
Xrm.Page.ui.controls.get("IFRAME_Engage").setSrc(newUrl);
}To use the legacy URLs, replace the
newURLin the code above with the Legacy login URLs.
-
Customize the Engage URL with parameters that support the desired experience for your sales users. Learn more.
Tip: To pass the email address of the contact or lead add the following parameter to the URL
emailAddress="+ document.getElementById("{emailaddress1}").title;and replace{emailaddress1}with the value in your Microsoft Dynamics 365 instance. For example, it can beemailaddress1,emailaddress1_d, oremailaddress1_i.To determine what is used in your Microsoft Dynamics 365 data, inspect an existing contact's email address with your browser's developer tools. For example, to find your value using Google Chrome:
- Go to Sales > Contacts and click an existing contact.
- Pressing Ctrl+Shift+I to open developer tools.
- On the Elements tab, press Ctrl+F and search for emailaddress1.
- The value associated with the contact's email address field that is followed by
title="{emailAddress}"indicates the value you need to include. In the following example, the needed value is emailaddress1_d.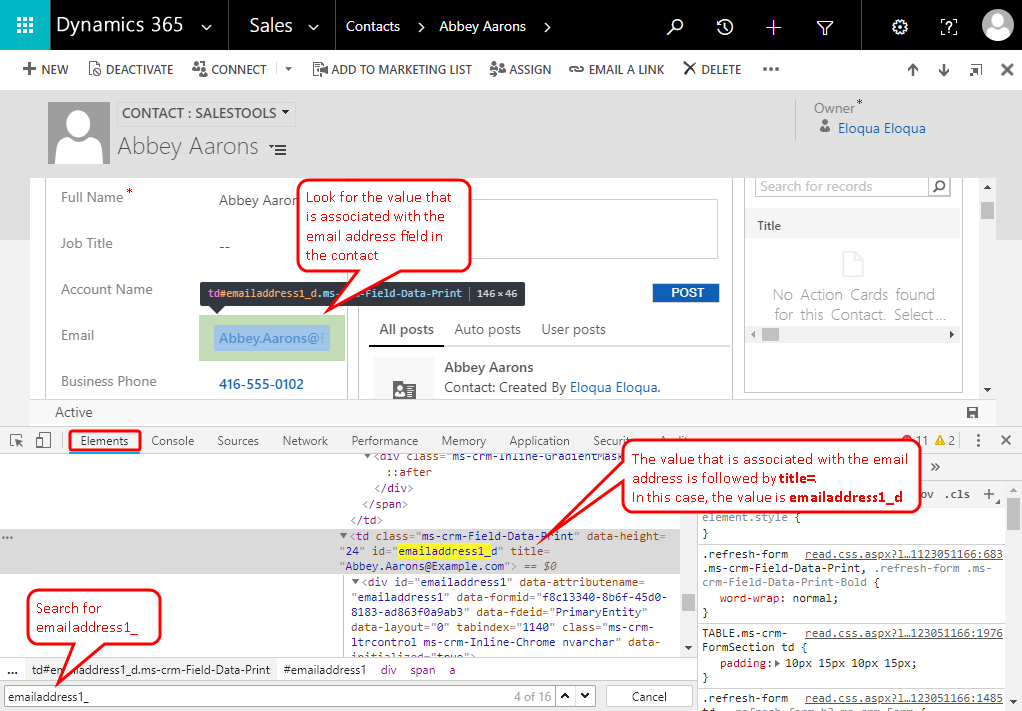
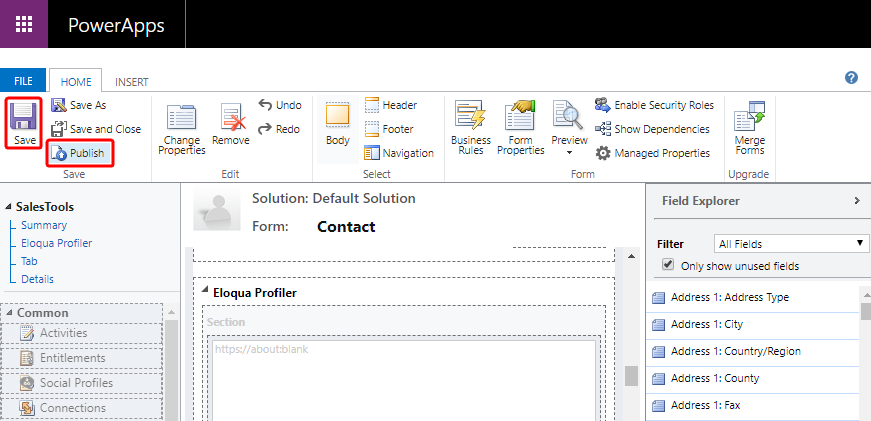
- Click OK and then click OK to close the IFRAME Properties window.
- On the Home tab, click Save, click Publish, and then close the PowerApps window.