Uploading external activities
Note: We're updating our help center to reflect the new Redwood experience. During the transition, some content reflects the previous version of the UI.
You can import external activities using an import file. For a more automated solution, consider using the External activity app.
Before you begin:
- Create your upload file (.txt, .csv, .xls, .xlsx). It must contain the following columns:
- External Asset Type
- External Activity
- External Asset Name
- Contact Email Address
- Campaign ID (always include if known)
Date (MM/DD/YYYY format)
Note: To ensure the external activity generates a campaign response, the date must be between the reporting start date of the campaign and the current day's date. Uploading an external activity with a date before the campaign's reporting start date or after the current date will result in the activity successfully being added to the contact record, however will not create a campaign response for that activity.
- Additional contact fields can be included as well like first and last name, and so on.
Note: With Salesforce integration, the Salesforce Campaign ID must be mapped to the Last SFDC Campaign ID contact field in Oracle Eloqua, unless a list upload is preformed directly to a campaign to create external activities.
The Campaign ID can be found in each campaign's URL. For example, https://secure.p01.eloqua.com/Main.aspx#campaigns&id=XXX, where XXX is the campaign ID. If you initiate your upload from the campaign canvas, you don't need to provide the campaign ID.
- Separate the fields in the upload file using a comma (,), pipe (|), or semi-colon (;).
- The first row of the file must be column headings. Oracle Eloqua will attempt to map the headings to existing Oracle Eloqua fields.
- If you are adding or updating contacts, make sure that you can map the data in your upload file to contact fields in Oracle Eloqua. Use similar naming conventions in your upload file to make this mapping easier.
Note: If a contact does not exist in your database, Oracle Eloqua will automatically create the contact.
To upload an external activity:
- Navigate to Orchestration
 , then click Campaigns.
- Choose the upload action:
- In the classic UI, click Upload External Activities.
- In the Redwood experience, click Actions > Upload External Activities.
Tip: To upload activities directly to a campaign, first open the campaign, then click Actions > Upload External Activities.
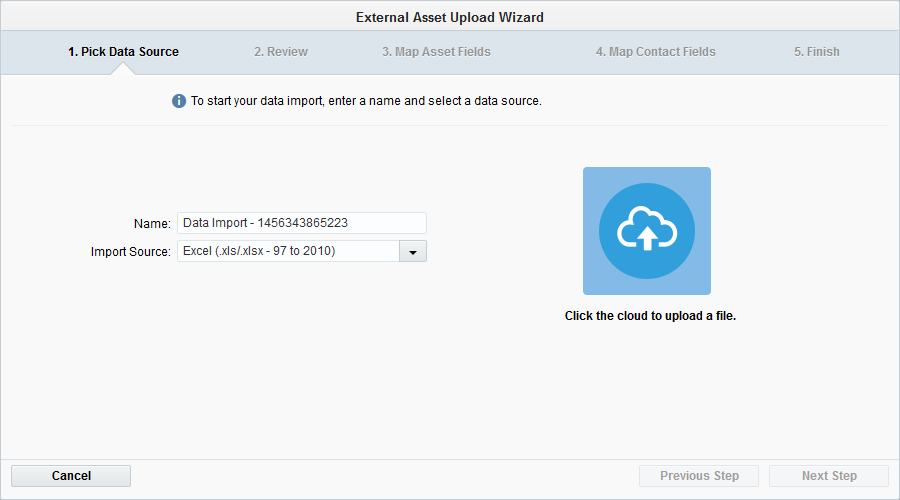
- Complete the information about the upload. You'll want to be sure to click the correct type of upload from the Import Purpose drop-down list.
Classic UI
Redwood experience

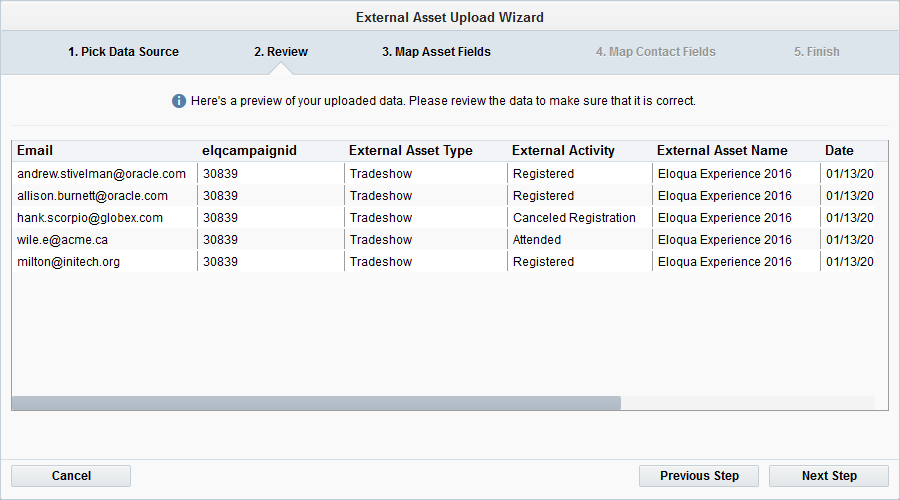
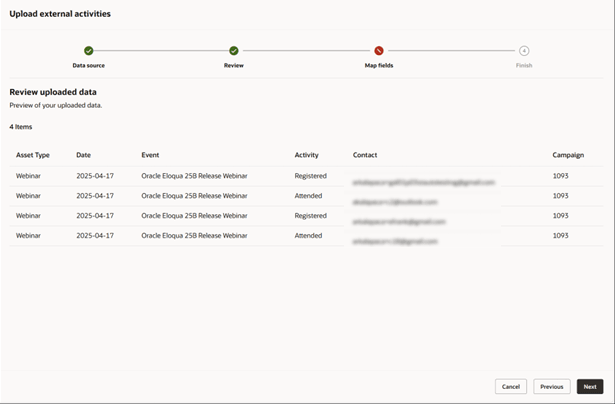
- Verify the contents of the file on the Review tab and click Next Step.
Classic UI
Redwood experience
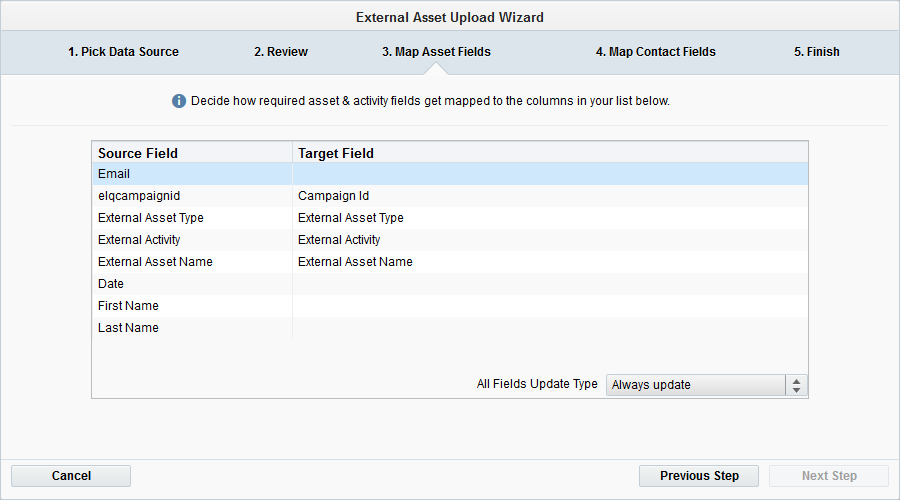
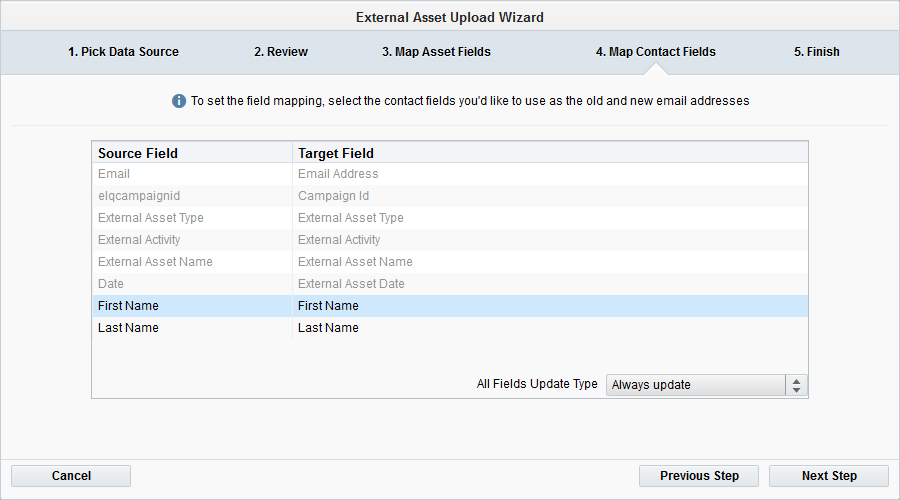
- Complete the field mapping. You need to map both the external activity fields and the contact fields included in your upload file. Make sure that you select when you want the fields to update using the Update Type drop-down list. For example, update the field if it is blank or not blank. Using Set to default will use the default configuration for each field. In the classic UI, if a specific field should be updated differently than the rest, double-click the field and configure the update type for that specific field.
Classic UI
Redwood experience

- Complete the final step of the wizard. You can add the contacts into a shared list.
Classic UI
Redwood experience

- Click Finish.
The activities are uploaded. If a contact does not already exist in your Oracle Eloqua database, Oracle Eloqua will create a contact. Uploading an external activity will also trigger Oracle Eloqua to check when the activity was imported and re-score contacts associated with the imported data based on any active lead scoring models.
Resolving issues with an import
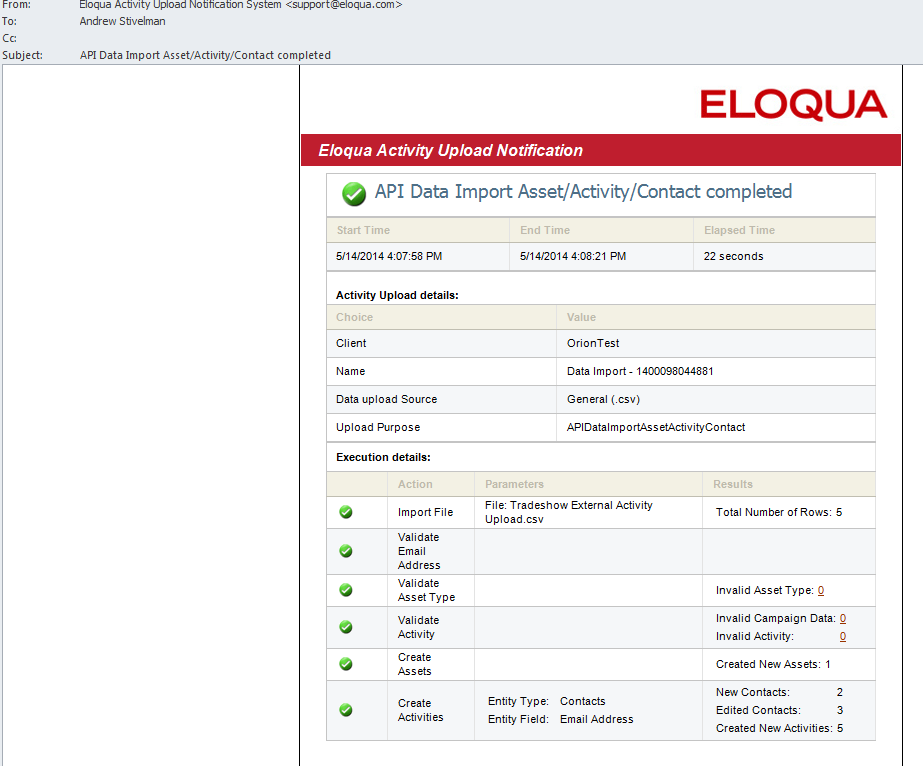
If you configured the import to send a confirmation email, the email details results of your import, and it provides links to any failed operations for troubleshooting purposes.
If there were any failures, you must resolve them before the import can complete. To resolve a failed import, you must update the original source file with the applicable fixes, and upload the file again.
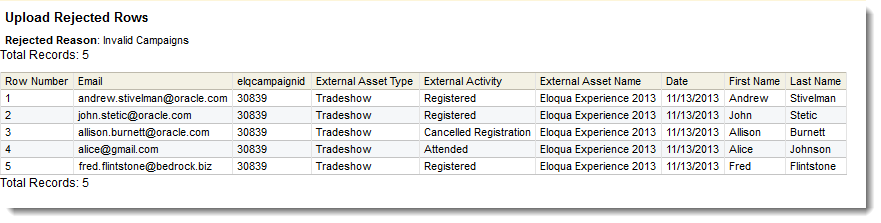
In the following example, there were five invalid entries for Campaign Data that must be resolved to complete the import. As a result of this failure, no data was imported. To view more details about the failure, you click the link provided.
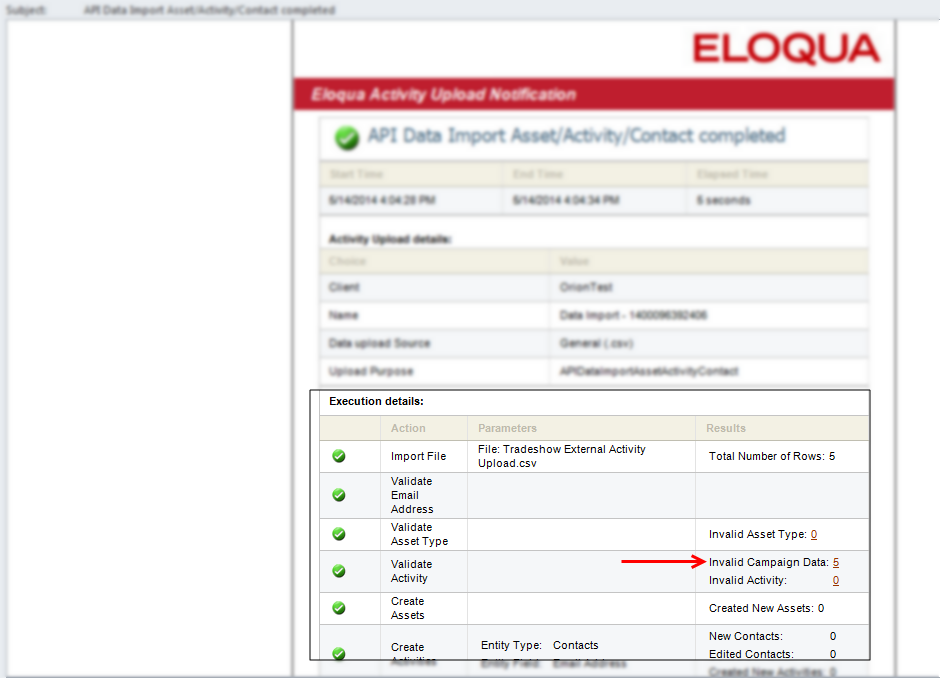
In this example, the import failed because the campaign specified was invalid.