Step 3: Adding elements to the campaign canvas
Campaign elements define the workflow that campaign members will flow through during your campaign. Our welcome campaign will:
- Send an email to new contacts with an exclusive offer
- Identify those that have signed up for our offer
- If they haven't signed up for our offer, we'll send a follow-up
- Whether they've signed up or not, our campaign ends by adding the contacts to another campaign that suits their needs
Adding elements to our campaign will allow us to create this flow. After you've completed this step, our canvas will look like this:

To add elements to the campaign:
- To add elements to the canvas, drag and drop them onto the canvas or double-click the element. Add the following elements to the canvas:
- Segment Members - Later we'll build a segment that will bring new contacts into our campaign
- Email - This will be for our first email that we send to new contacts
- Submitted Form? - This is our first decision step. We'll use it to check if our contacts have signed up for our event. The outcome of this evaluation with be either yes or no. We'll build those paths later in this tutorial.
We've dragged the elements around and they now look like this:

- Connect the elements on the canvas.

Remember, the Submitted Form? element is a decision step that can have two paths - a yes path and a no path. We will connect those paths later on.
- Below the Submitted Form? decision step, continue adding the following elements to your canvas.
- Email - This will be our follow up email.
- Wait - If they haven't submitted the form, we'll use this wait step to give the contact a little more time before sending the next email.
- Email - This will be a newsletter email.
- Move to Campaign - Whether the contact signed up for our offer or not, we'll move them over to our monthly newsletter campaign. You could choose Move to Campaign or Add to Campaign. Moving campaign members removes them from the current campaign and places them in the specified step of the new campaign. When you add campaign members to a campaign, they remain in the current campaign as well as being added to the new campaign.
We've dragged the elements around and they now look like this:

- From the Submitted Form? decision step, connect the No path to the Email element and the Yes path to the Wait element.

- Continue connecting the rest of the elements. Your final canvas should look like this:
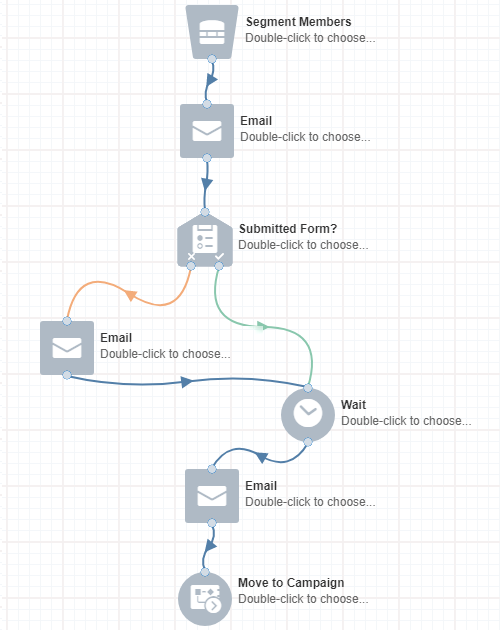
Now that all the elements are on the campaign, let's rename them so that we know how they are intended to be used.
- Double-click the Segment Members element.
The element configuration options appear. The configuration options vary depending on the element.
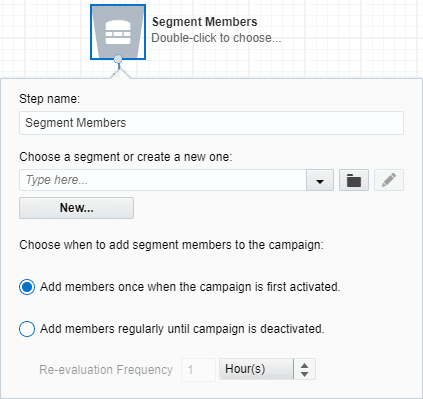
- Enter New Subscribers in the Step name field.
Giving your elements a descriptive name can help others understand what each step in the campaign is for. Your organization might have naming best practices to follow, so be sure to check those out.
- Rename your elements as follows:
Element Name Segment Members New Subscribers Email Welcome Offer Submitted form Signed up for offer? Email Welcome Email Reminder Email News and Upcoming Events Move to Campaign Move to Monthly Newsletter Here is the completed canvas:
Congratulations on building your first campaign flow!
Before we go, here are some more tips about using the campaign canvas:
-
The Campaign Steps pane by default shows popular elements. To view all the available elements, click the Campaign Steps heading. You can mark your own favorite elements by clicking the star icon.

- You can select multiple items on the canvas. After they are selected, you can move them around or you can copy and paste them. When you copy elements, you can paste them to other campaigns.
