Step 1: Adding the email
We have several elements that we still need to configure. Let's start by adding the welcome offer email to our campaign.
To add an email to a campaign:
- Navigate to Orchestration
 , then click Campaigns.
 - Click DO NOT LAUNCH - My first welcome campaign in the Recently Accessed pane.
- Double-click on the Welcome Offer element.
- Select DO NOT LAUNCH - My first email from the drop-down.
- In the Signature tab, the Use a Signature check box allows you to use a signature for your campaign to insert Oracle Eloqua sender information into emails. This can help you personalize your message, as well as change the reply-to address.
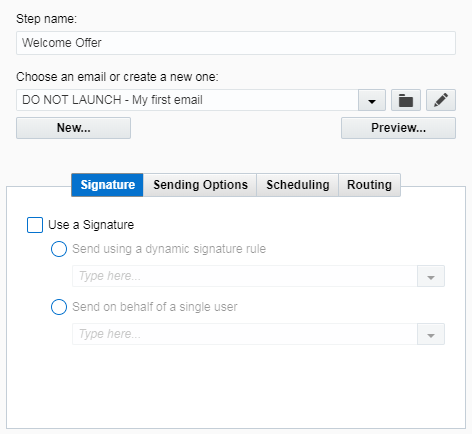
We do not want to use a signature for our welcome campaign.
- In the Sending Options tab, select the various options to change how and who the email is sent to. For example, if your organization has a large contact list, you can choose to break the email send into smaller batches.
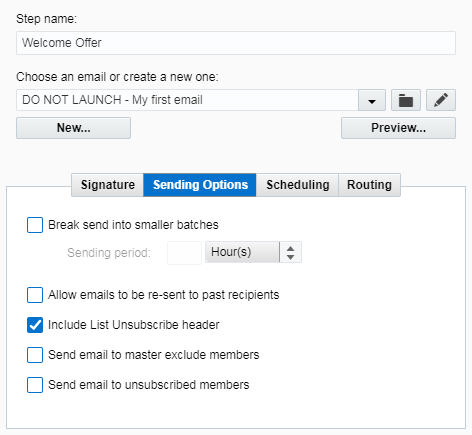
We want to keep the default settings for our welcome campaign.
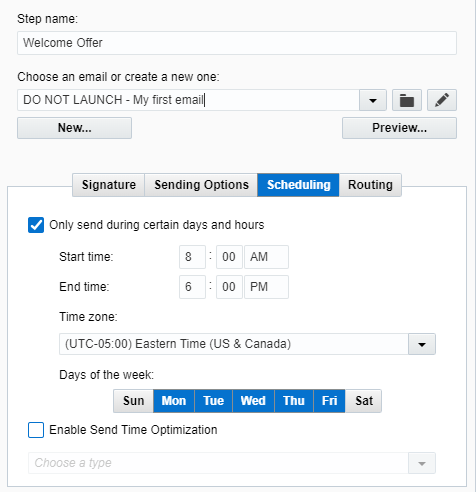
- In the Scheduling tab, select the Only send during certain days and hours check box.
- Set the Start time to 8 am and End time to 6 pm.
- Select Monday through Friday.
- In the Routing tab, selecting the Automatically route contacts excluded from email send check box quickly groups excluded campaign members into a shared list or another program.
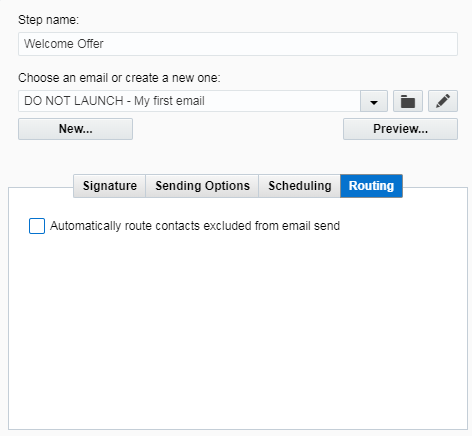
We do not want to configure this tab for our welcome campaign.
The email that we created has been added to our welcome campaign! Now we want to add the landing page and form.